Ballistic Training Indoors: How to Set Up KYL 500 yd + Ballistic Correctly
Train precision shooting with real MOA and MRAD units. Practice a realistic 500-yard ballistic drill indoors using your real firearm.
LaserHIT ballistic drills were designed to bring long-range logic into dry-fire training. Instead of simply practicing trigger control, you work with the same elements that define real shooting: elevation, wind, and decision-making.
The DRILLS section inside the LaserHIT app has limited space to explain the ballistic system. This guide walks through the key steps to prepare your setup correctly.
Step 1. Use the Correct Laser Cartridge
Ballistic drills require high-precision hit detection.
Use only: LaserHIT LR cartridge or LaserHIT HD cartridge.
These cartridges are optimized for camera detection and precise scoring. Generic cartridges or third-party laser training devices will not provide the accuracy required for ballistic drills due to their technical limitations.
Step 2. Use the Correct KYL 500 yd + Ballistic Target
This drill works only with the designated LaserHIT KYL 500 yd + Ballistic target. The target geometry and reference reticles are required for proper ballistic scaling and alignment.
The target can be obtained directly through the LaserHIT app.
On the Drill Description screen, scroll down in the right-side panel to the “LASERHIT TARGETS” or “PRINT TARGET” sections under “Get Kit, Extra Cartridges, Targets.”
Use the official target provided through these links. Other targets or scaled images will not match the ballistic geometry required for this drill.
Step 3. Activate Ballistic Presets
Open the LaserHIT app.
Go to: DRILLS -> Challenge -> KYL 500 yd + Ballistic
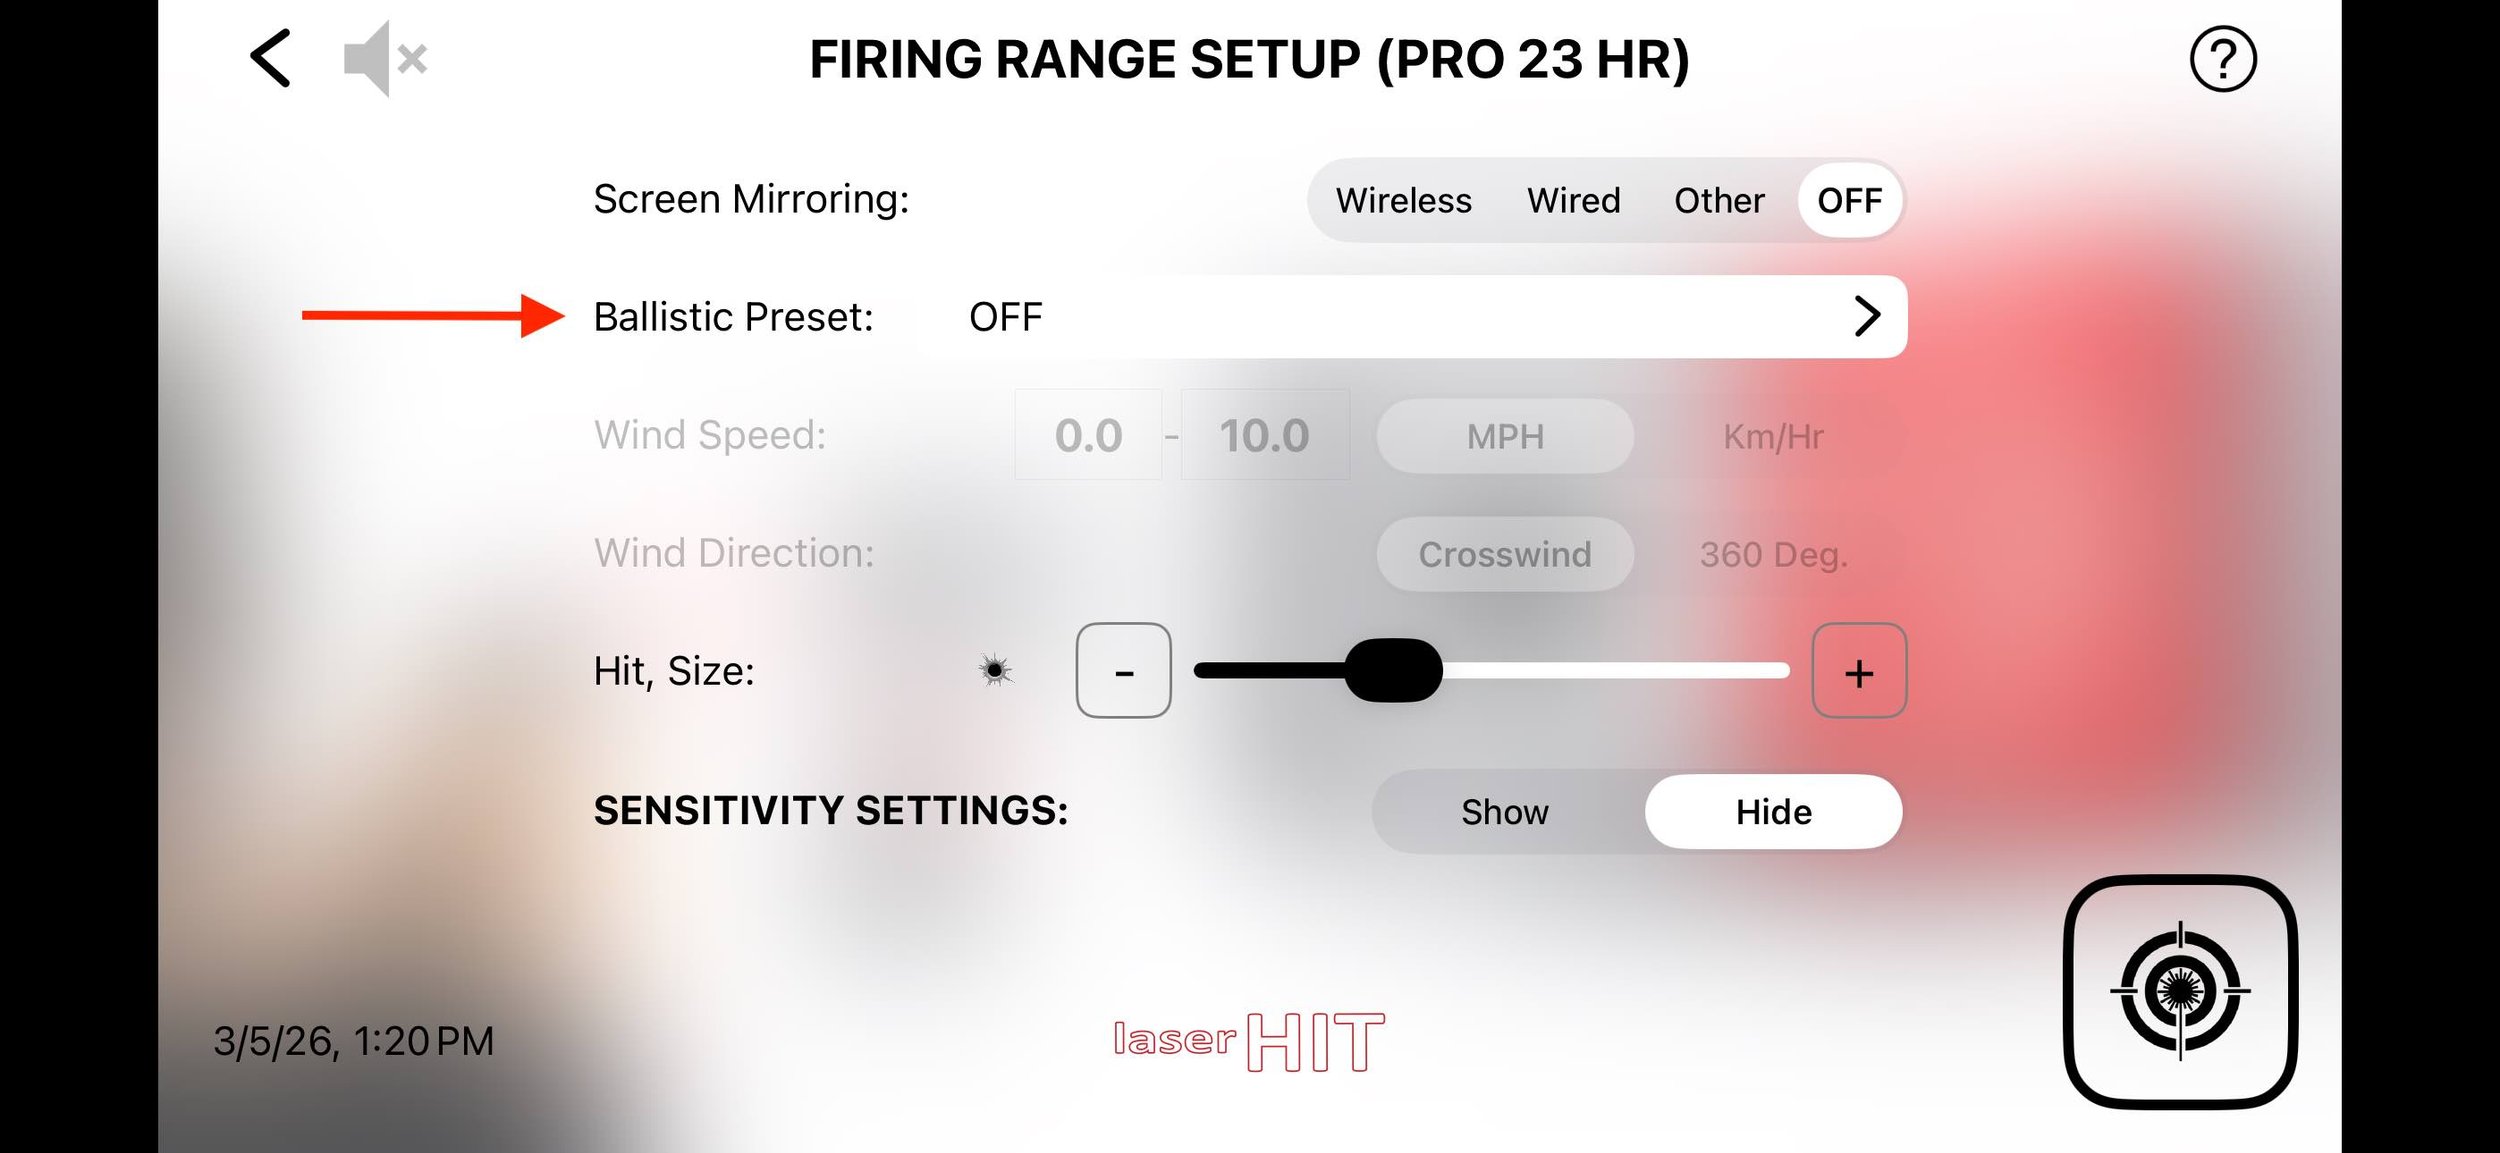
On the Firing Range Setup screen you will see the Ballistic Preset panel.
Tap the toggle to activate it. This opens the My Ballistic Presets screen.
Step 3. Add and Select a Ballistic Preset
Tap the + icon in the upper right corner.
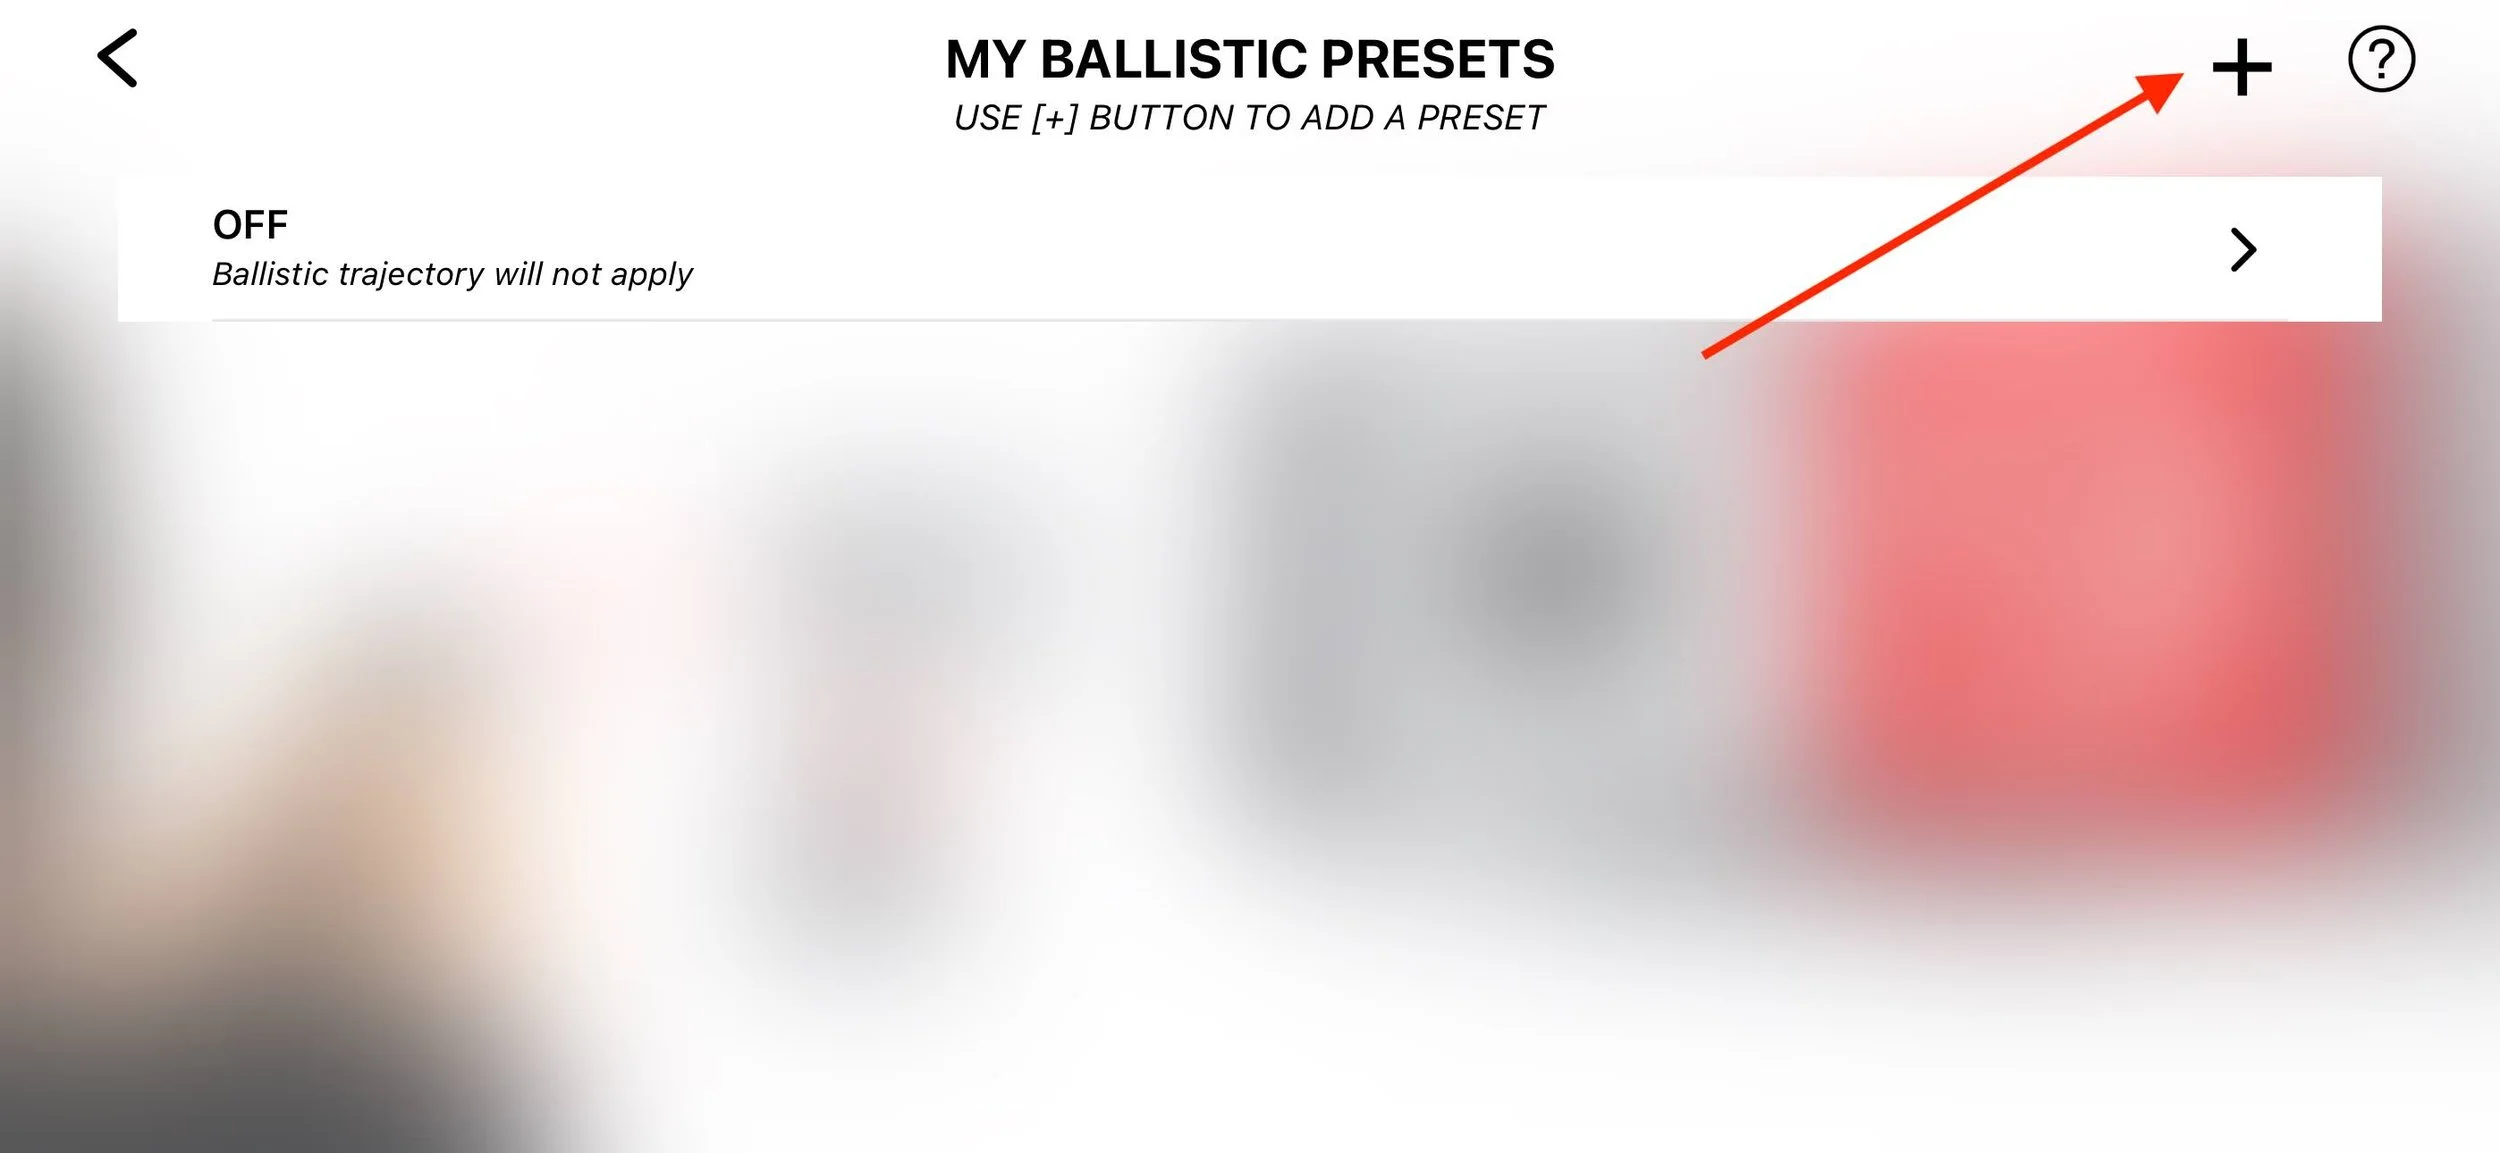
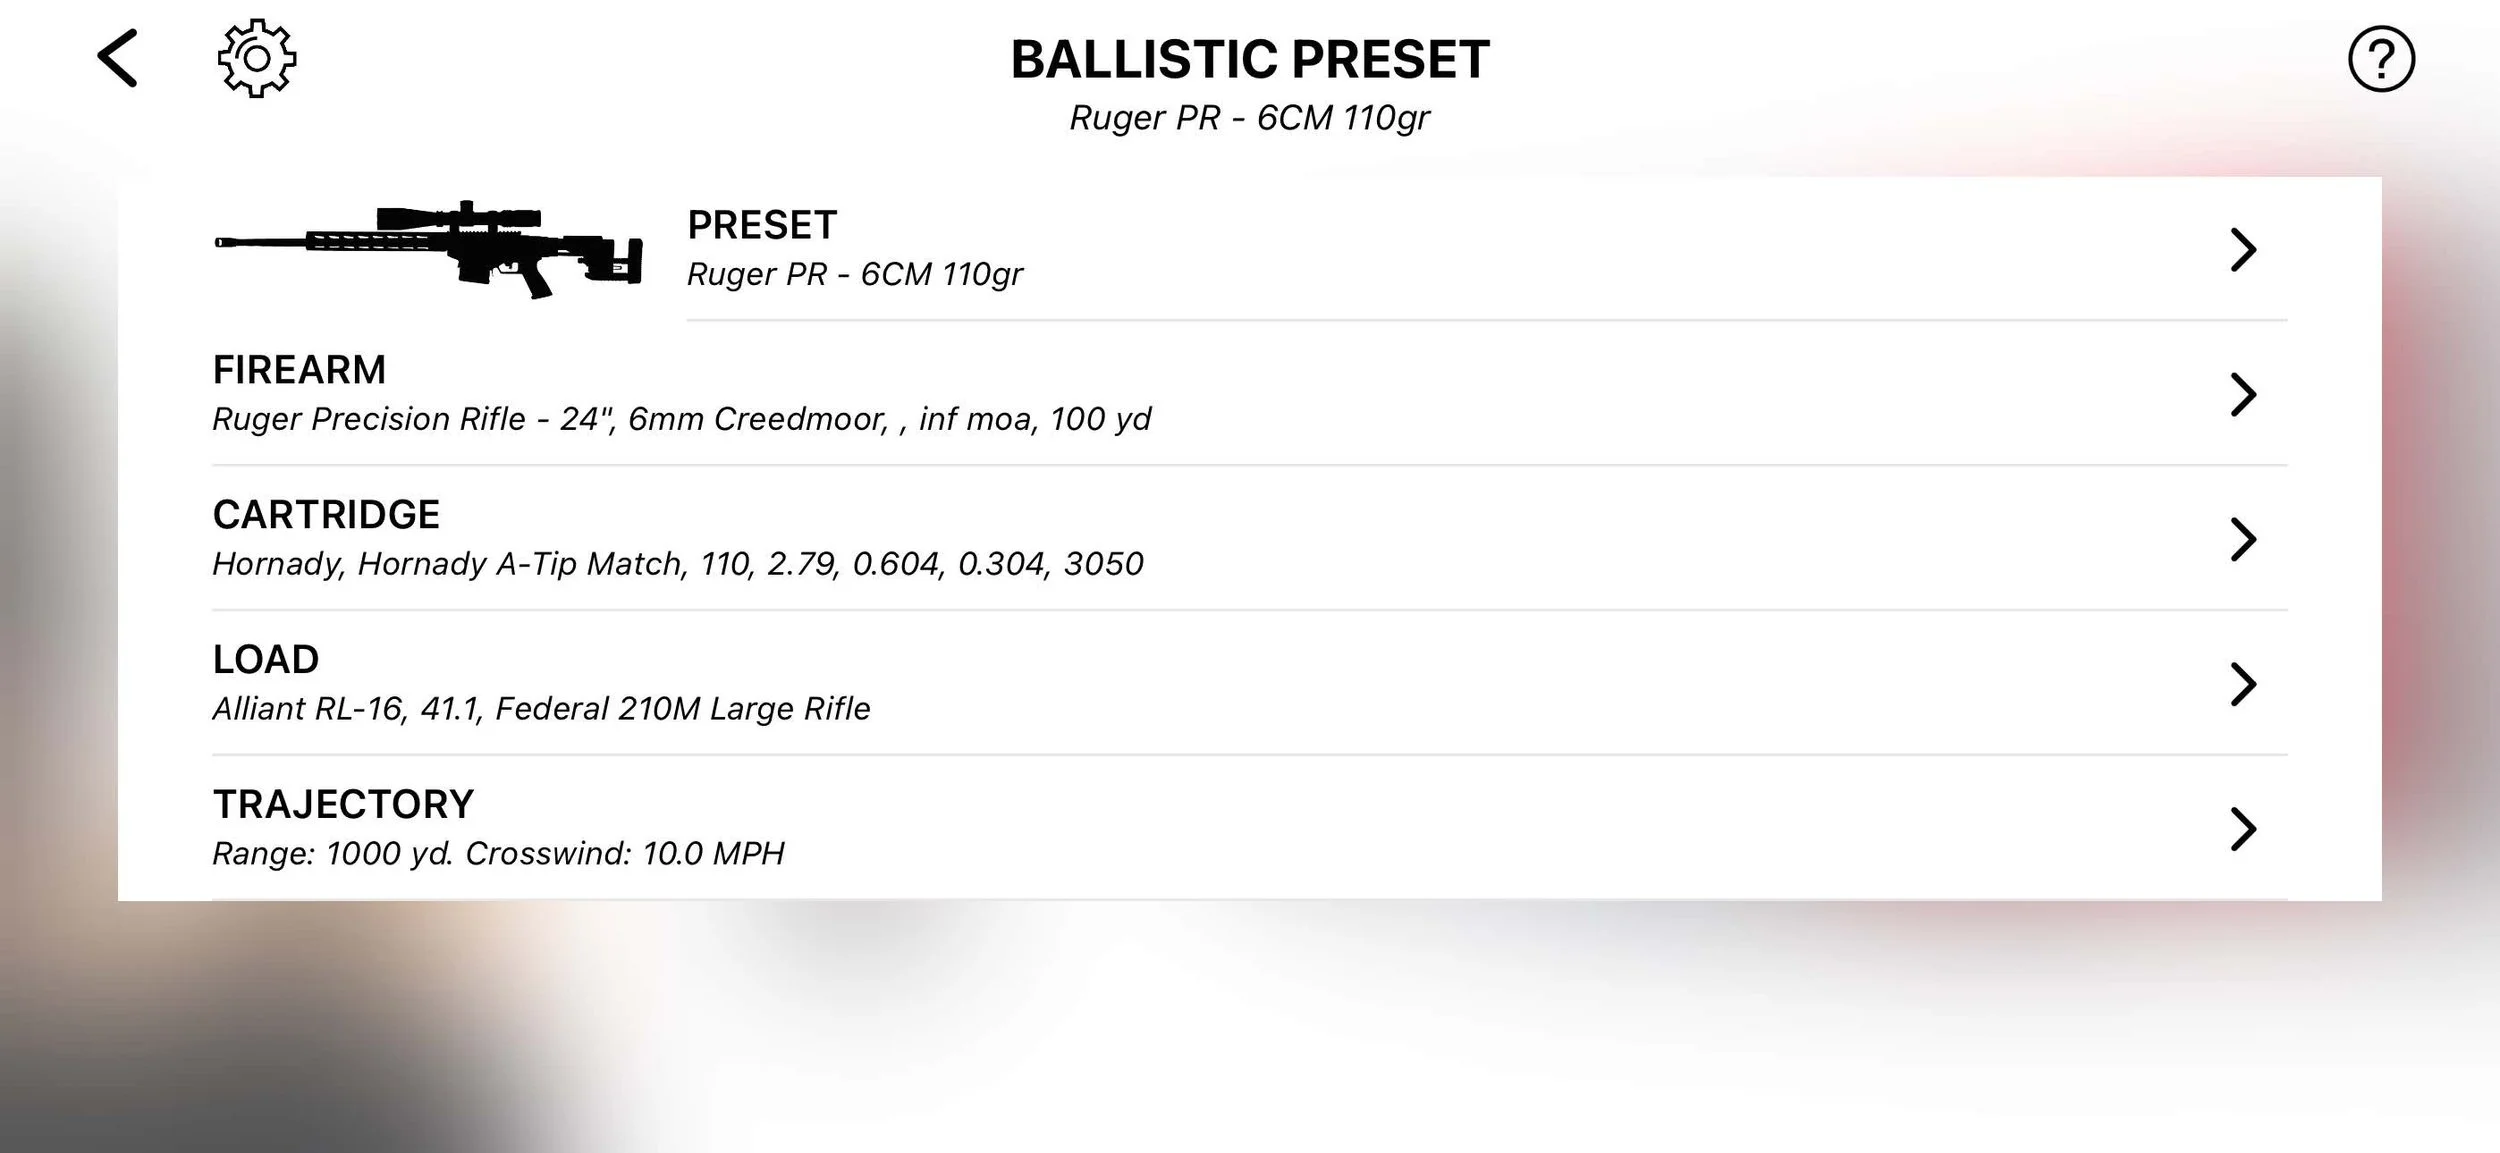
A list of ballistic presets will appear.
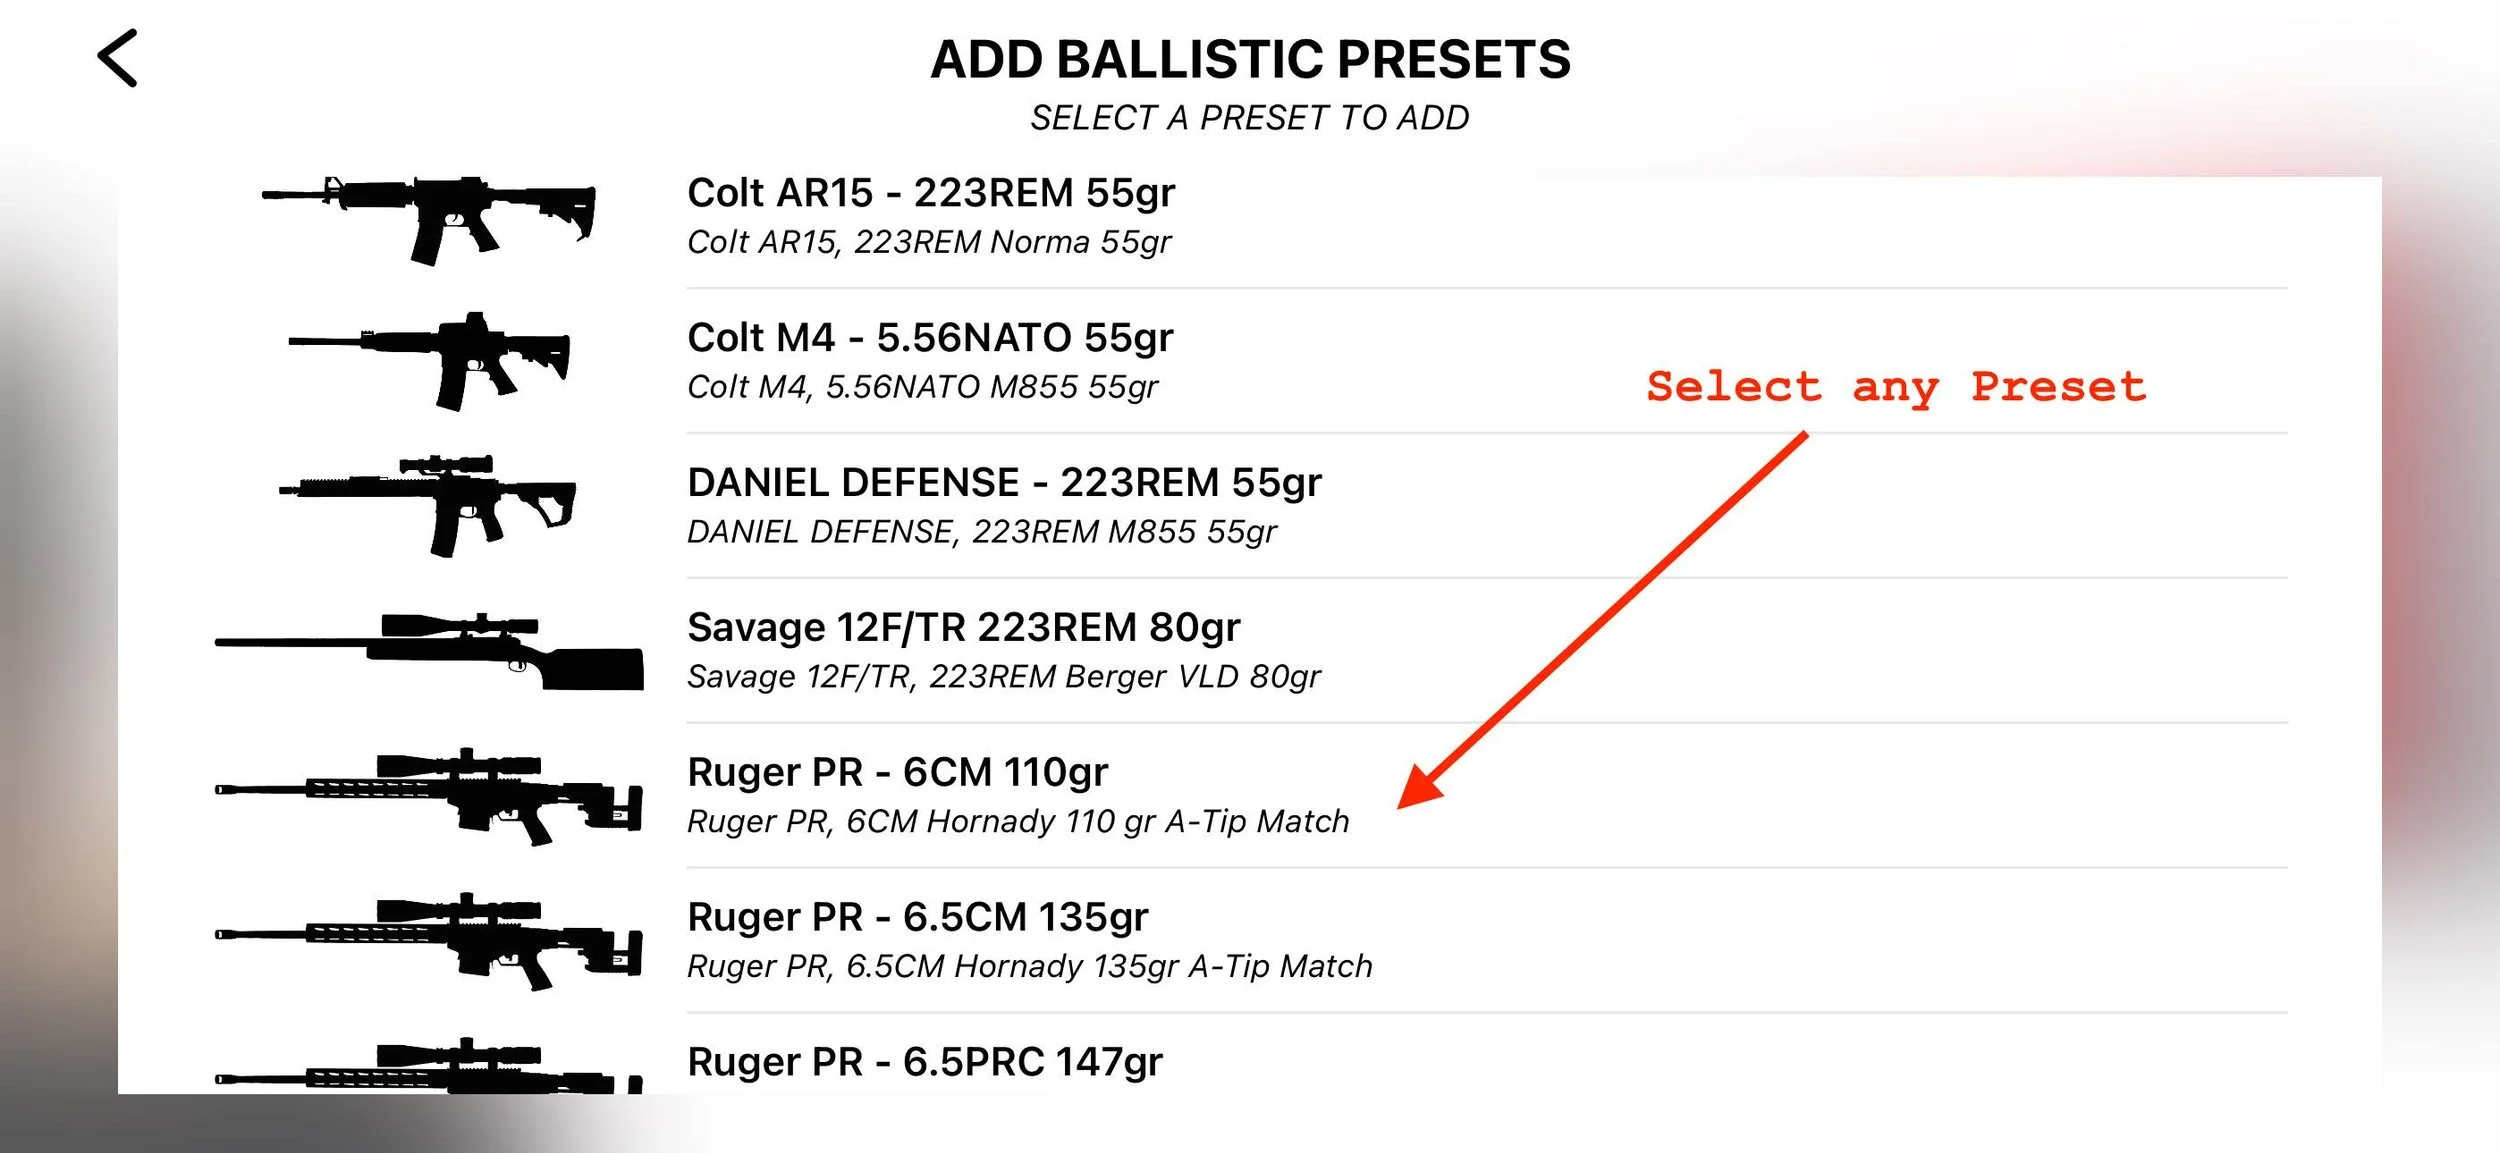
These presets provide example firearm configurations so you can confirm that the system works correctly before building your own ballistic profile.
As a first-time user, start by selecting a preset that is close to your firearm and caliber. This allows you to verify that the drill, ballistic engine, and hit detection are working correctly before creating your own setup.
Once selected, the preset will appear in your My Ballistic Presets list.
After completing your first training stage, you can return to the Firing Range Setup screen to build your custom ballistic profile using your own DOPE data.
To learn more, see our posts explaining ballistic dry-fire setup:
• Custom Ballistic Presets: Editing Your Firearm Profile in LaserHIT
• Importing DOPE from Hornady
• Importing DOPE from GeoBallistics
• How to setup indoor Ballistic
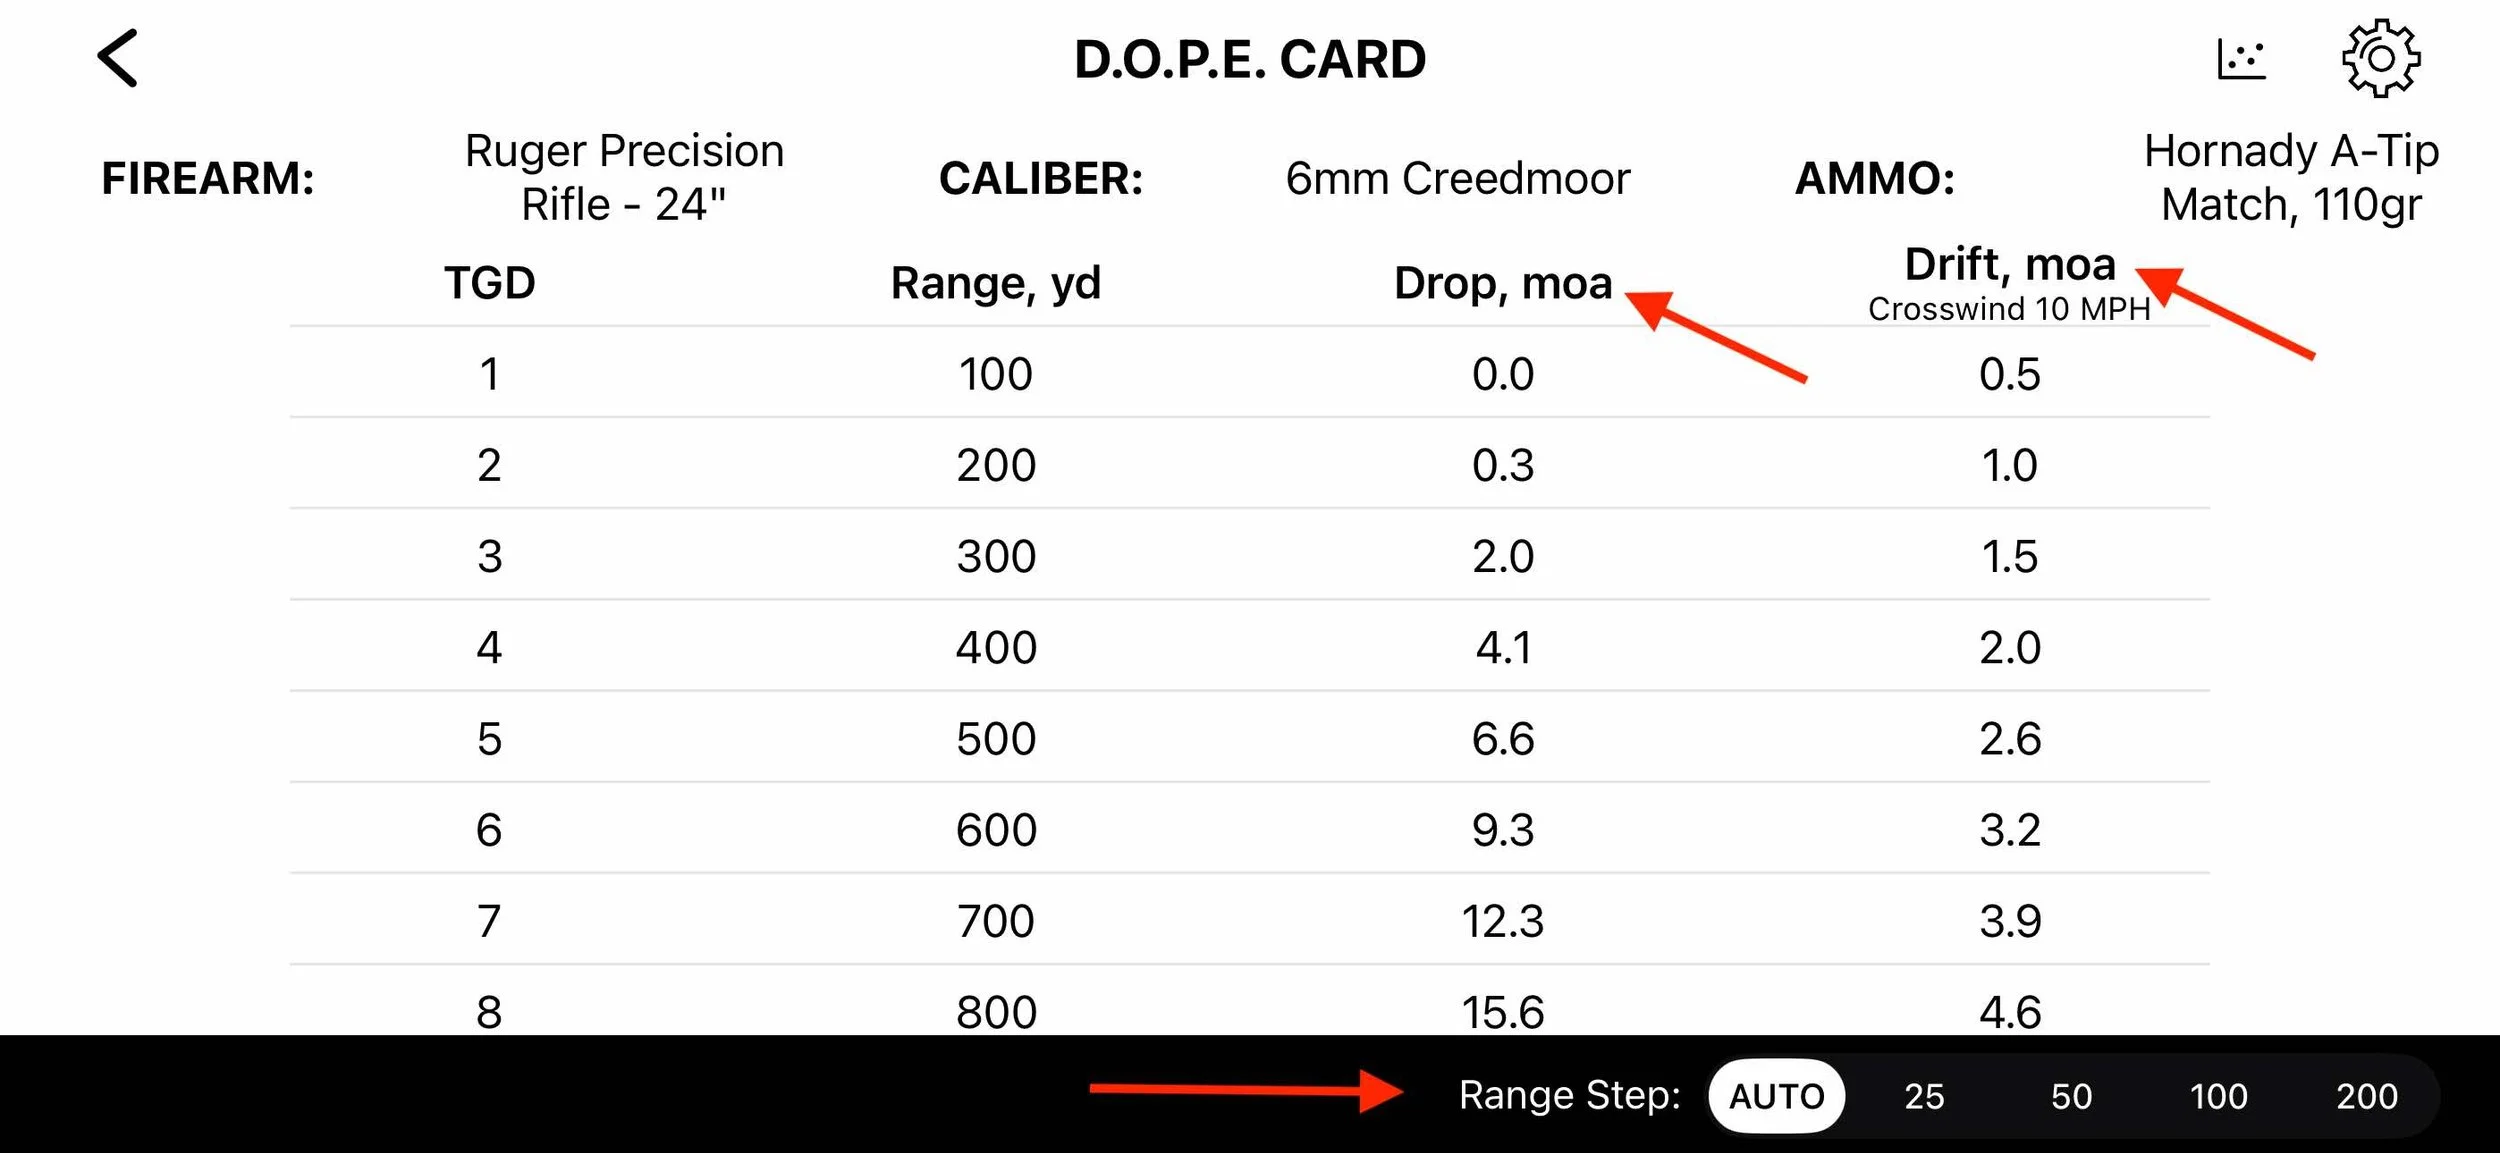
Step 4. Review the DOPE Card
Tap the preset you selected.
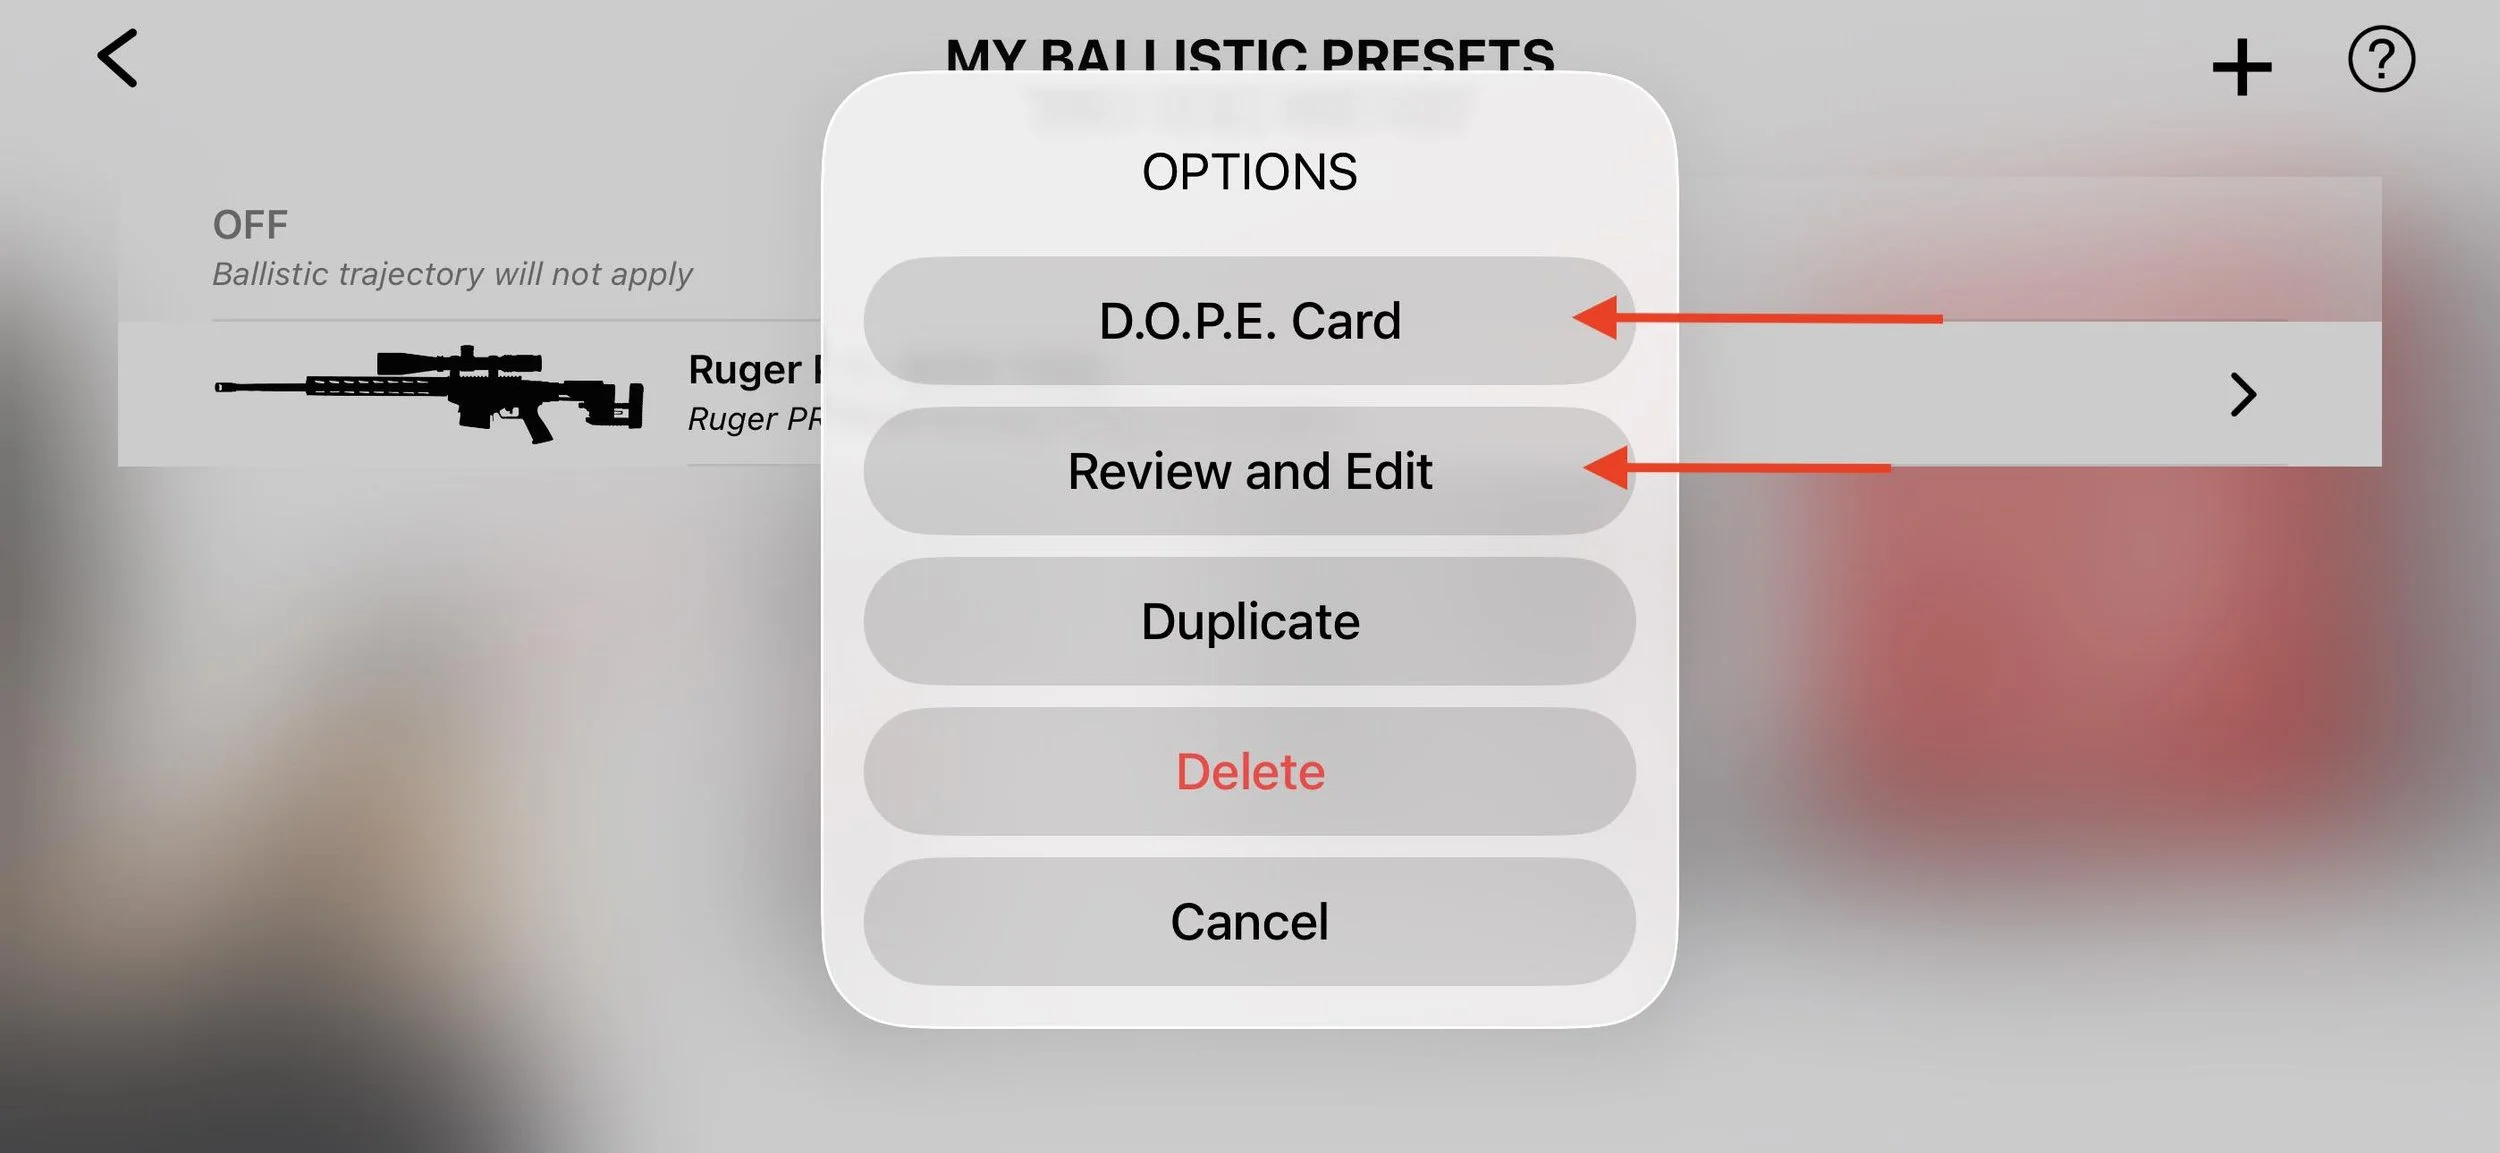
A menu will appear with several options. Choose DOPE Card.
Here you can view the ballistic table that defines the trajectory for this preset.
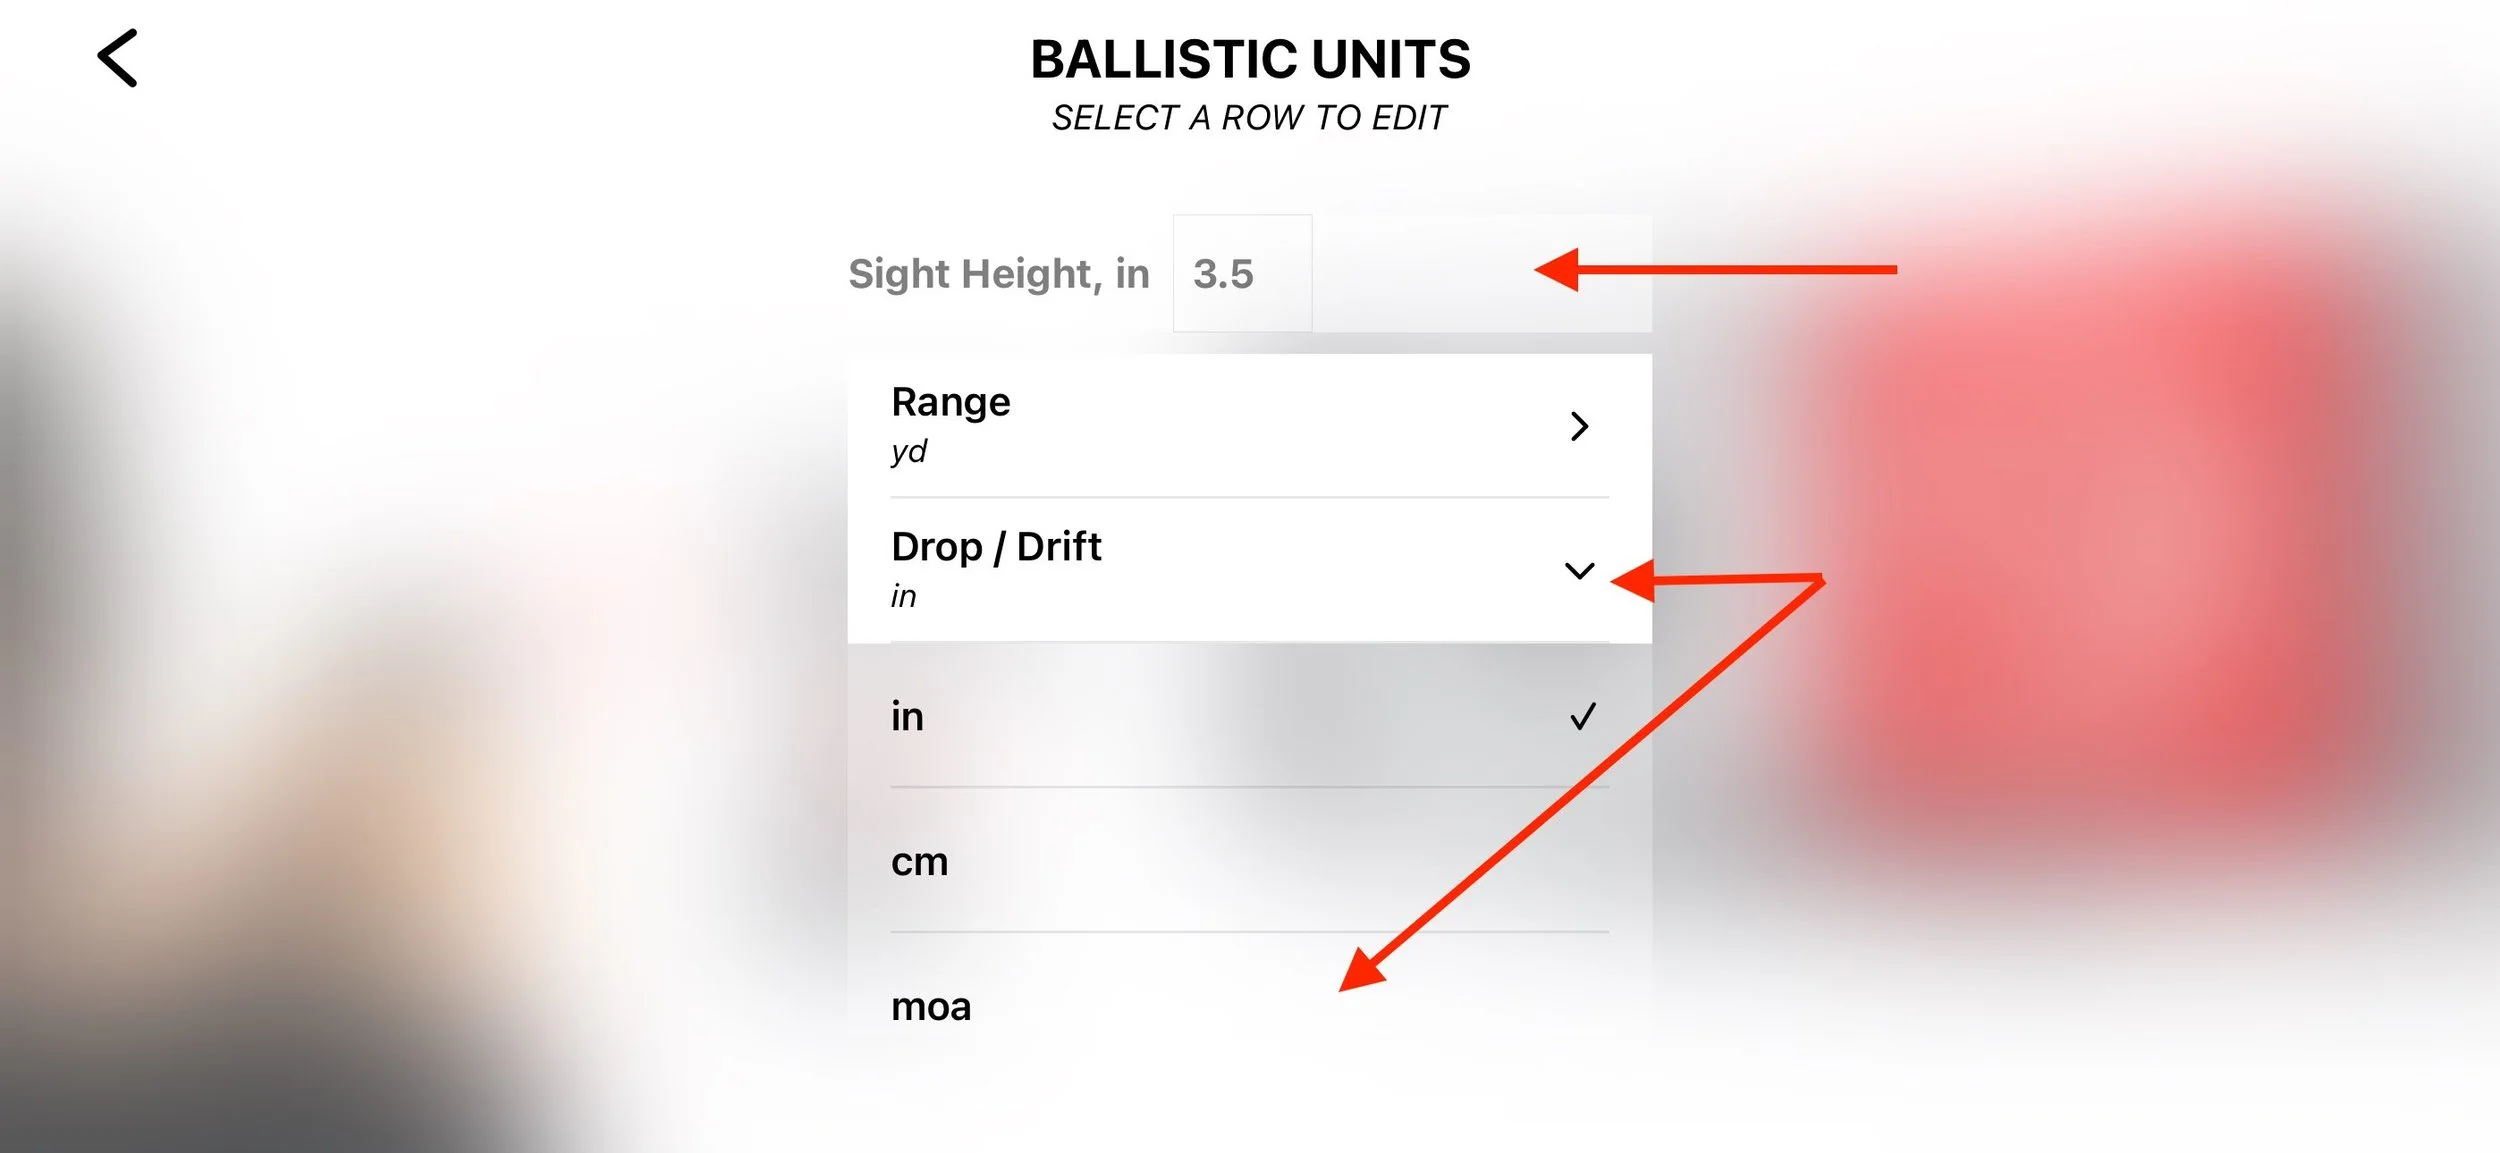
By default, drop and drift values appear in inches.

Most rifle optics use MOA or MRAD.
Use the Settings icon to switch the units so they match your scope.
You can also explore Review and Edit, where you will find options to adjust firearm details, cartridge data, and trajectory values.
Step 5. Understanding the Wind in Ballistic Drills
Each stage of the KYL 500 yd + Ballistic drill consists of six shots.
Before every stage, the system applies a crosswind value.
The wind is randomly generated between 0 and 10 mph.
Your elevation remains fixed based on your DOPE. Wind becomes the variable you must solve before taking the shot.
This recreates the real long-range decision process:
Read the wind -> Calculate the hold -> Execute the shot
Step 6. Align Your Scope With the Target Reference Reticle
The KYL 500 yd + Ballistic target includes printed reference reticles on the left side.
These are not decorative elements. They are alignment tools.
Before starting your session, align your scope reticle with the printed reference marks on the target.
This confirms that your firing line distance is correct.
Even small changes of a few inches forward or backward can shift the ballistic geometry. Proper alignment ensures that the simulated drop and wind values match the intended scaling.
Also confirm that your phone camera has a clear view of the target.
Make sure the phone is not obstructing the target when viewed through the scope from your firing position.
What KYL 500 yd + Ballistic Actually Trains
KYL stands for Know Your Limits.
The drill uses six plates that decrease in scoring plate sizes from left to right.
In the ballistic version, plate sizes range from 3 MOA down to 0.5 MOA.
Before the stage begins, you dial elevation based on your DOPE.
During the stage, wind conditions are applied.
You must:
• apply the correct wind hold
• maintain stability
• execute a clean shot within the time limit
This combination trains both precision mechanics and decision-making under pressure.
Why This Matters
Most dry-fire training focuses only on trigger control.
Ballistic drills add the missing layer: thinking.
You are not only breaking the shot. You are verifying your ballistic logic.
Over time, the process becomes familiar:
Dial elevation -> Read wind -> Apply hold -> Break the shot
When the same sequence appears on the real range, your brain has already practiced it dozens of times.
Before You Start
Take a few minutes to confirm your setup:
• Correct LR or HD cartridge installed
• KYL 500 yd + Ballistic target downloaded, printed, or installed
• Target secured firmly on a wall or board and not hanging loose
• Phone positioned 2–3 feet from the target
• Use the + zoom control in the app to fit the target between the edges of the phone screen
• Ballistic preset selected
• Units match your optic
• Scope reticle aligned with target reference marks
• Phone camera has a clear view of the target
The target must remain completely stable. Any movement can affect hit detection accuracy.
Proper phone distance and zoom adjustment ensure the camera reads the target area with maximum precision.
Once these steps are completed, the drill behaves exactly as intended.
Now you can focus on the part that matters most.
Reading the wind and breaking the shot.