Precision Setup Guide for Serious Dry-Fire Training
If you are looking to improve your shooting at home, you have probably seen many laser training systems. Most appear similar: a laser cartridge, a target, and a phone app.
But serious dry-fire training is not determined by what the system looks like. It is determined by how accurately the system measures your performance.
The moment you move beyond casual hit-or-miss practice into measurable training, setup quality becomes critical.
Your phone camera must:
detect the laser signal
recognize target geometry
process hit location
calculate feedback
display results
all within milliseconds.
Lighting, target alignment, camera angle, distance, reflections, and environmental movement all influence how accurately the system performs.
This is not a limitation of advanced dry-fire systems.
It is the reality of precision measurement.
Choose the Right Training Area
Start by selecting a stable environment with:
even lighting
minimal reflections
no direct sunlight
a solid, light-colored wall or white cardboard for target placement
limited movement behind the firing line
no moving shadows across the target area
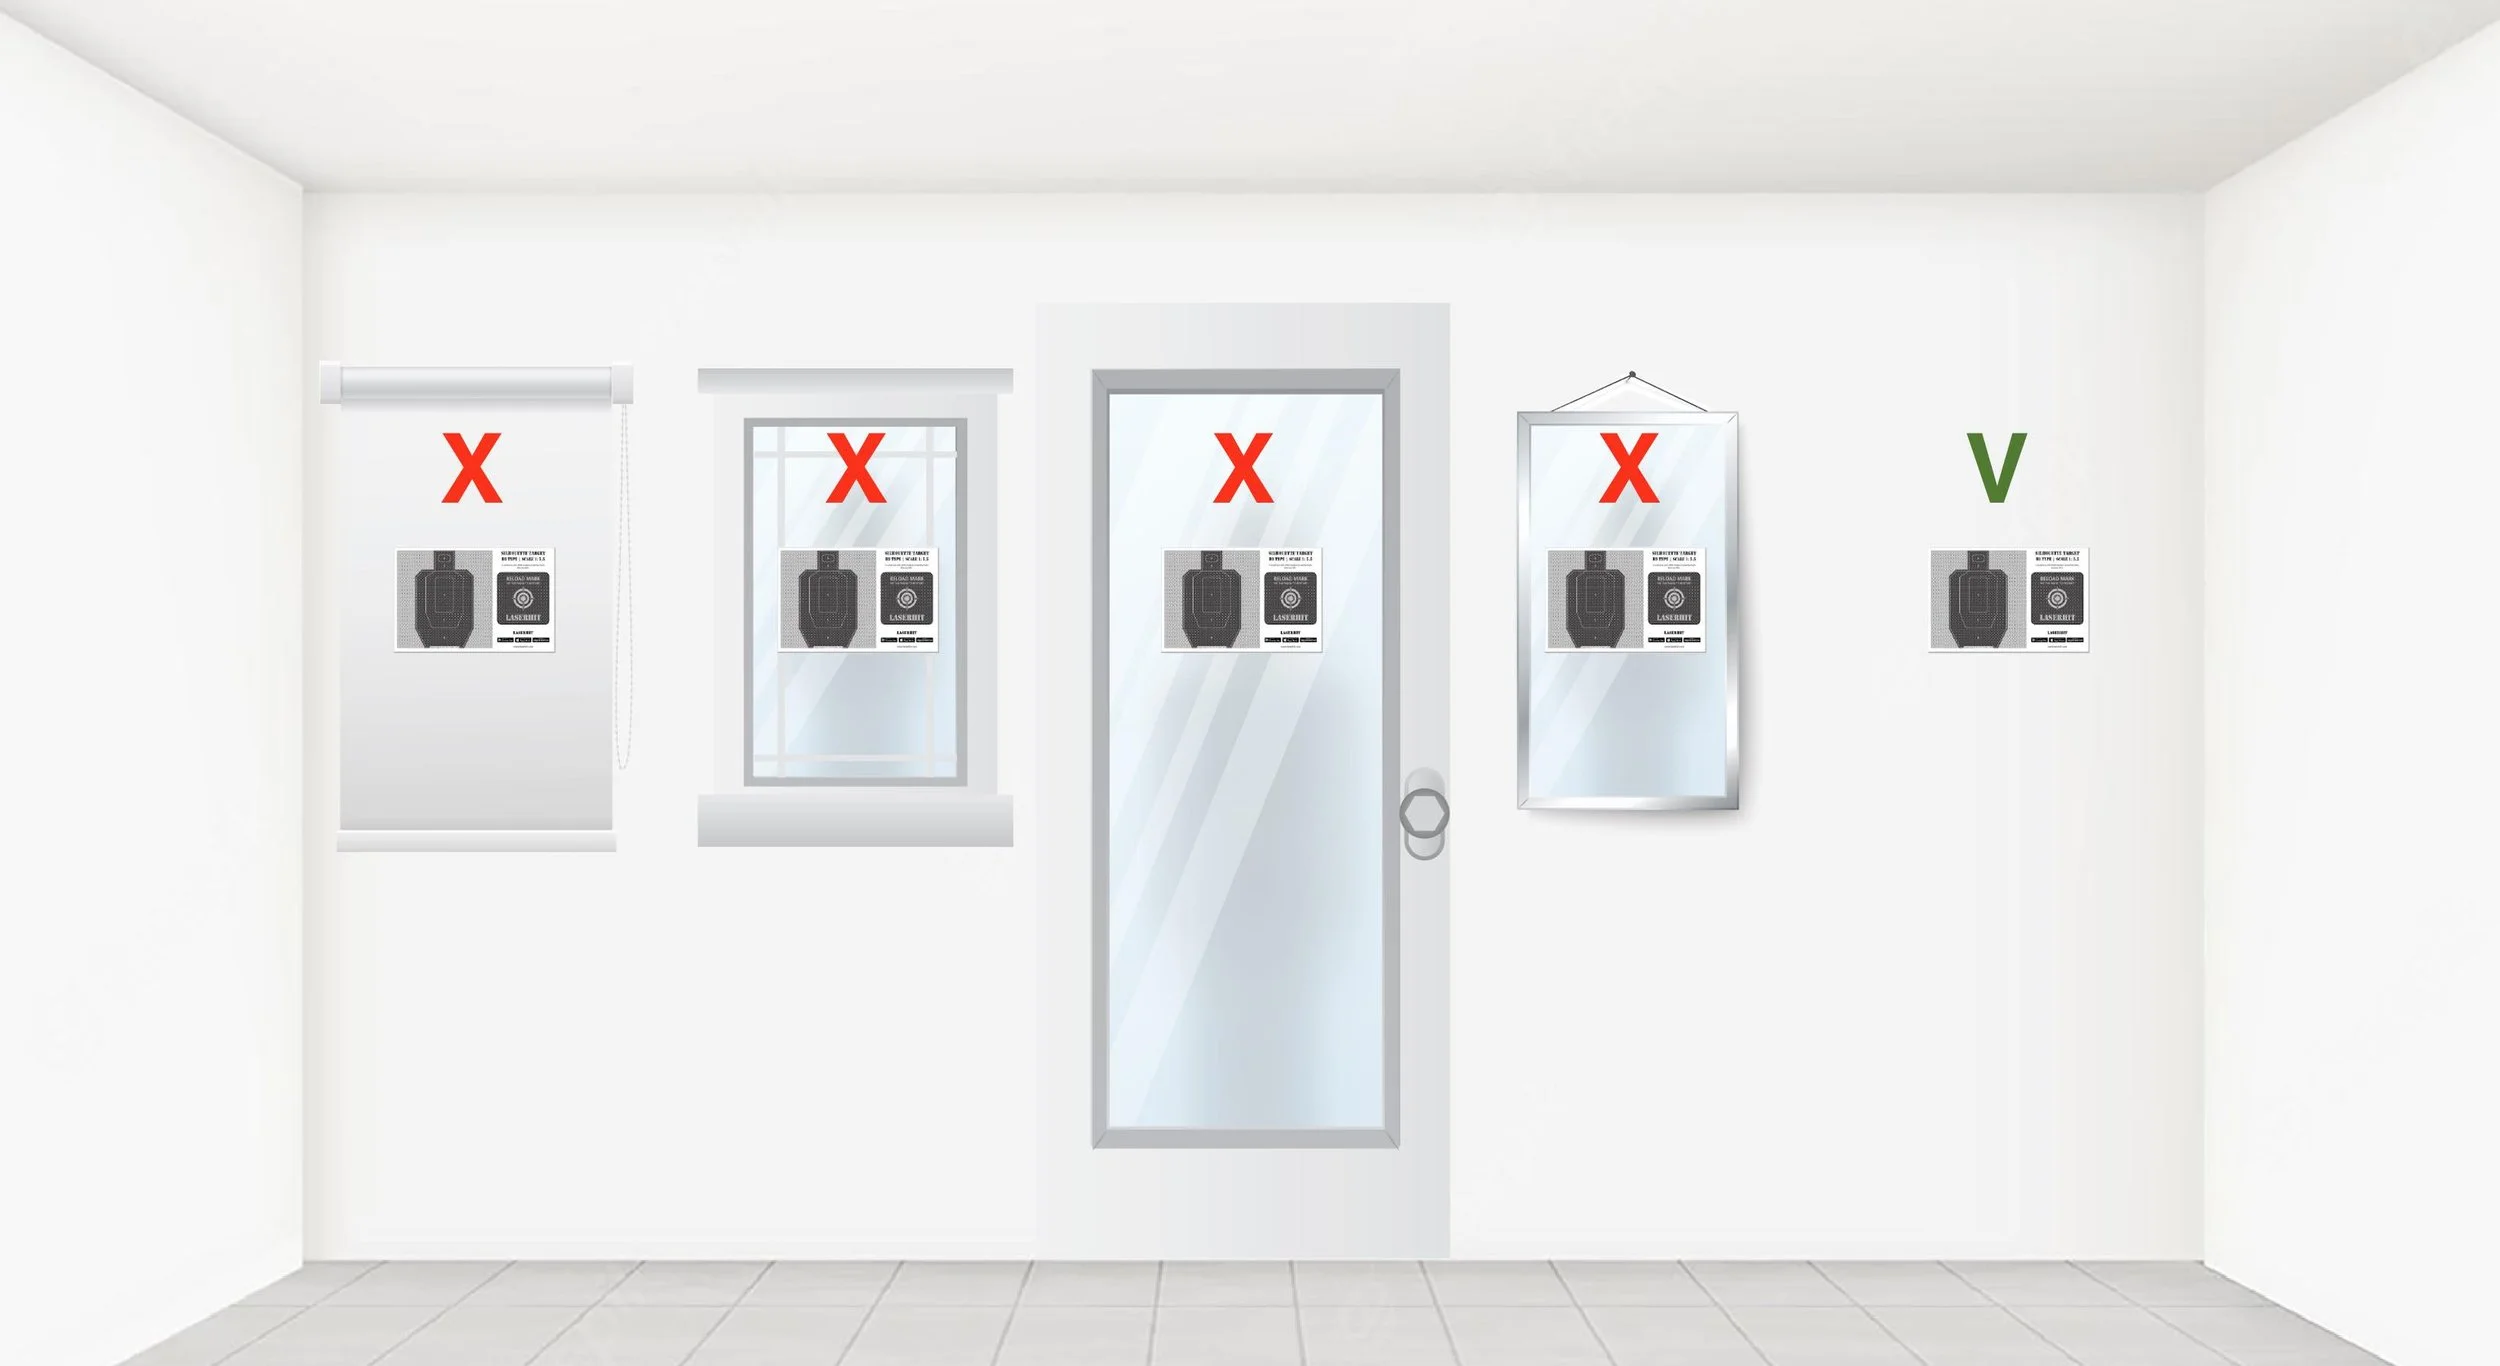
Avoid:
mirrors
glossy surfaces
TV screens
ceiling fan shadows
moving pets or people behind the target
Your phone camera is constantly analyzing the target area. Every reflection, moving shadow, or background movement adds unnecessary visual noise.
A stable environment produces stable results.
Target Stability Matters
Targets should be firmly mounted on all four corners.
A target hanging from a single pin may shift slightly from airflow or vibration. Even small movement can affect:
alignment
scaling
hit confirmation
Precision systems depend on predictable geometry.
If you would not accept a crooked optic mount, you should not accept a tilted target.
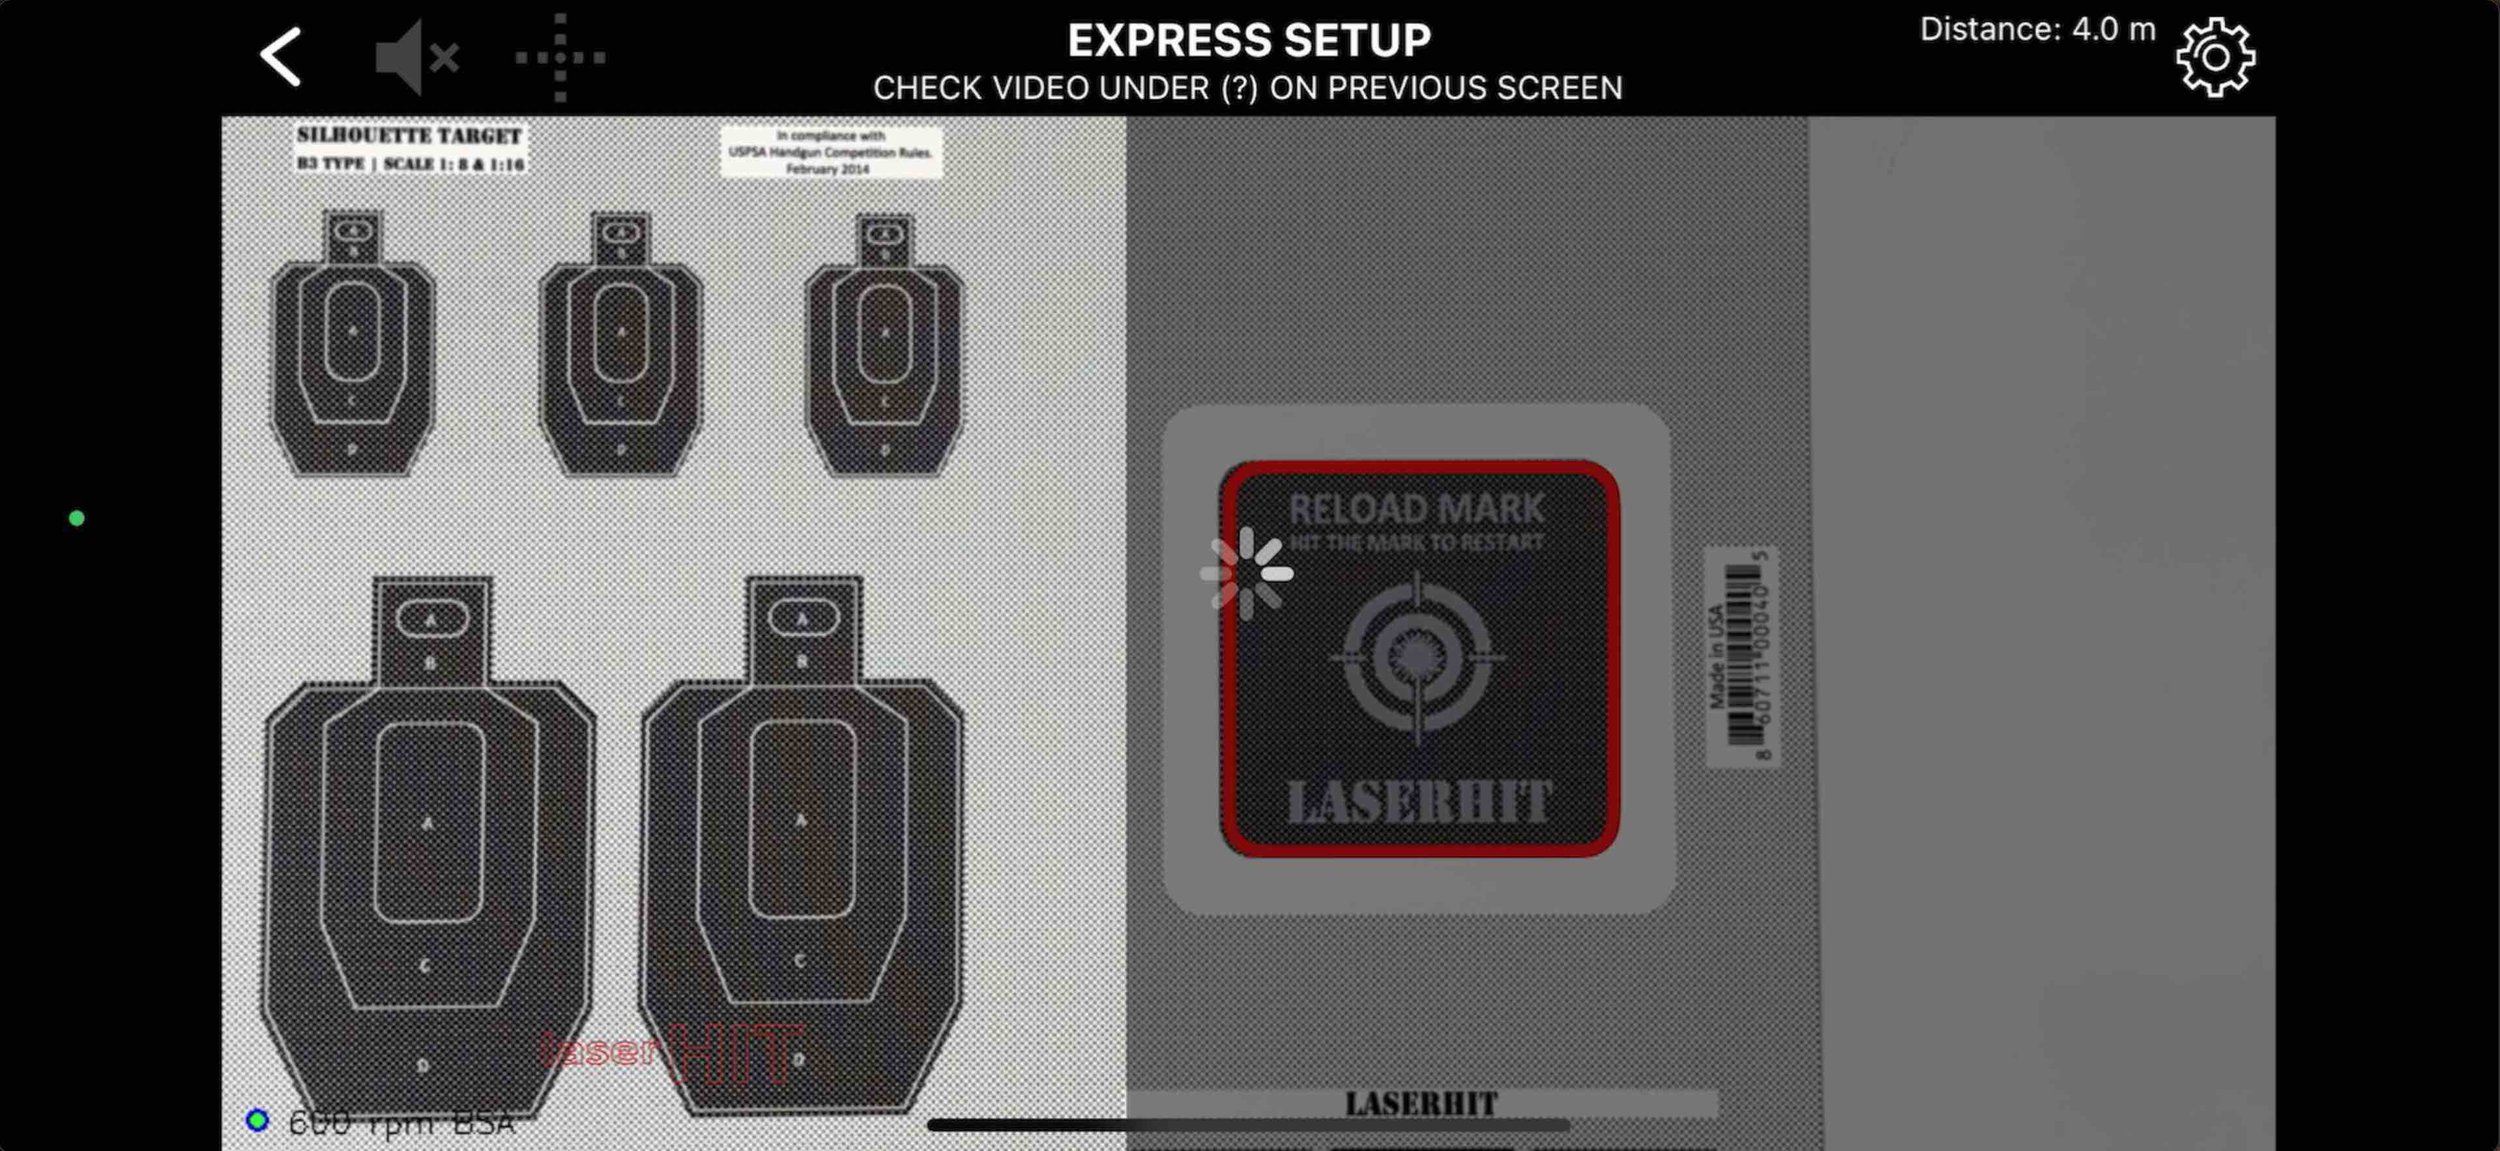
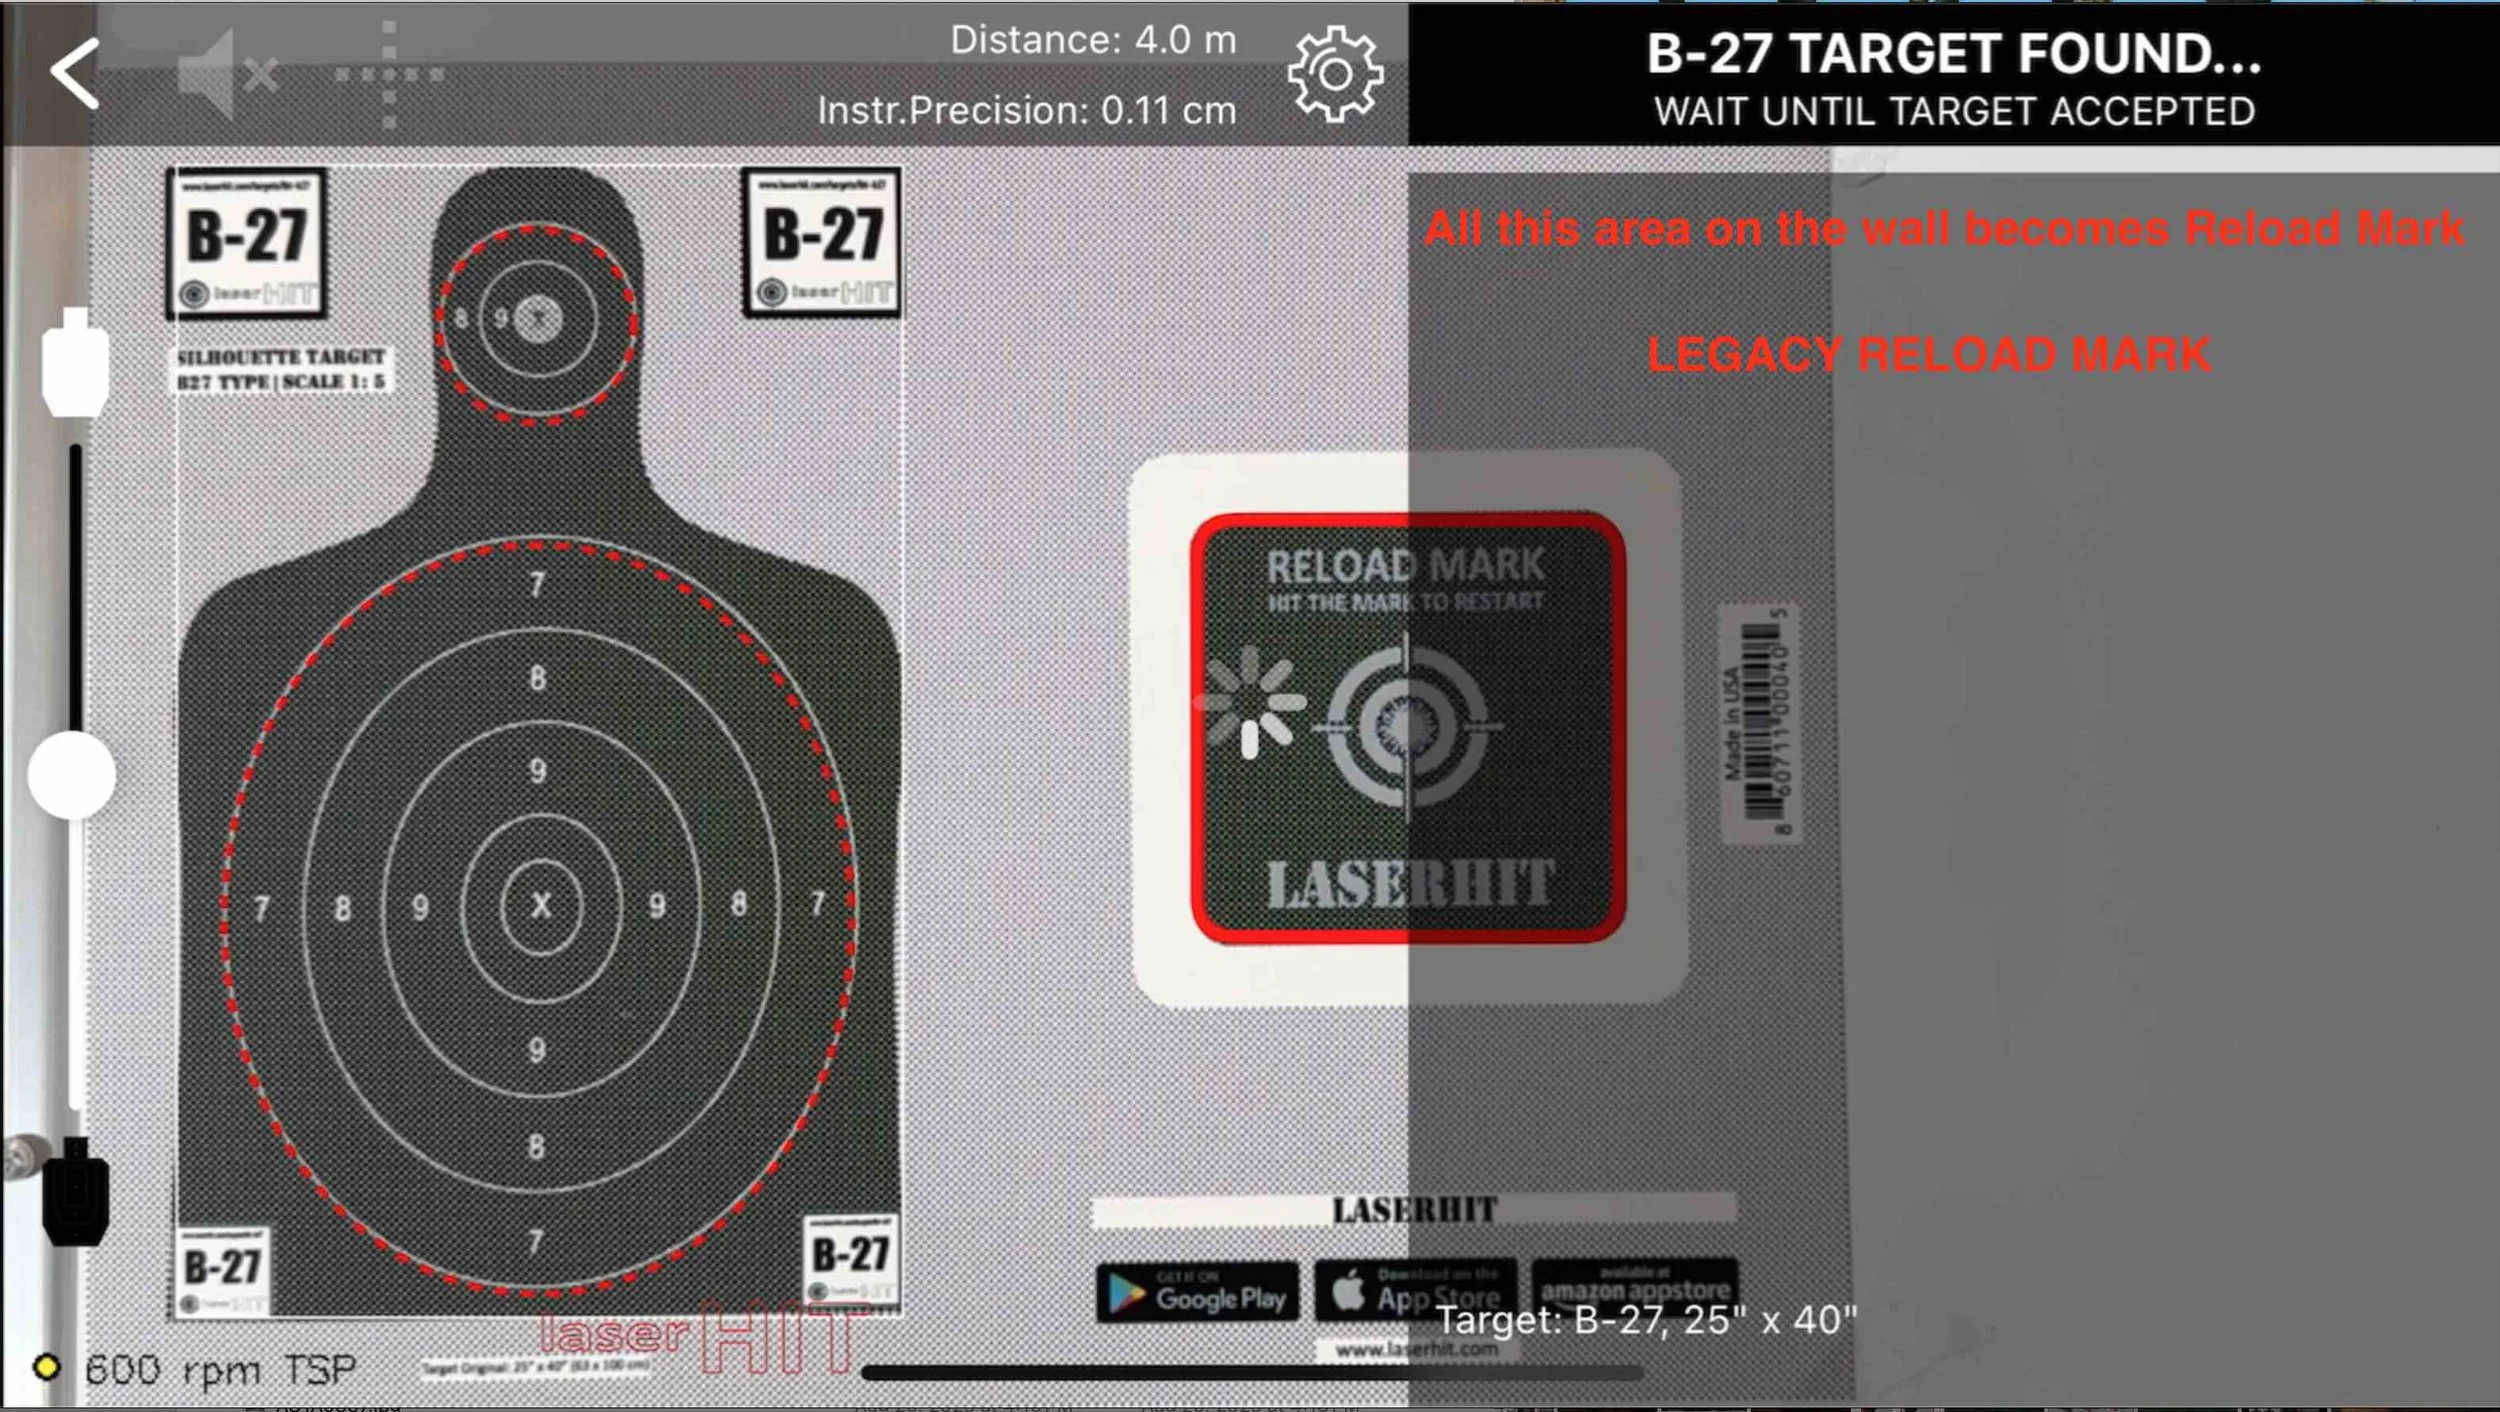
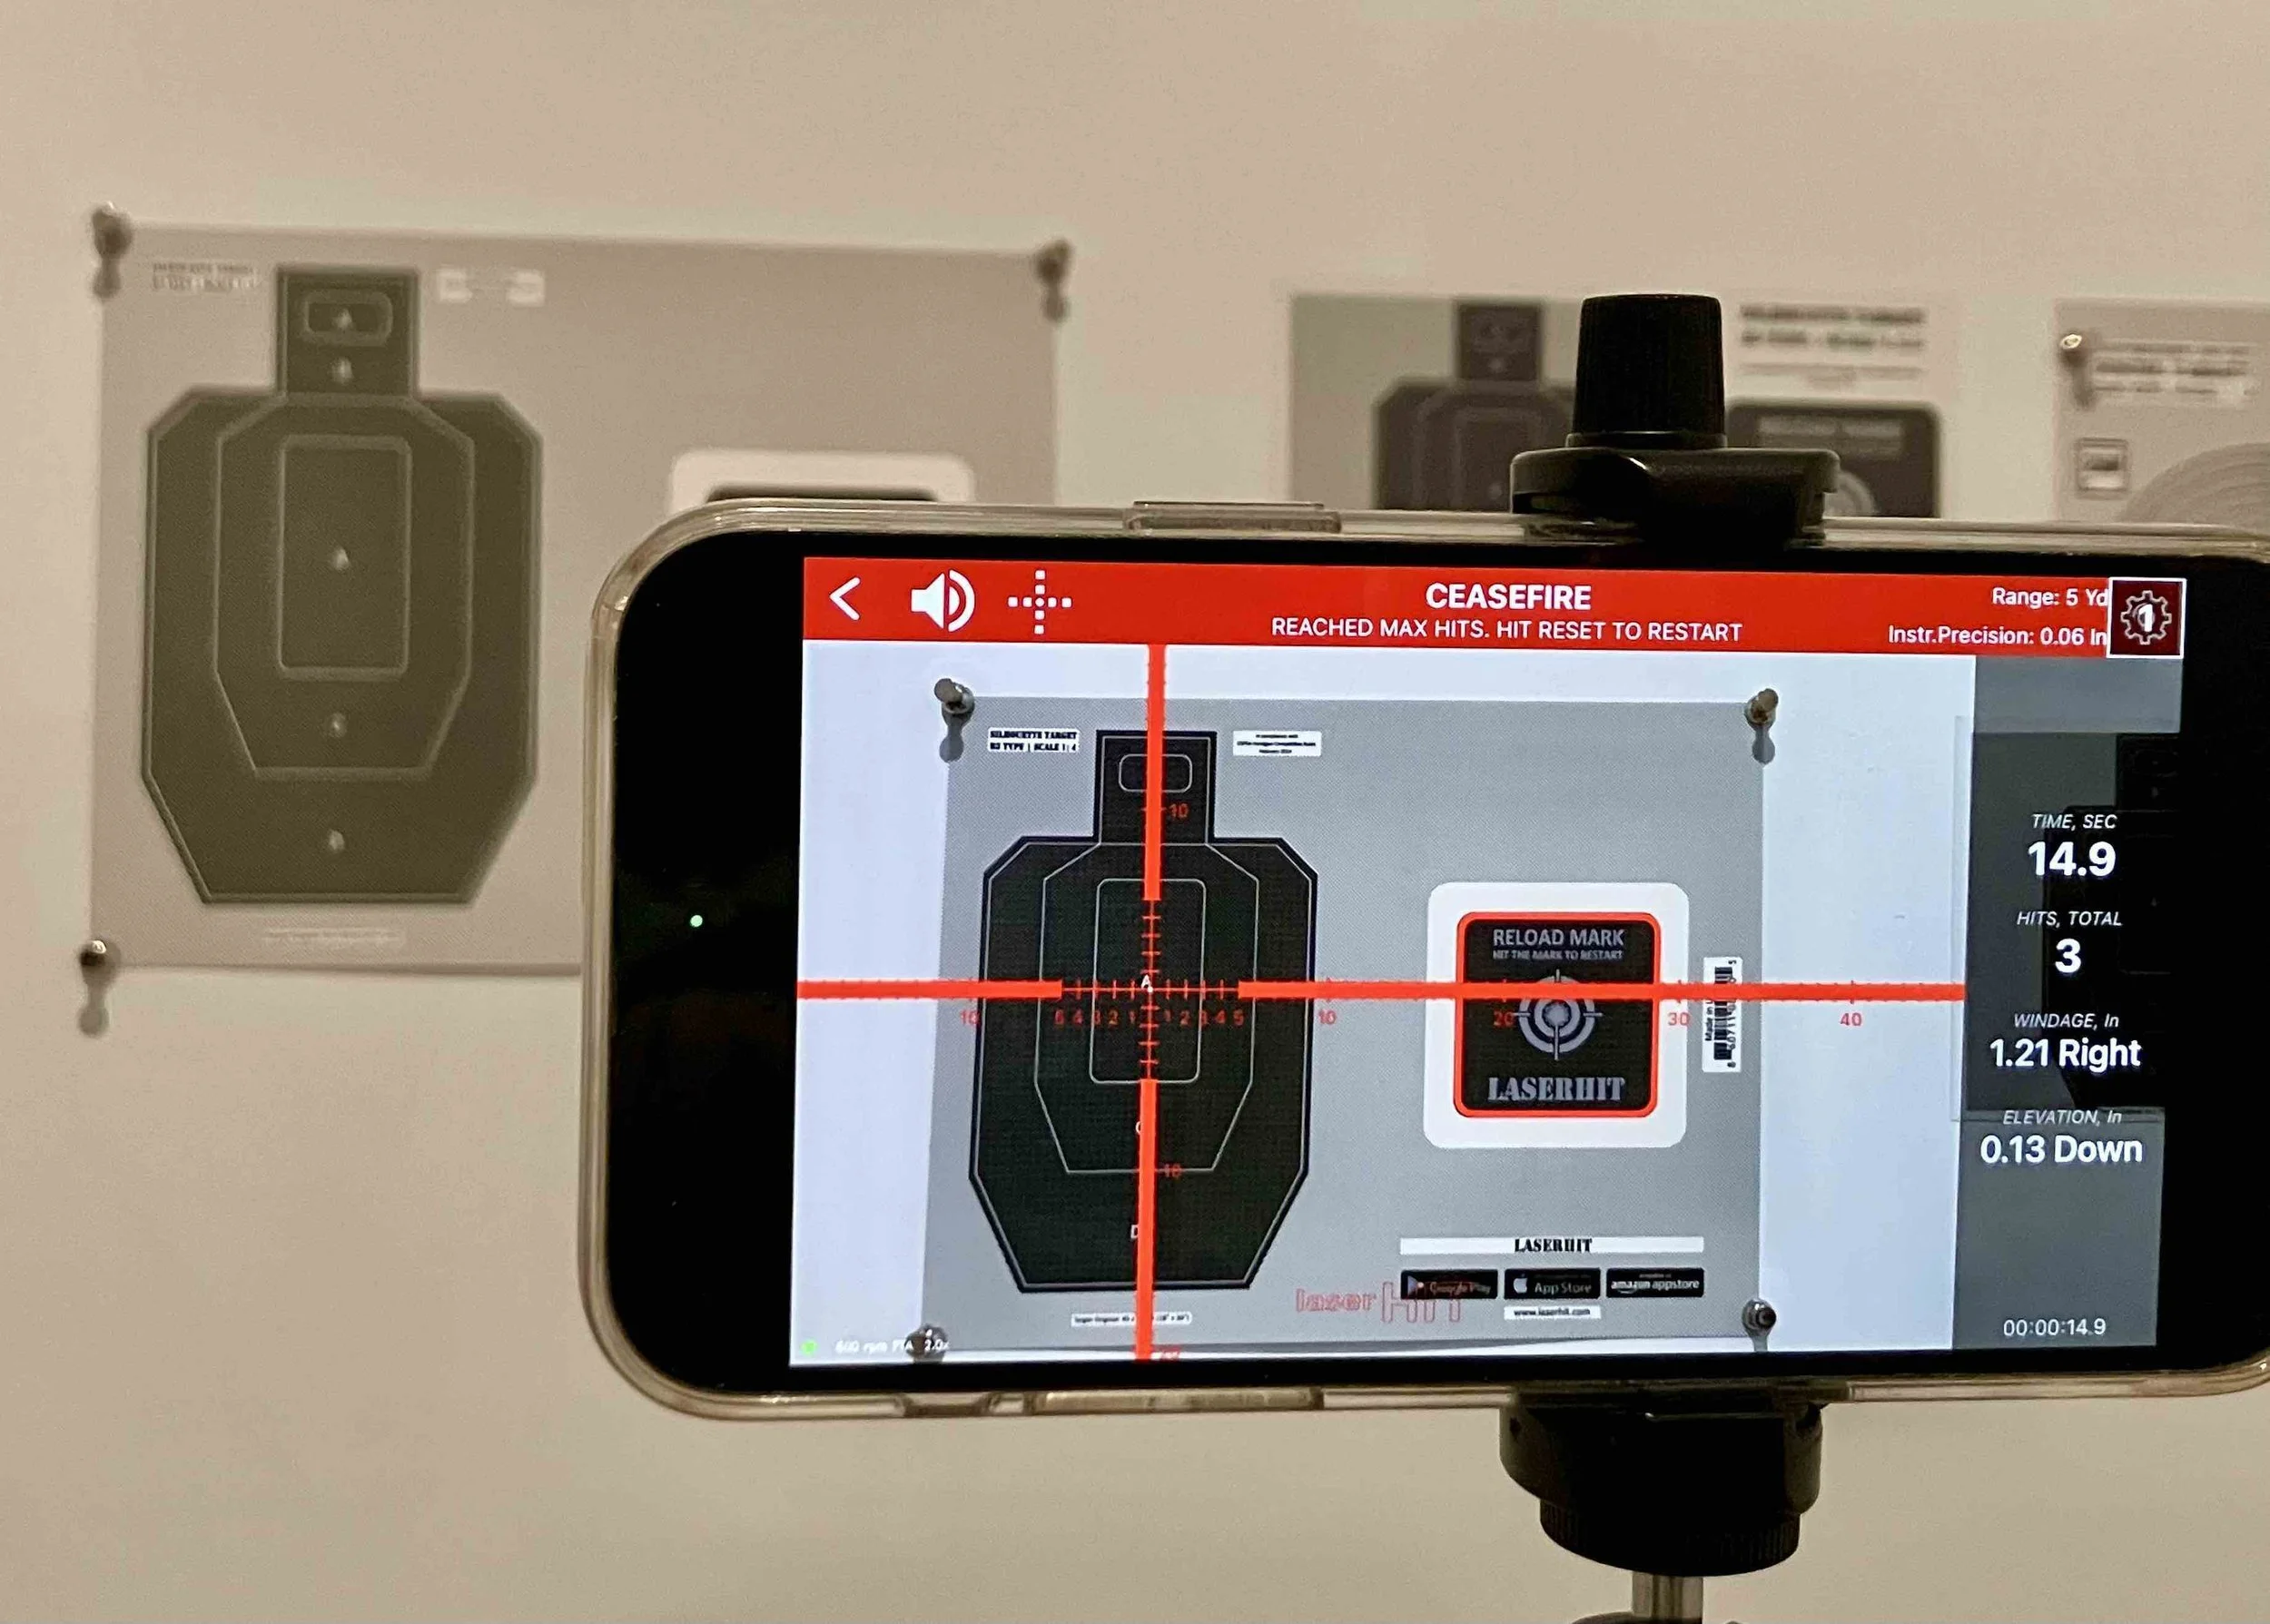
Understanding the Reload Mark
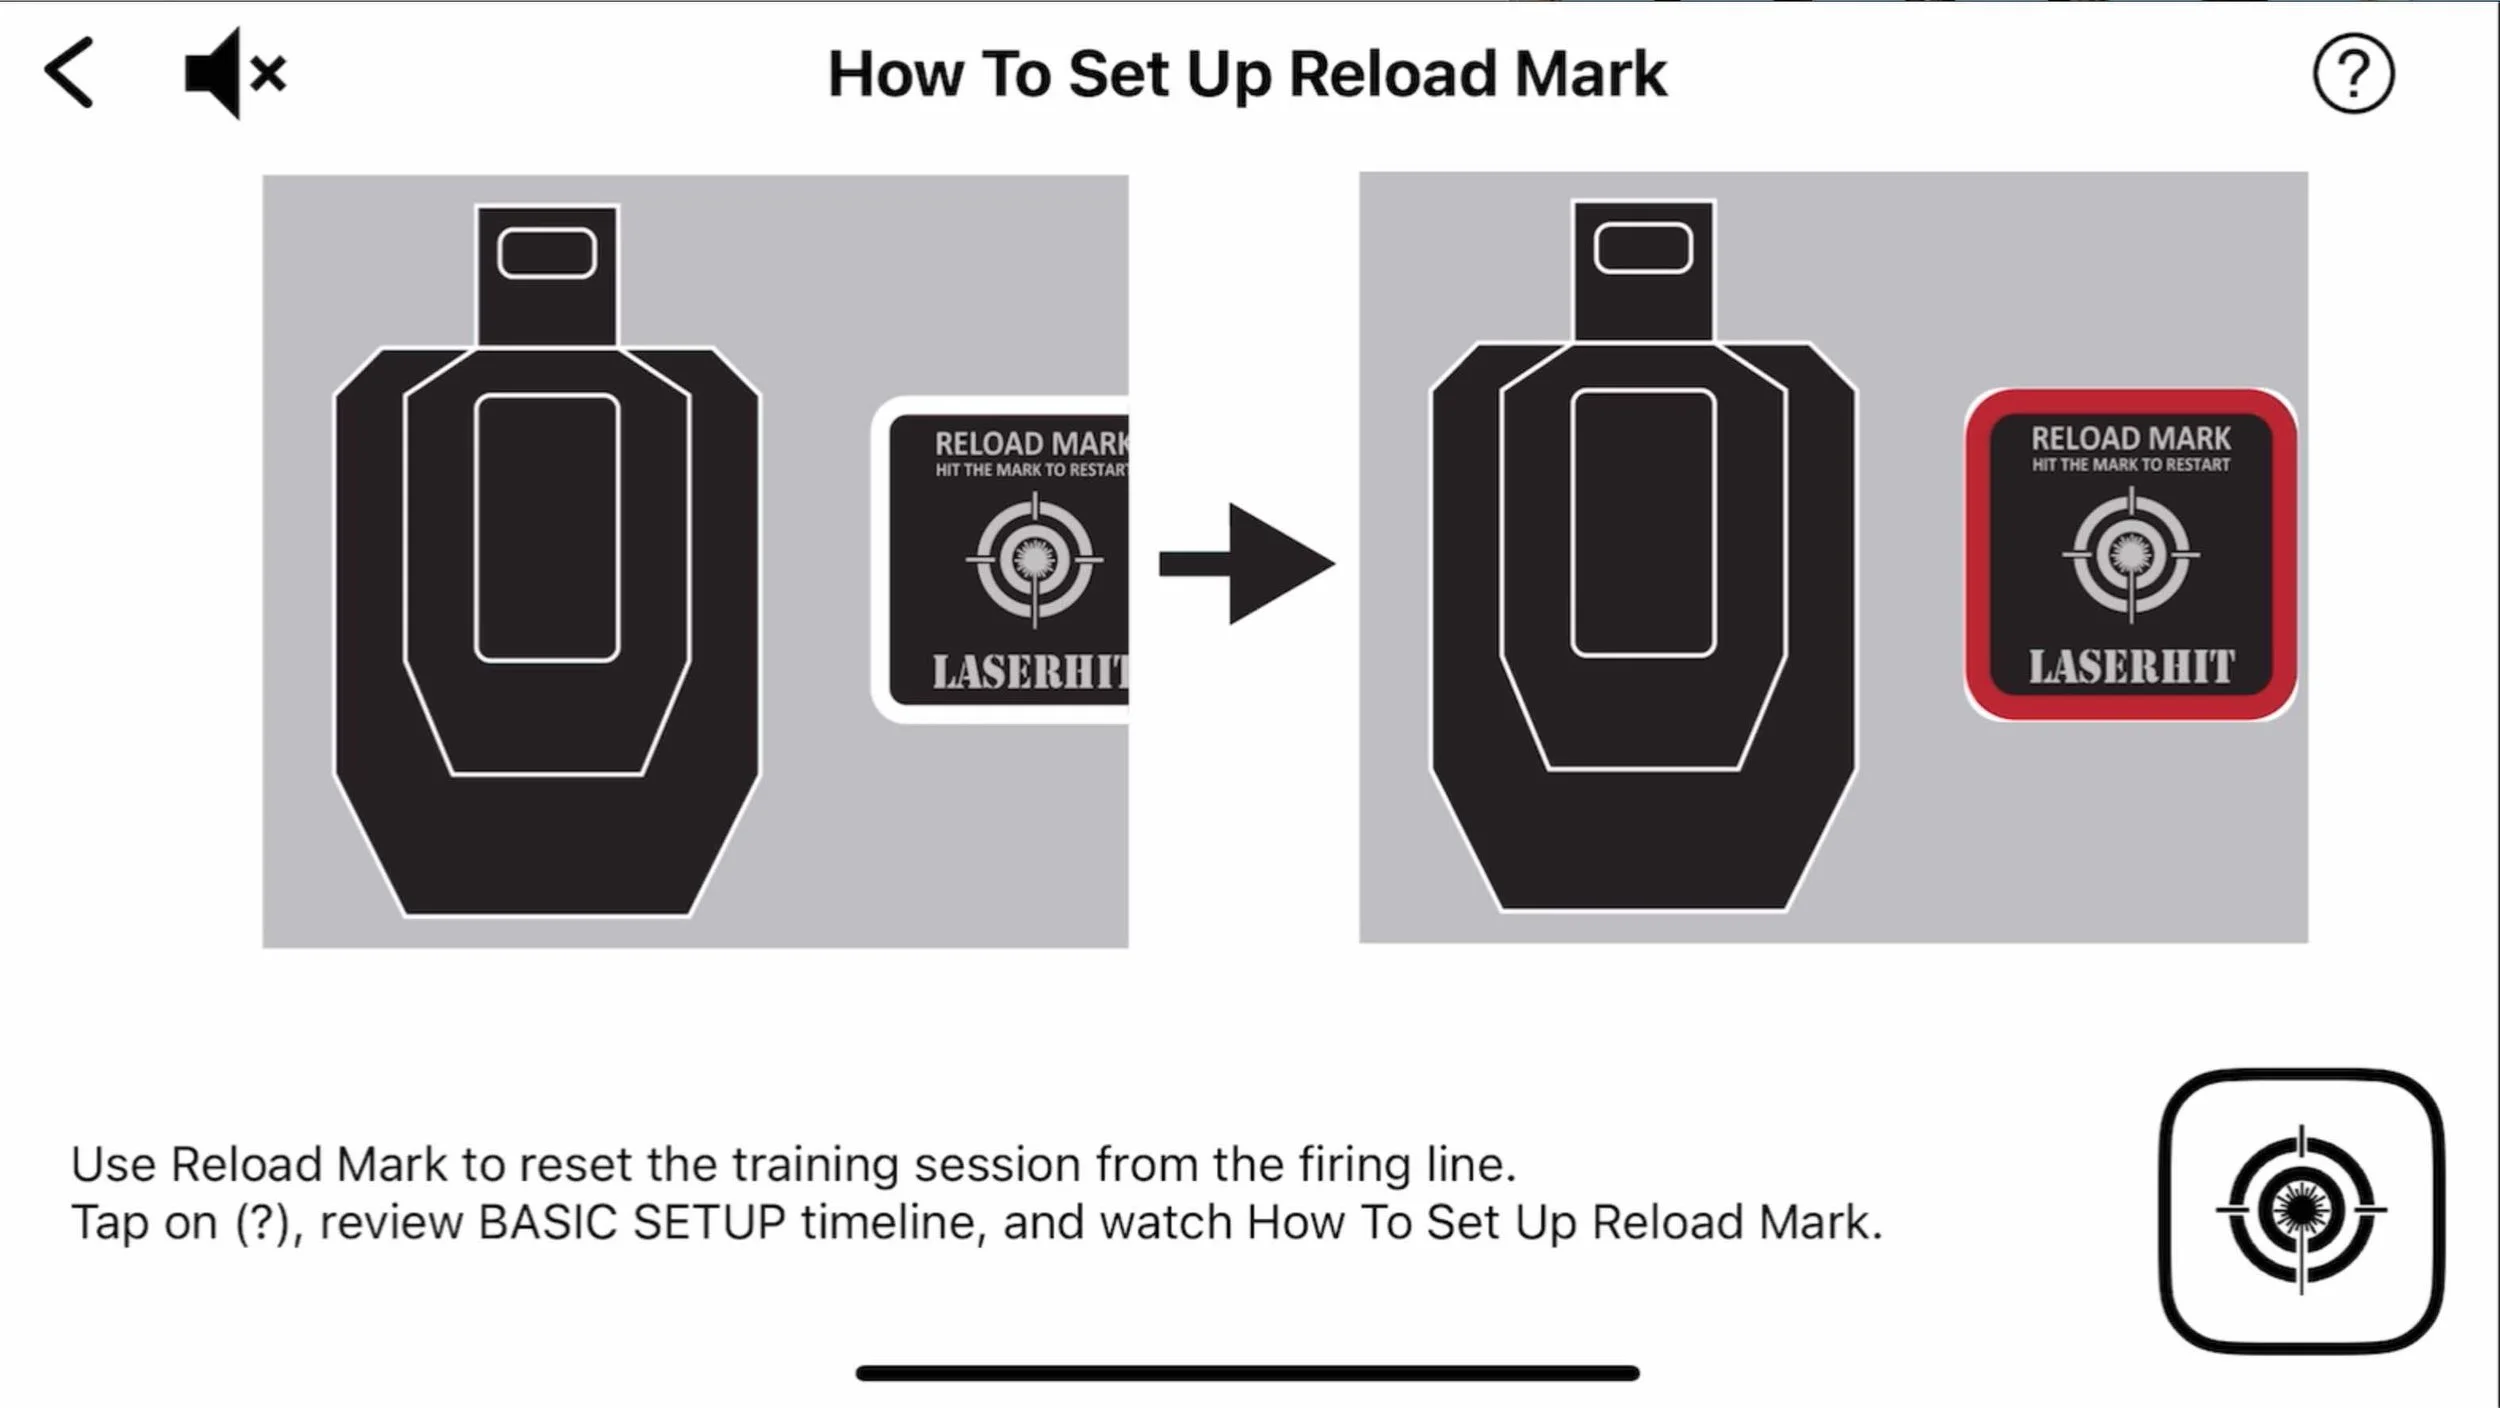
The Reload mark is more than a reset button.
It is part of the target reference system.
The Reload mark allows the app to:
confirm setup alignment
remotely restart or reset training sessions
For proper recognition:
the entire Reload mark must remain visible
including the white outer frame surrounding the black square
Once recognized correctly, the app confirms the Reload mark with a visible red frame on the phone screen.
Using Custom Targets
When using custom targets, the LaserHIT Reload mark is still required.
It can be downloaded free from the LaserHIT website and should be placed close to the target area so the camera can view:
the target
the Reload mark
inside the same camera frame.
Reload Legacy Feature
During some custom 1:1 target scale setups, the Reload mark may appear too small inside the camera image.
In this case, the Reload Legacy feature can be enabled from the Firing Range Setup screen.
This converts the right gray panel of the phone screen into an extended virtual Reload area.
When projected toward the target area, this virtual zone performs the same reload/reset function as the physical Reload mark.
Final Setup Rule
For maximum setup precision:
the entire target area
and the entire Reload mark
must remain fully visible inside the phone screen boundaries.
One of the most common setup frustrations occurs when users technically follow the instructions, but parts of the target geometry extend beyond the visible camera frame.
At that point, the system cannot fully confirm the training environment.
And precise geometry always begins with complete visibility.
Phone Camera and Target Positioning
The phone camera must clearly see:
the entire target area
the Reload mark
all expected hit zones, especially during long-range simulation
The relationship between the phone camera and the target area is extremely important for stable detection and precision measurement.
Keep the phone relatively close to the target area. As camera distance increases, the system receives less usable visual information from the target area, which may reduce detection precision.
The phone should not obstruct the target when viewed from the shooting position, while the camera must still maintain a clear and stable viewing angle.
For most setups, the best positioning is:
slightly to the right of the primary target
slightly below target center
especially during multi-target drills.
Small left-right tilt adjustments or slight upward-backward angle changes may be necessary to achieve the best relationship between the phone camera and the target area.
LaserHIT also supports wireless or wired connection between the mobile device and a TV or home projector, allowing training feedback to appear on a larger screen in real time.
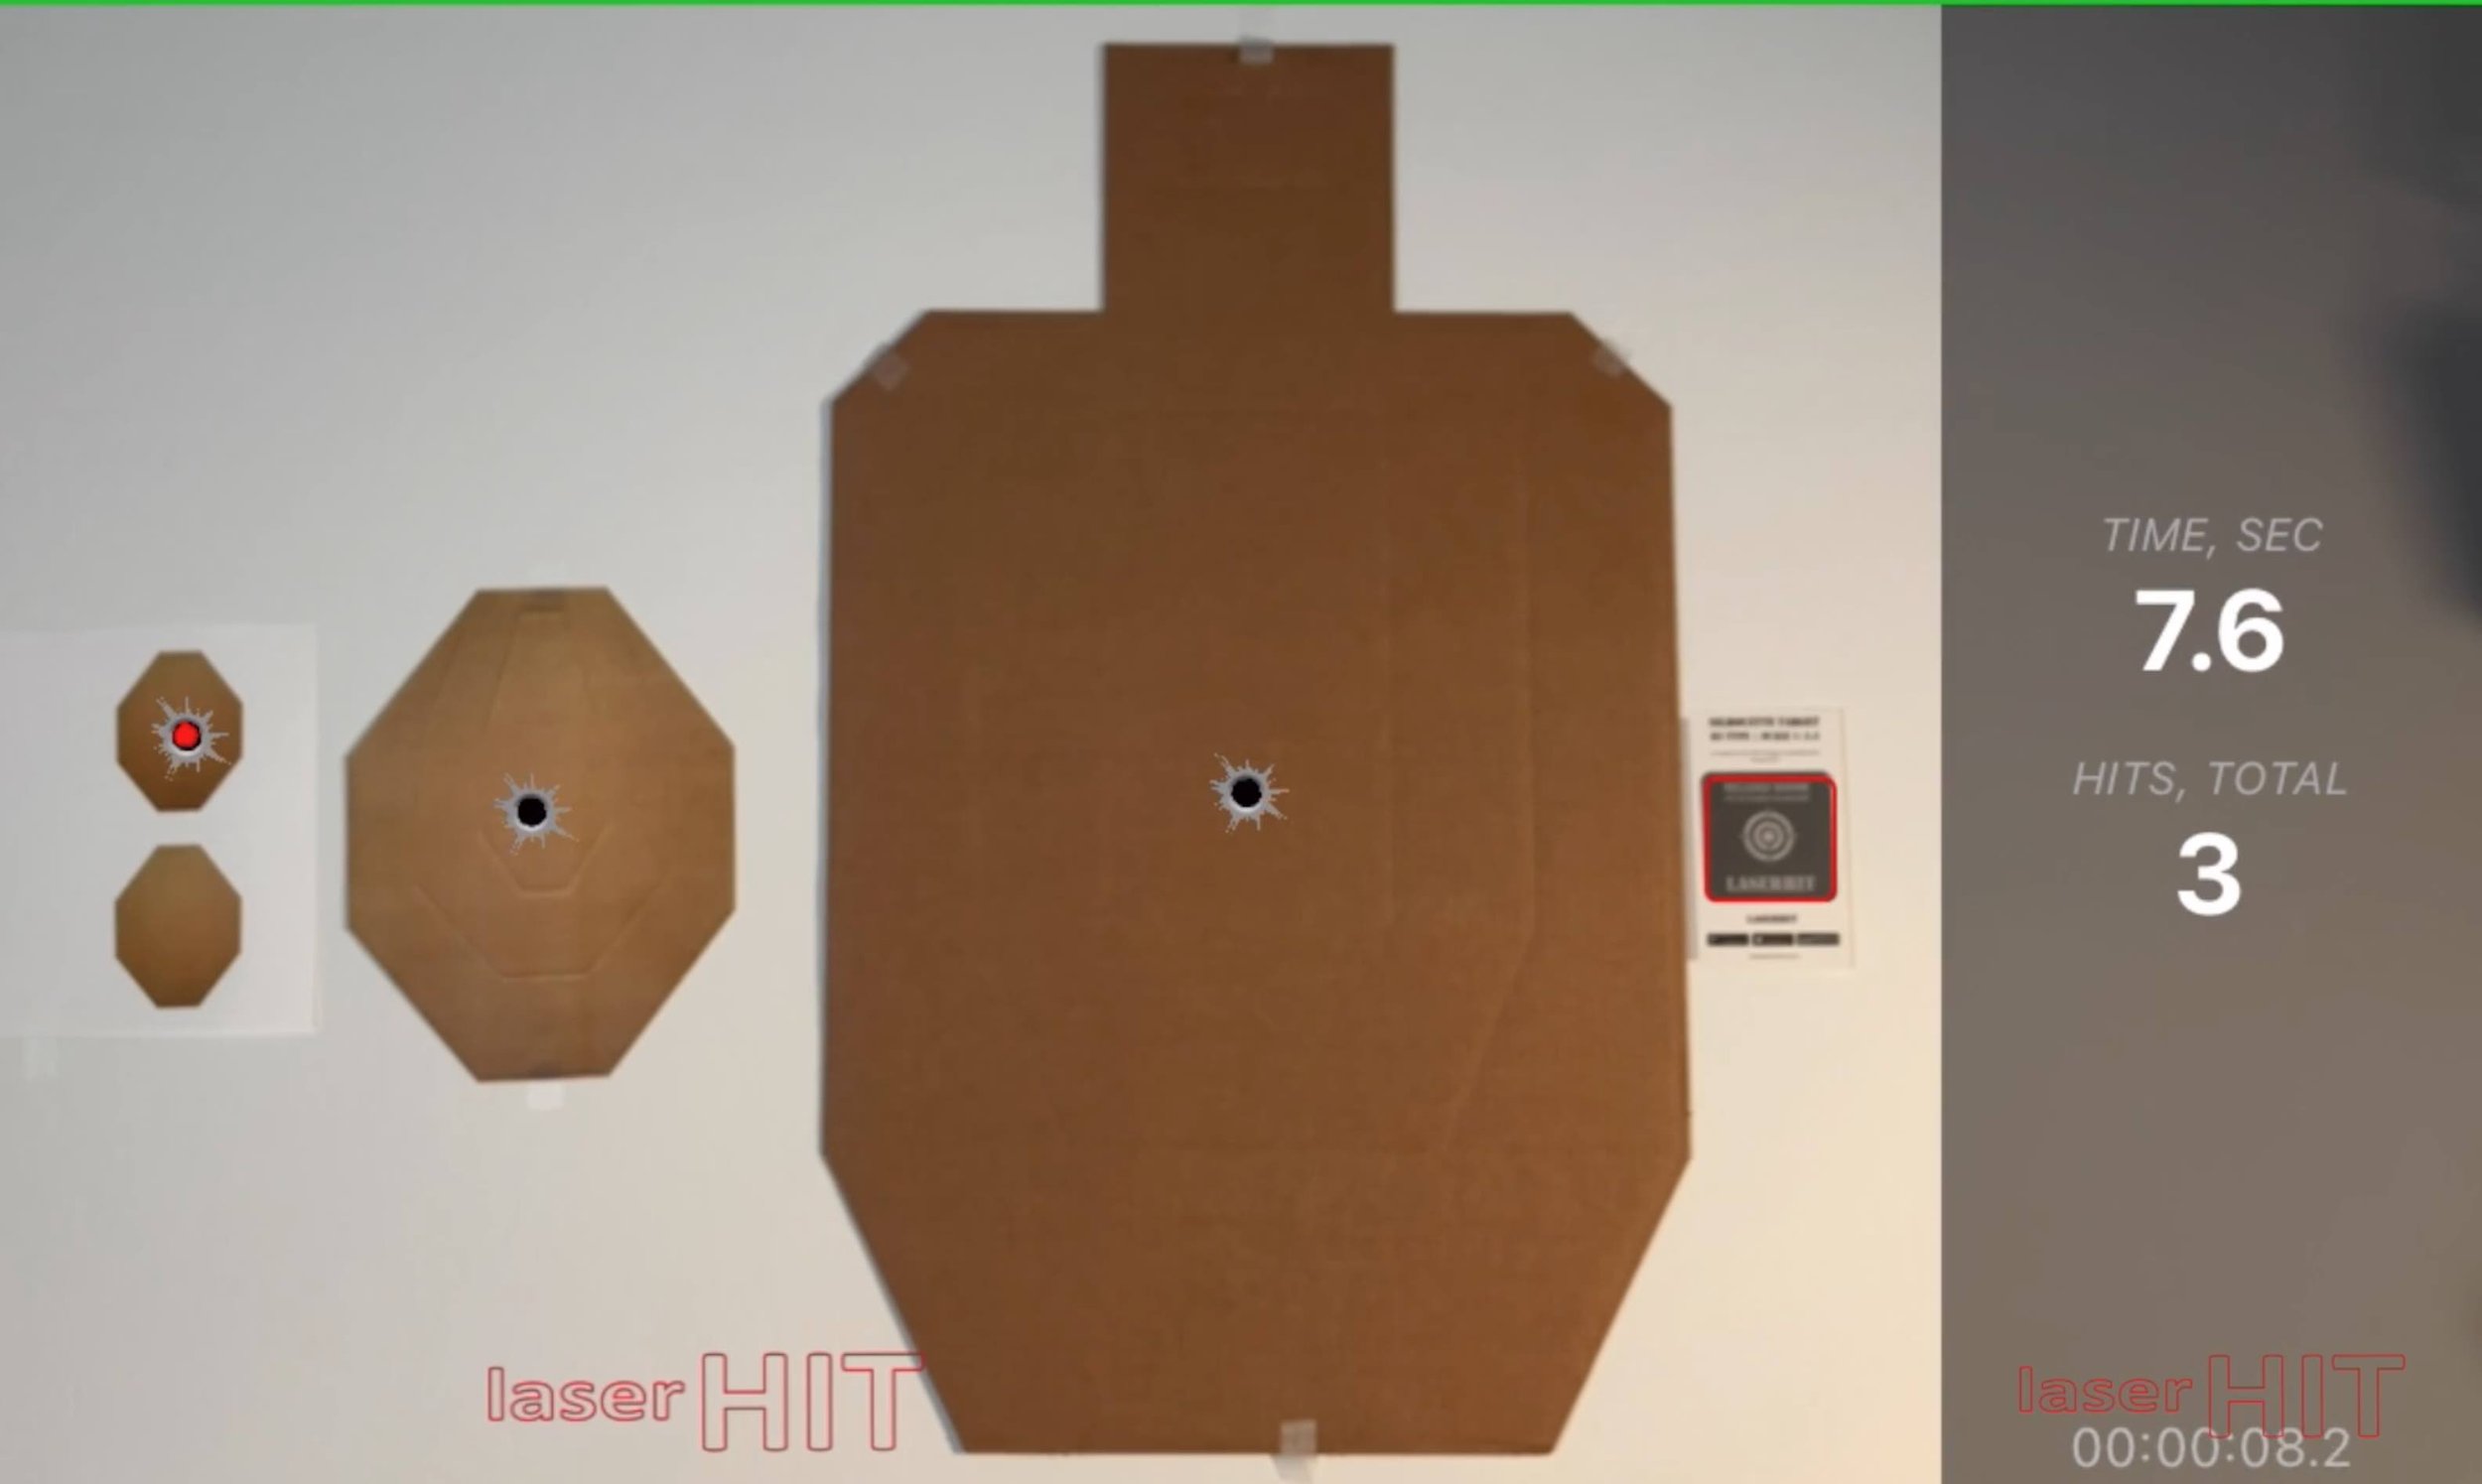
Target Size Inside the Camera Frame
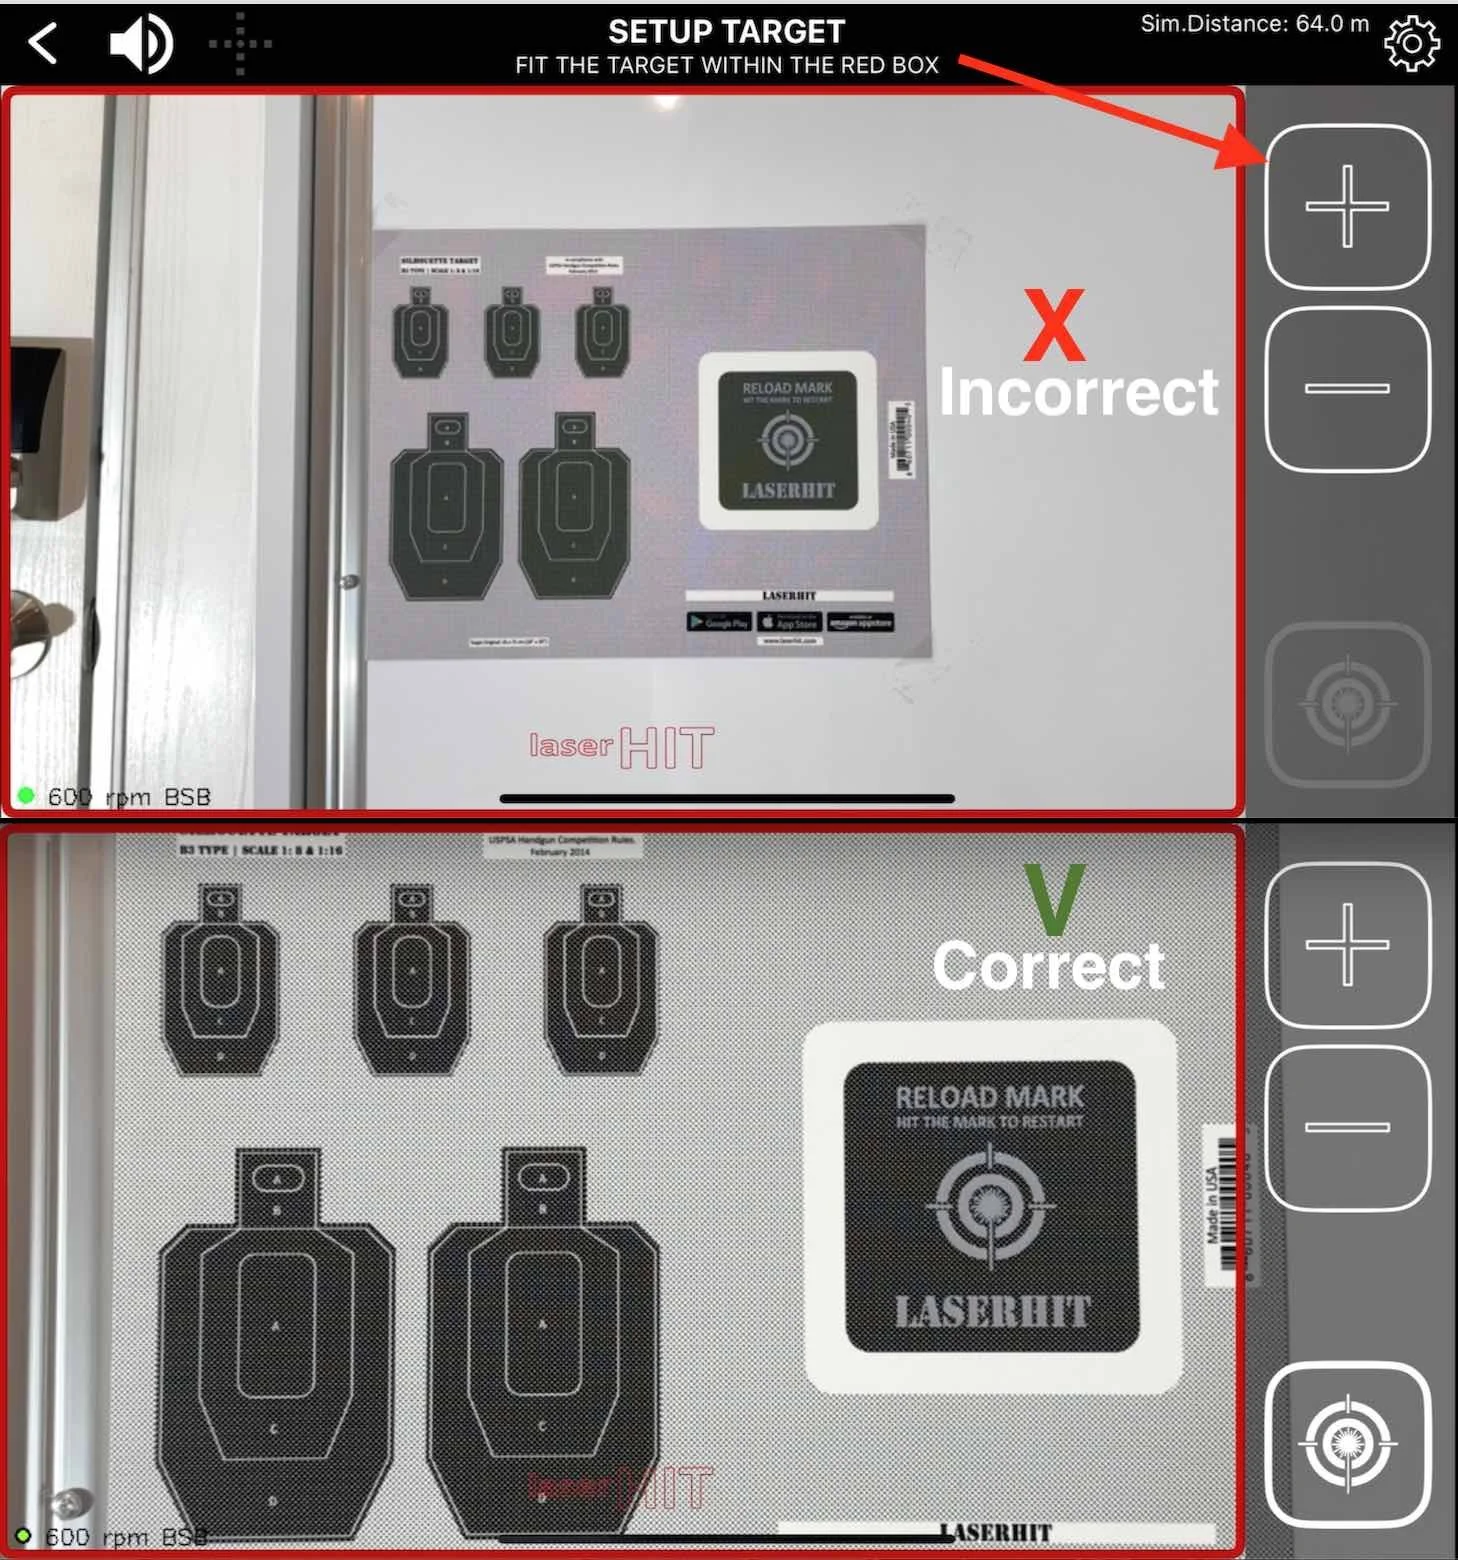
The target area should occupy as much of the phone screen as possible without extending beyond the screen edges.
This is one of the most commonly missed setup details.
The larger the visible target area appears inside the camera image:
the more usable visual information the system receives
the more stable the target recognition becomes
the more precise the hit analysis can be
This is why the LaserHIT setup screen includes:
Zoom +
Zoom -
as primary adjustment tools.
The goal is simple:
maximize the visible target area while keeping:
the entire target area
the Reload mark
fully visible inside the phone screen.
If parts of the target area or Reload mark extend beyond the screen edges, setup confirmation and precision measurement may become inconsistent.
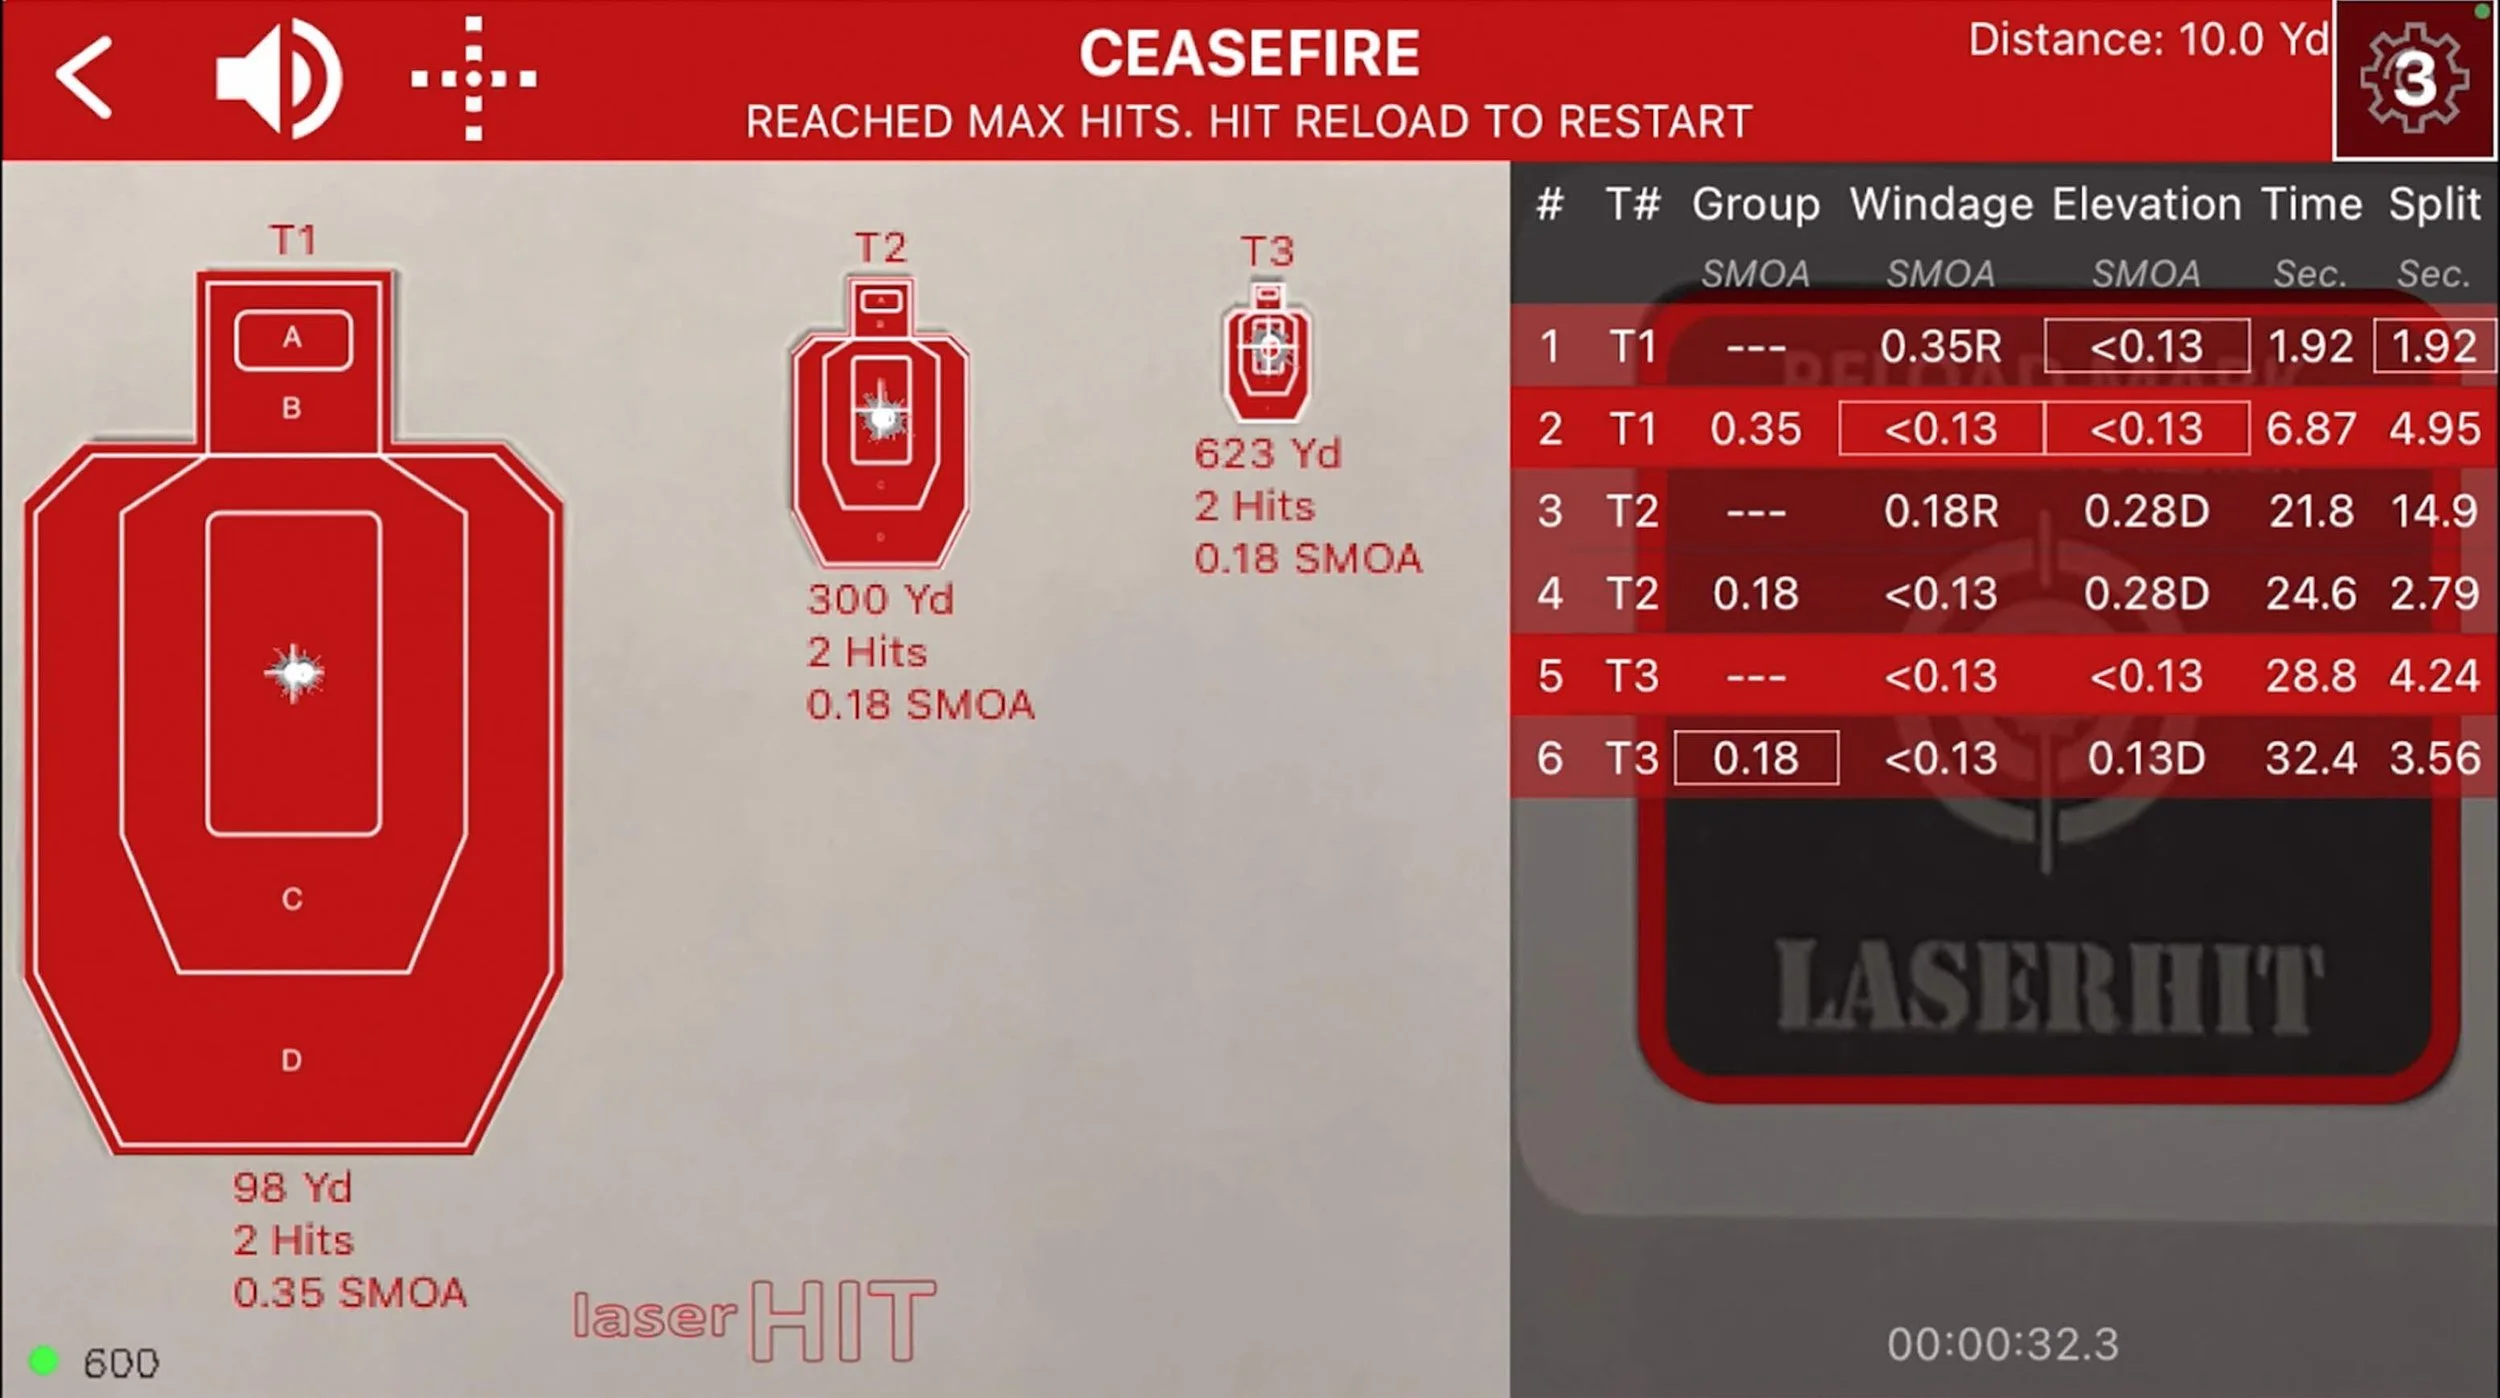
Long-Range and Ballistic Framing Considerations
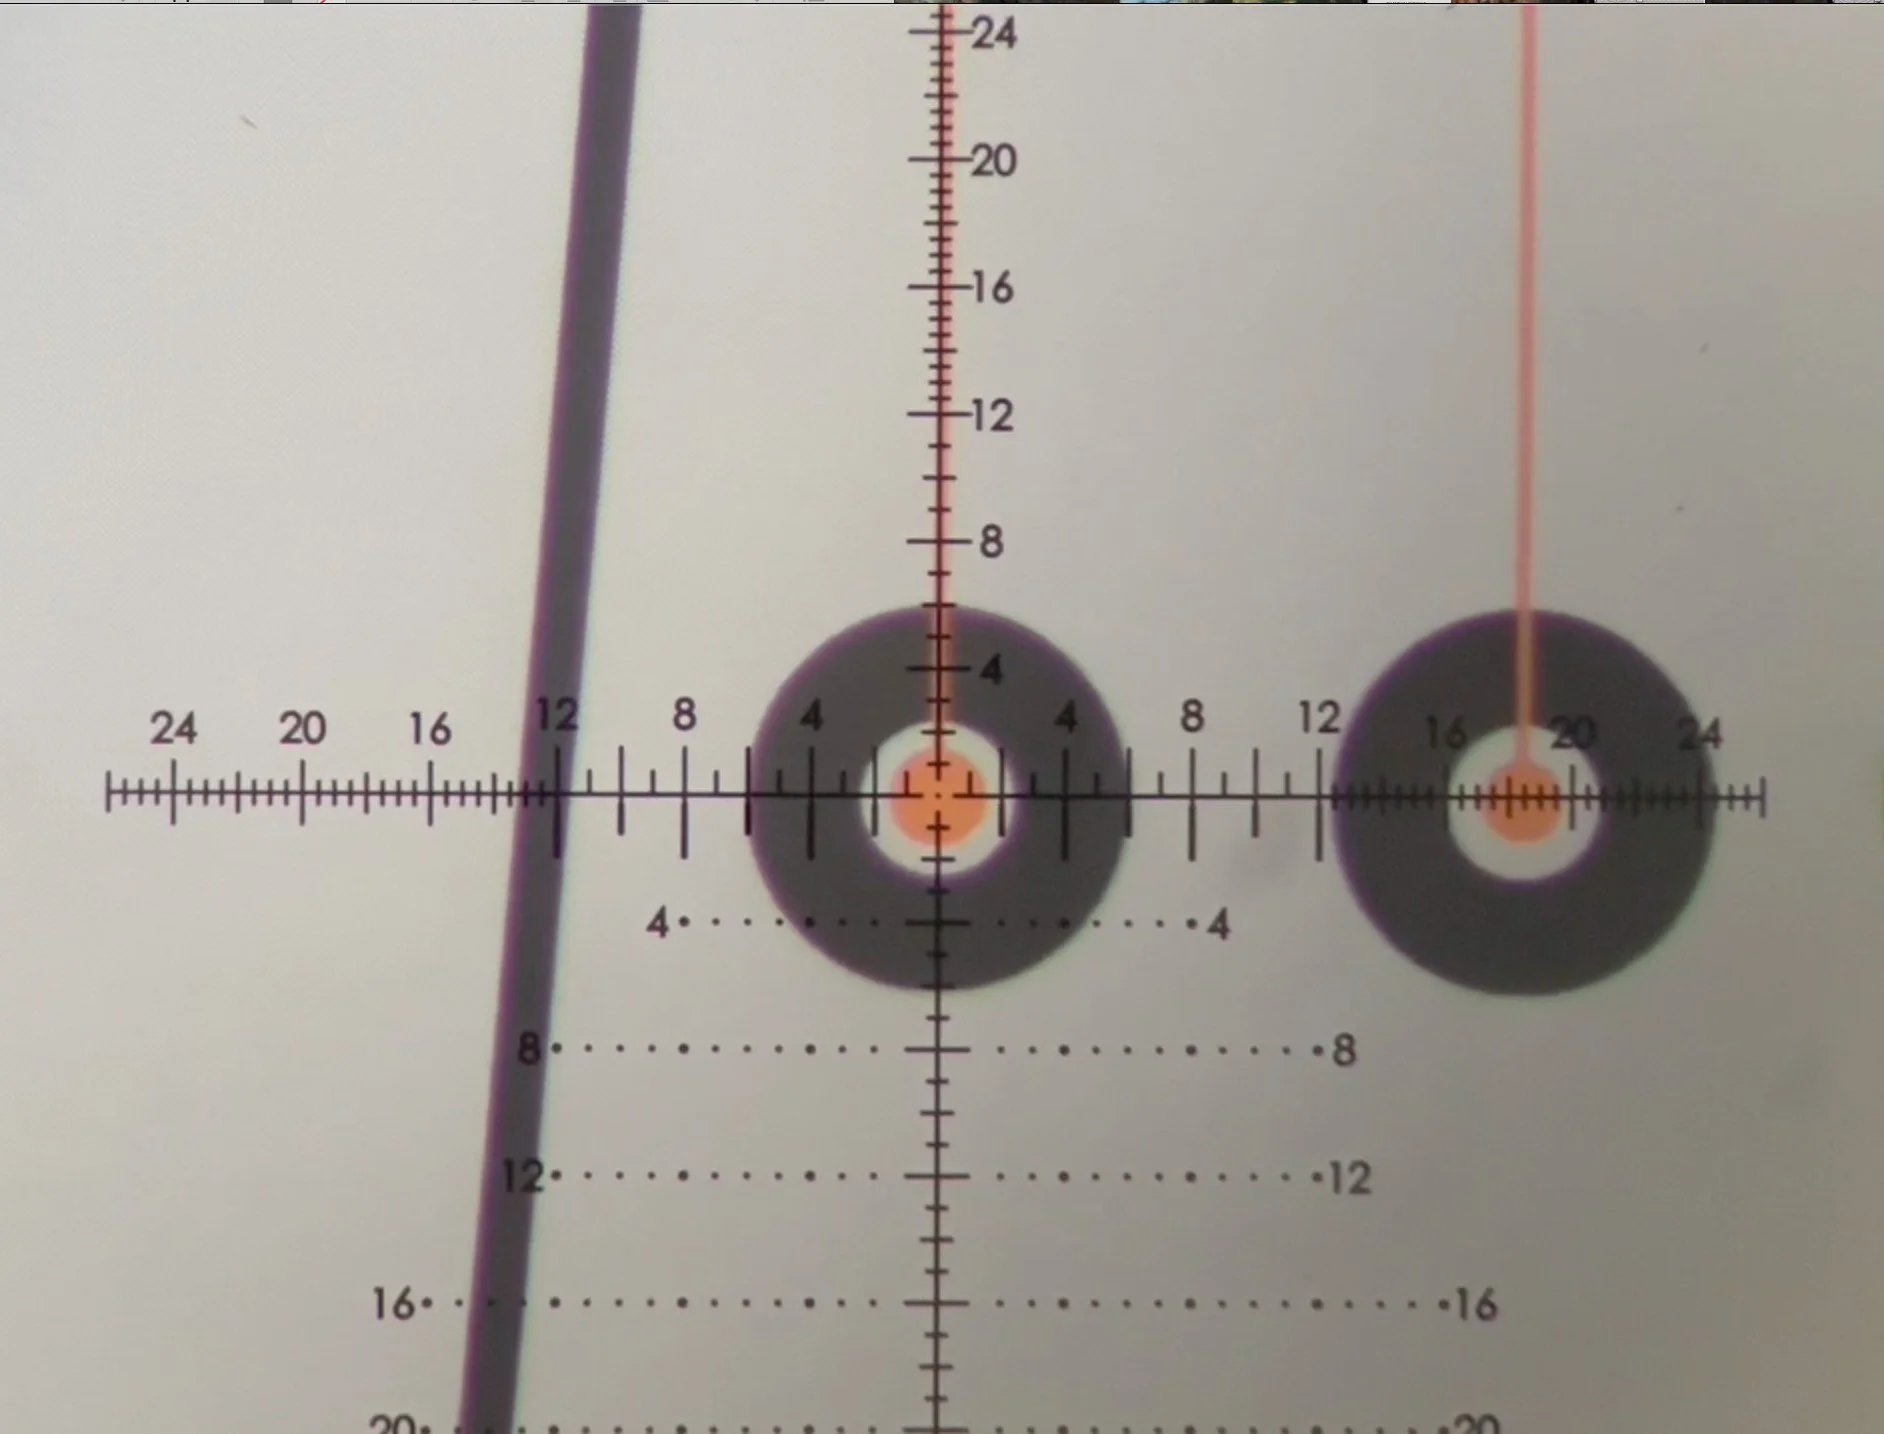
During long-range ballistic training, the phone camera must see more than the target itself.
The visible camera area should also include:
expected bullet drop area
ballistic flight path
lower impact zones during temporary zeroing
Otherwise, a situation may occur where:
the target appears correctly configured
the setup process completes normally
but impacts are not registered because part of the ballistic path falls outside the visible camera area
This becomes especially important during:
temporary laser zeroing
ballistic drop visualization
long-range angular simulation
Initial impacts may appear significantly below the target before final alignment is confirmed.
For advanced ballistic training, the entire expected ballistic flight and impact area must remain fully visible inside the phone screen boundaries.
Lighting and Detection
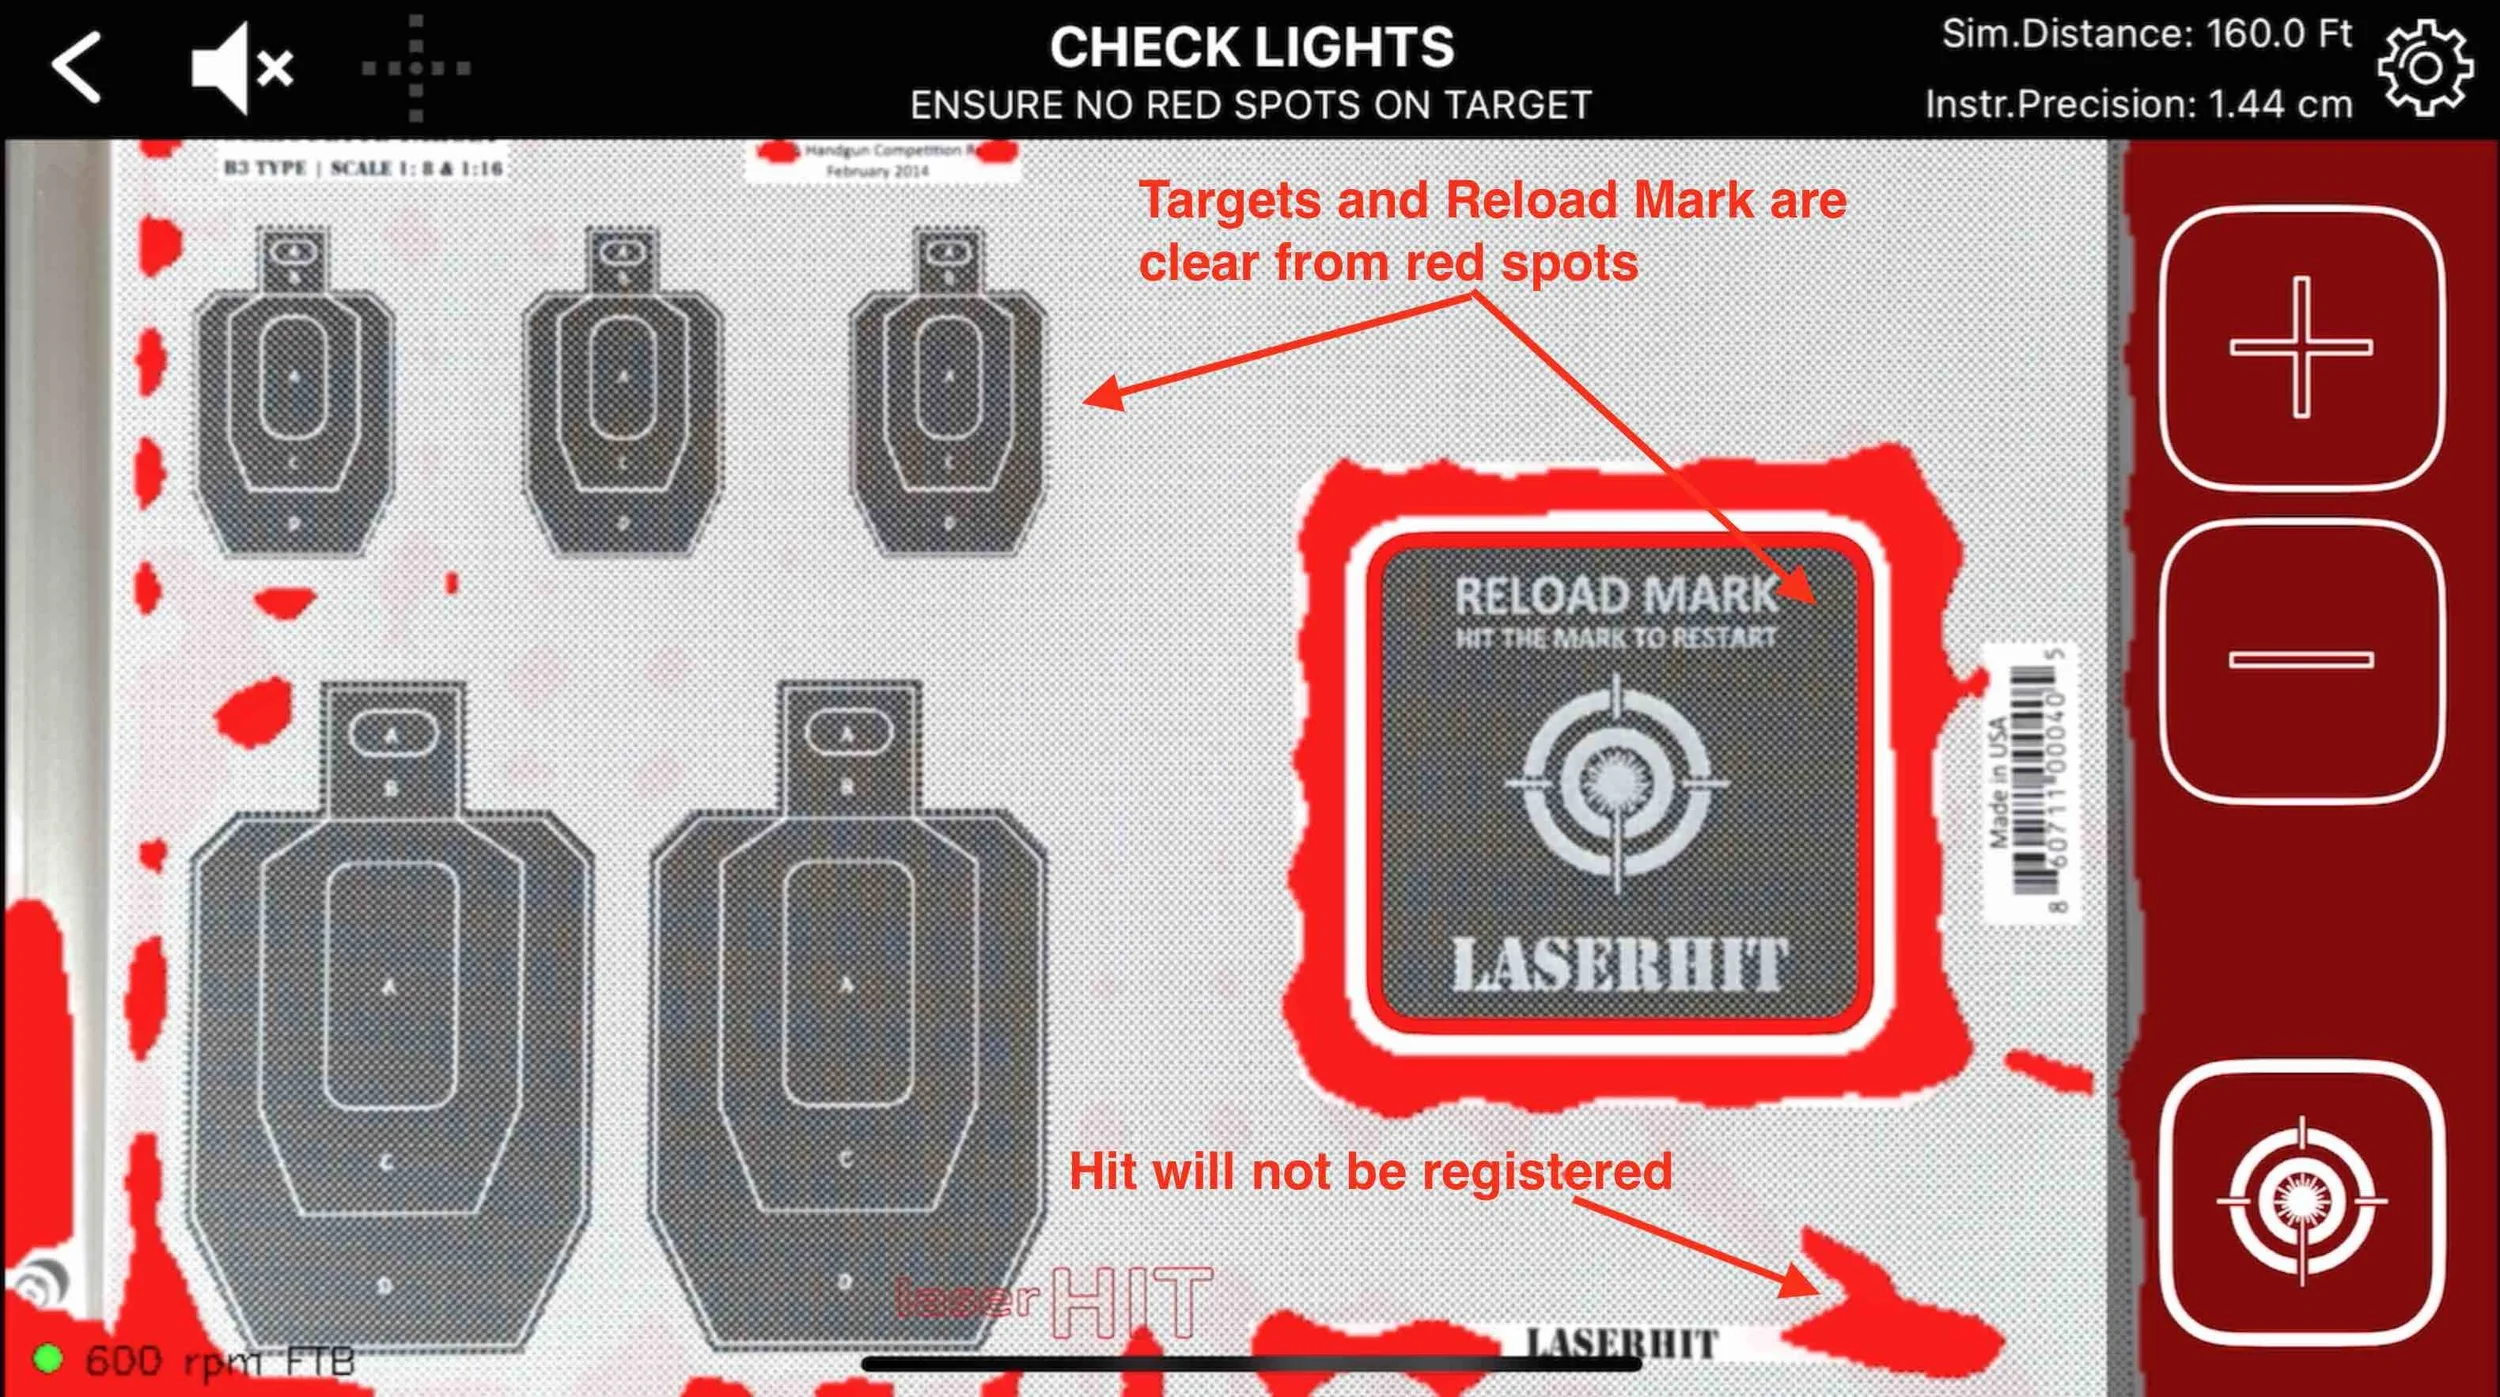
Good lighting is not defined by brightness alone. Excessive brightness and dim conditions can both reduce detection reliability.
The goal is:
consistent contrast
stable exposure
minimizing oversaturated hotspots on the target and Reload mark
During the setup process, the app may display red highlighted areas to help identify oversaturated hotspots or problematic lighting conditions. These indicators are visible only during setup and do not appear during active training sessions.
These “blind zones” becomes especially important during:
long-range distance simulation
precision grouping analysis
ballistic visualization of bullet drop and time-of-flight
Why Setup Precision Matters
Precision dry-fire training is ultimately a measurement environment.
The quality of the setup directly affects:
hit detection
target scaling
grouping analysis
ballistic simulation
measurable feedback
Small setup improvements often produce major improvements in training consistency and confidence.
General Setup Checklist
Before your first session, confirm:
stable lighting conditions
no direct sunlight or oversaturated hotspots
target secured on all four corners
Reload mark fully visible
phone camera unobstructed
phone positioned outside the shooter’s sight picture
entire target area visible inside the phone screen
correct target scaling and firing distance
stable tripod or phone support
no reflective surfaces near the target area
For long-range and ballistic training, also confirm:
bullet drop and impact area remain visible inside the camera frame
angular alignment and target framing are verified
A properly configured setup transforms dry fire from simple entertainment into measurable performance training that transfers directly to live fire.