Failure Drill L1: When Two Shots Are Not Enough
The Failure Drill L1 is one of the most recognizable defensive shooting patterns in the world. Often referred to as the Mozambique Drill or Failure to Stop, it was developed to address a simple but critical reality: not every threat is immediately neutralized by center-mass hits. LaserHIT introduces this drill as a structured dry-fire exercise that preserves the intent, logic, and discipline of the original technique while adding measurable feedback and accountability.
What the Failure Drill Is About
The Failure Drill is based on deliberate escalation. The shooter delivers two controlled shots to the torso to manage the threat quickly. If the threat remains active, the response shifts immediately to a precise shot to the head to achieve a decisive stop.
This sequence is not optional. It reflects real defensive logic, not a scoring shortcut or a speed challenge.
Two shots to control.
One shot to stop.
Why Shot Order Is Critical
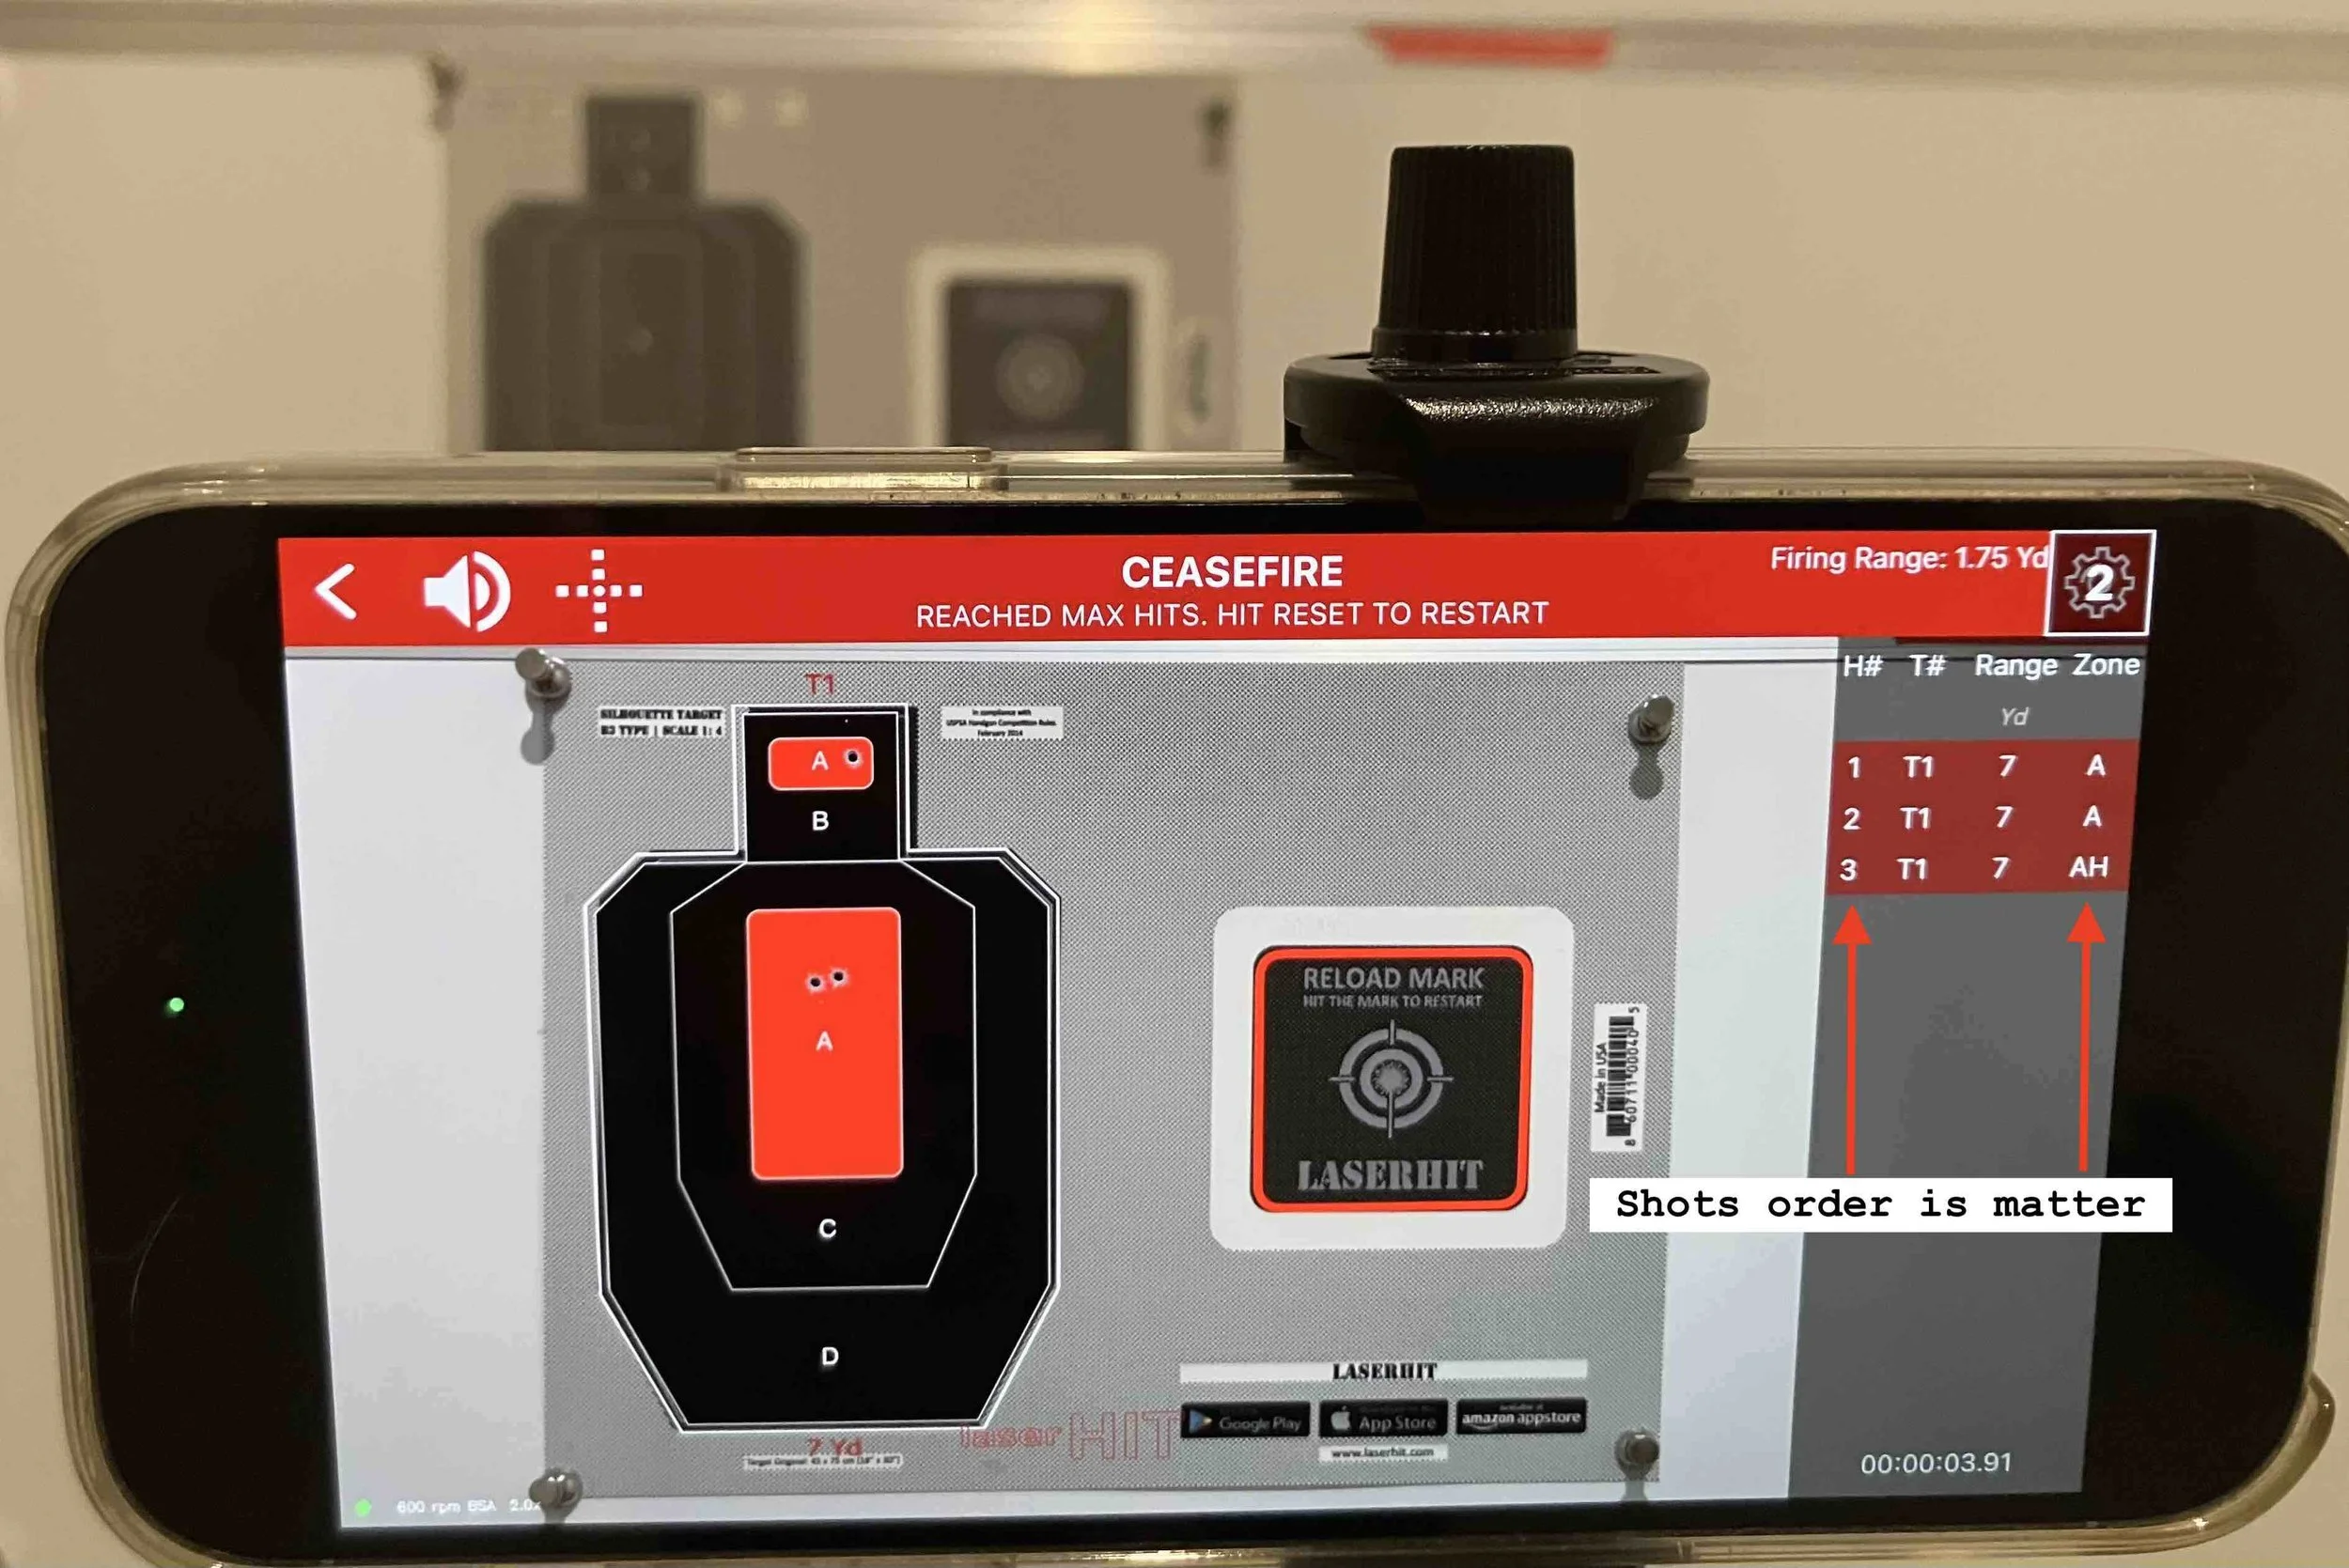
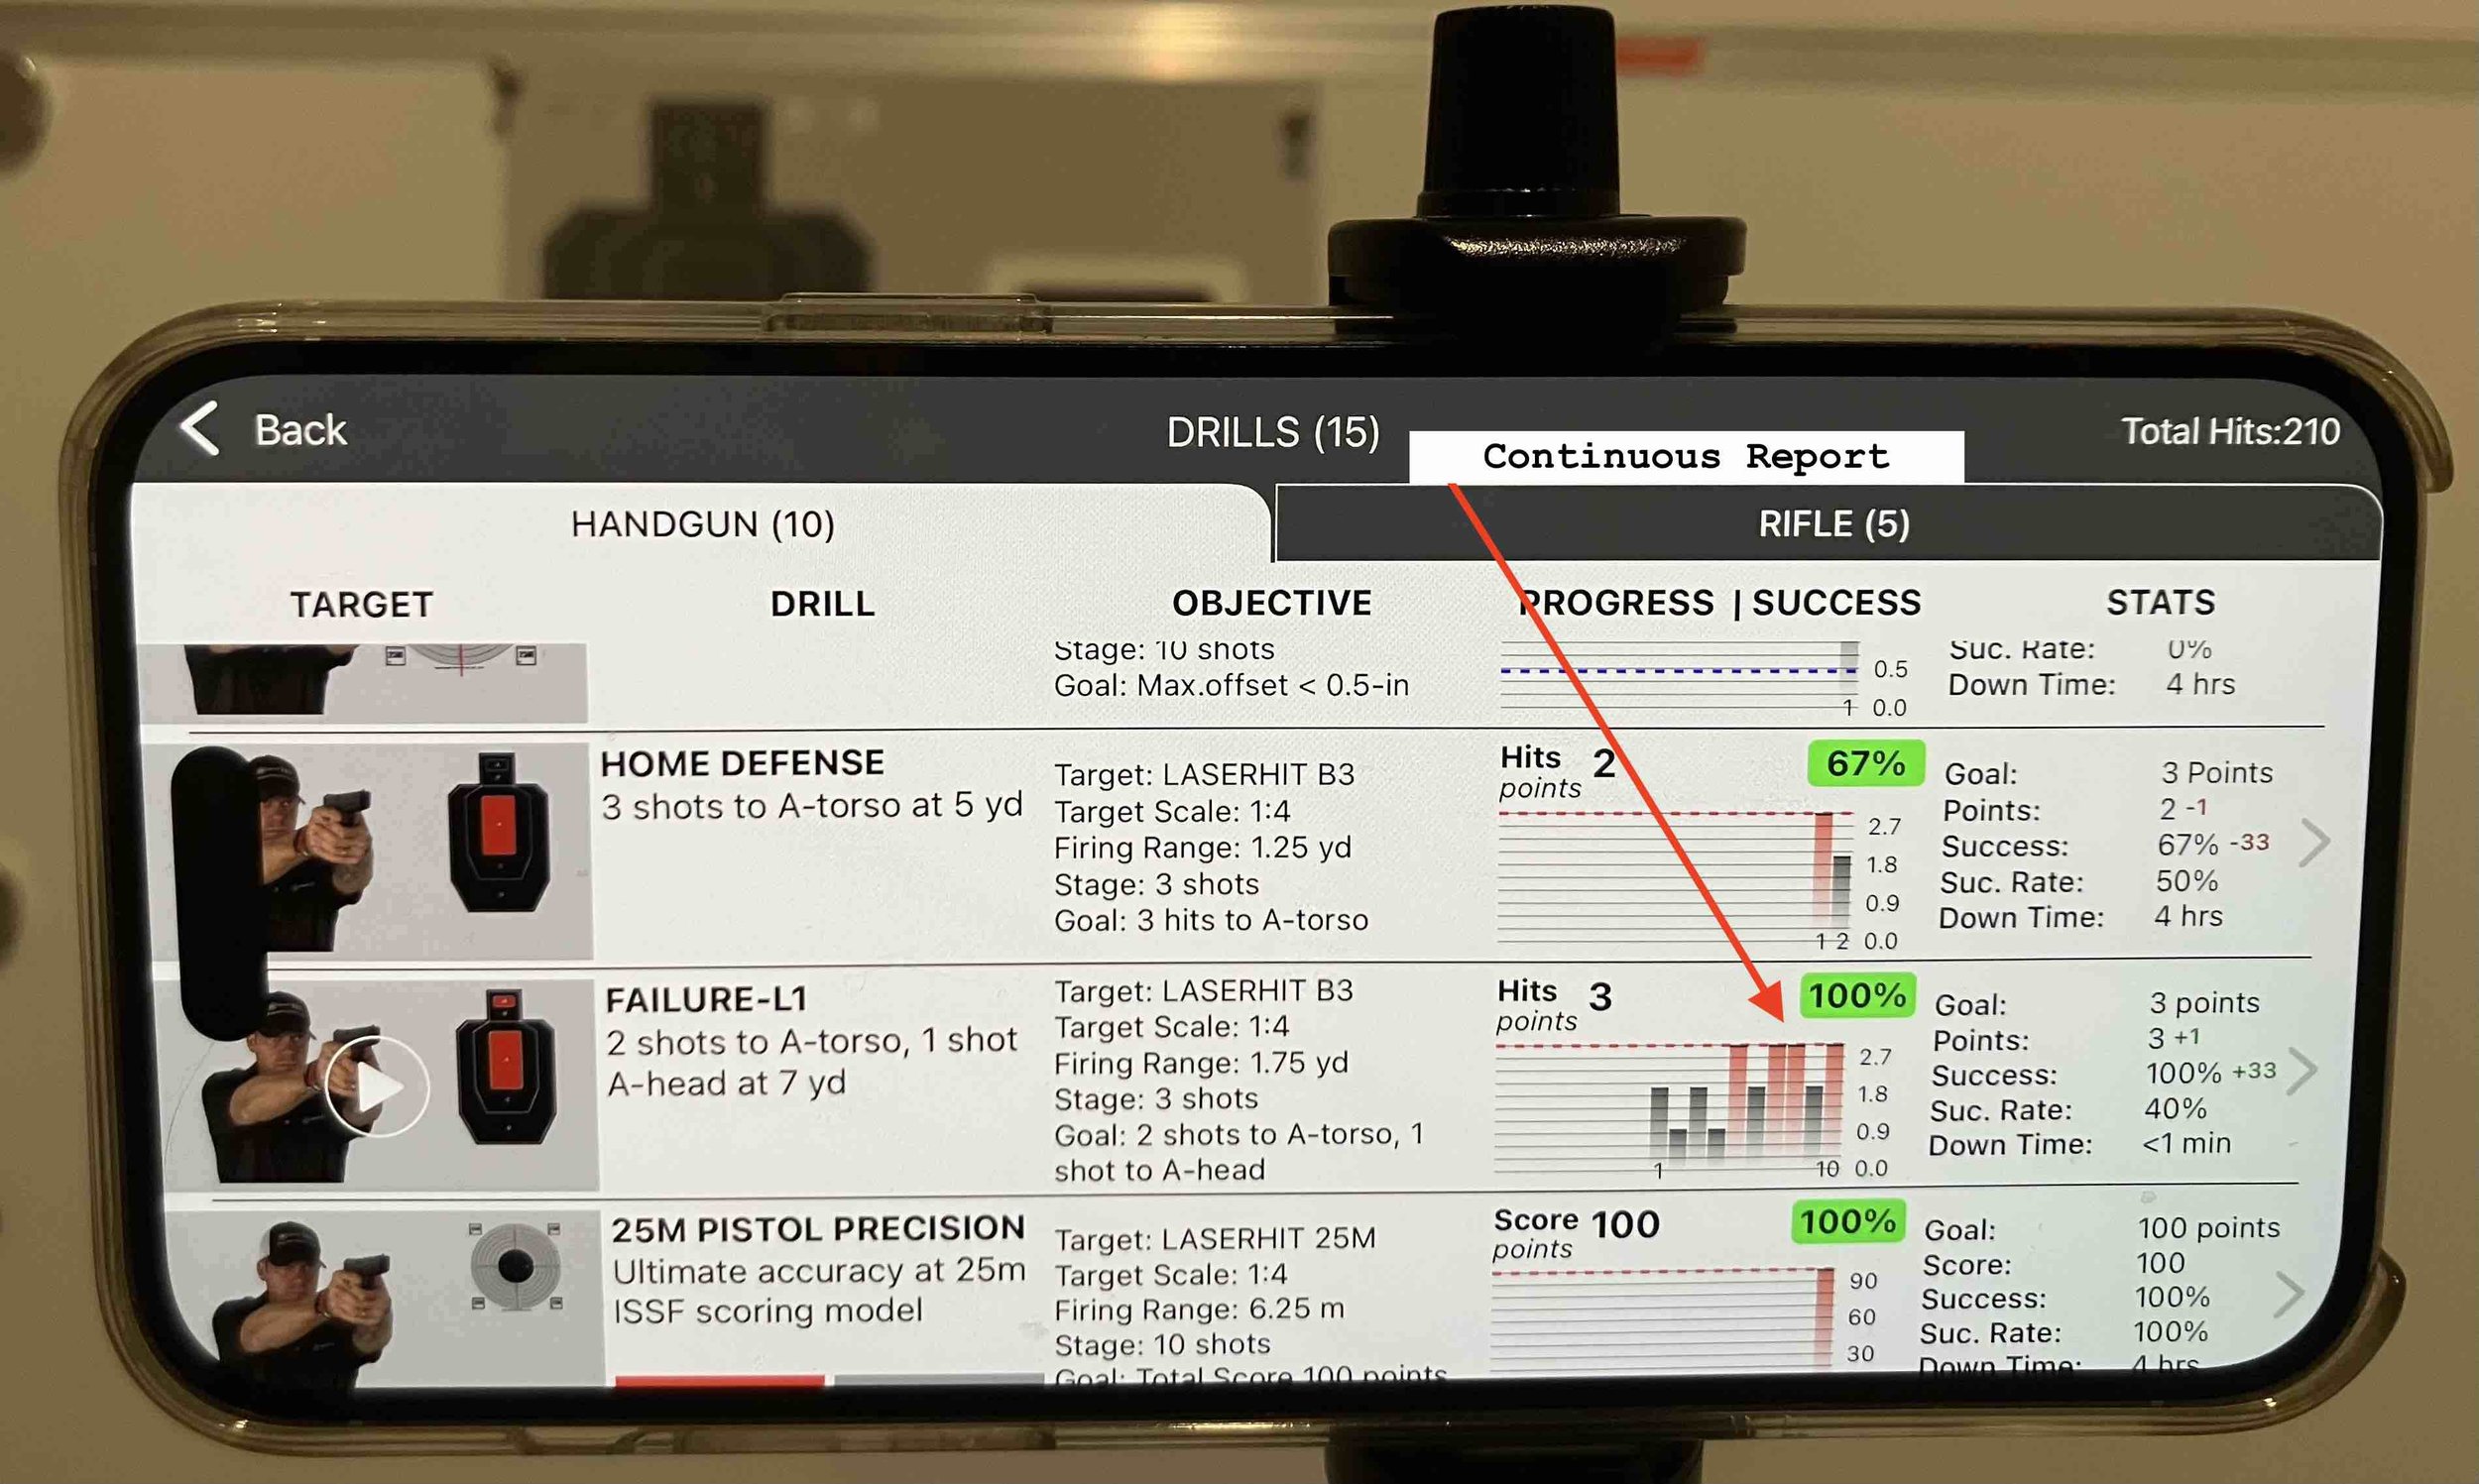
In LaserHIT Failure-L1, shot order matters as much as shot placement. The drill requires a specific sequence: two hits to the A-torso zone followed by one hit to the A-head zone.
If the sequence is broken, points are not awarded and the drill goal is not reached. A head shot fired first, or a head shot fired before completing the two torso hits, invalidates the stage.
This rule exists for a reason. The drill is not testing raw accuracy. It is testing decision-making under pressure. The system evaluates whether you can follow the correct escalation path while maintaining control and composure. Changing the order removes the meaning of the drill.
Why Only LaserHIT B3 Targets Are Supported
Failure-L1 uses zone-based scoring. The drill must clearly distinguish between torso and head scoring areas and verify the order in which they are hit.
For that reason, only LaserHIT B3 targets are supported. Custom targets are not accepted.
LaserHIT B3 targets are designed with defined A-zones that allow the system to recognize torso and head hits accurately, validate the correct shot sequence, and apply pass or fail logic without ambiguity. B3 targets are available in multiple supported scales, allowing the drill to be trained in different room sizes while preserving correct geometry and scoring behavior.
What This Drill Trains
The Failure Drill develops three critical skills at the same time. It reinforces disciplined center-mass shot placement under pressure, trains a rapid but controlled transition from a large scoring zone to a significantly smaller one, and forces visual confirmation and sight refinement before the final shot rather than encouraging rushed follow-ups.
Unlike static accuracy drills, this drill demands decision-making during execution. The shooter must reset grip, sights, and visual focus between shots while maintaining composure. This makes it especially effective for home defense and close-quarters training.
Why Laser Dry-Fire Makes This Drill Honest
In laser dry-fire, recoil does not hide mistakes. Poor grip recovery, inefficient sight tracking, and rushed trigger control become obvious immediately.
If transitions are slow, they show up.
If visual focus breaks down, the final shot misses.
If execution becomes rushed, the sequence fails.
Failure-L1 becomes a diagnostic tool. It exposes weaknesses that simple accuracy drills cannot reveal and highlights habits that matter when pressure is real.
Look Inside: What the System Is Actually Checking
Failure-L1 is strict by design, and the interface makes that visible if you know where to look. During Express Setup, red overlays indicate areas the system will ignore, not errors. As long as the B3 target and the Reload Mark remain clear, lighting spill and background noise will not affect training results.
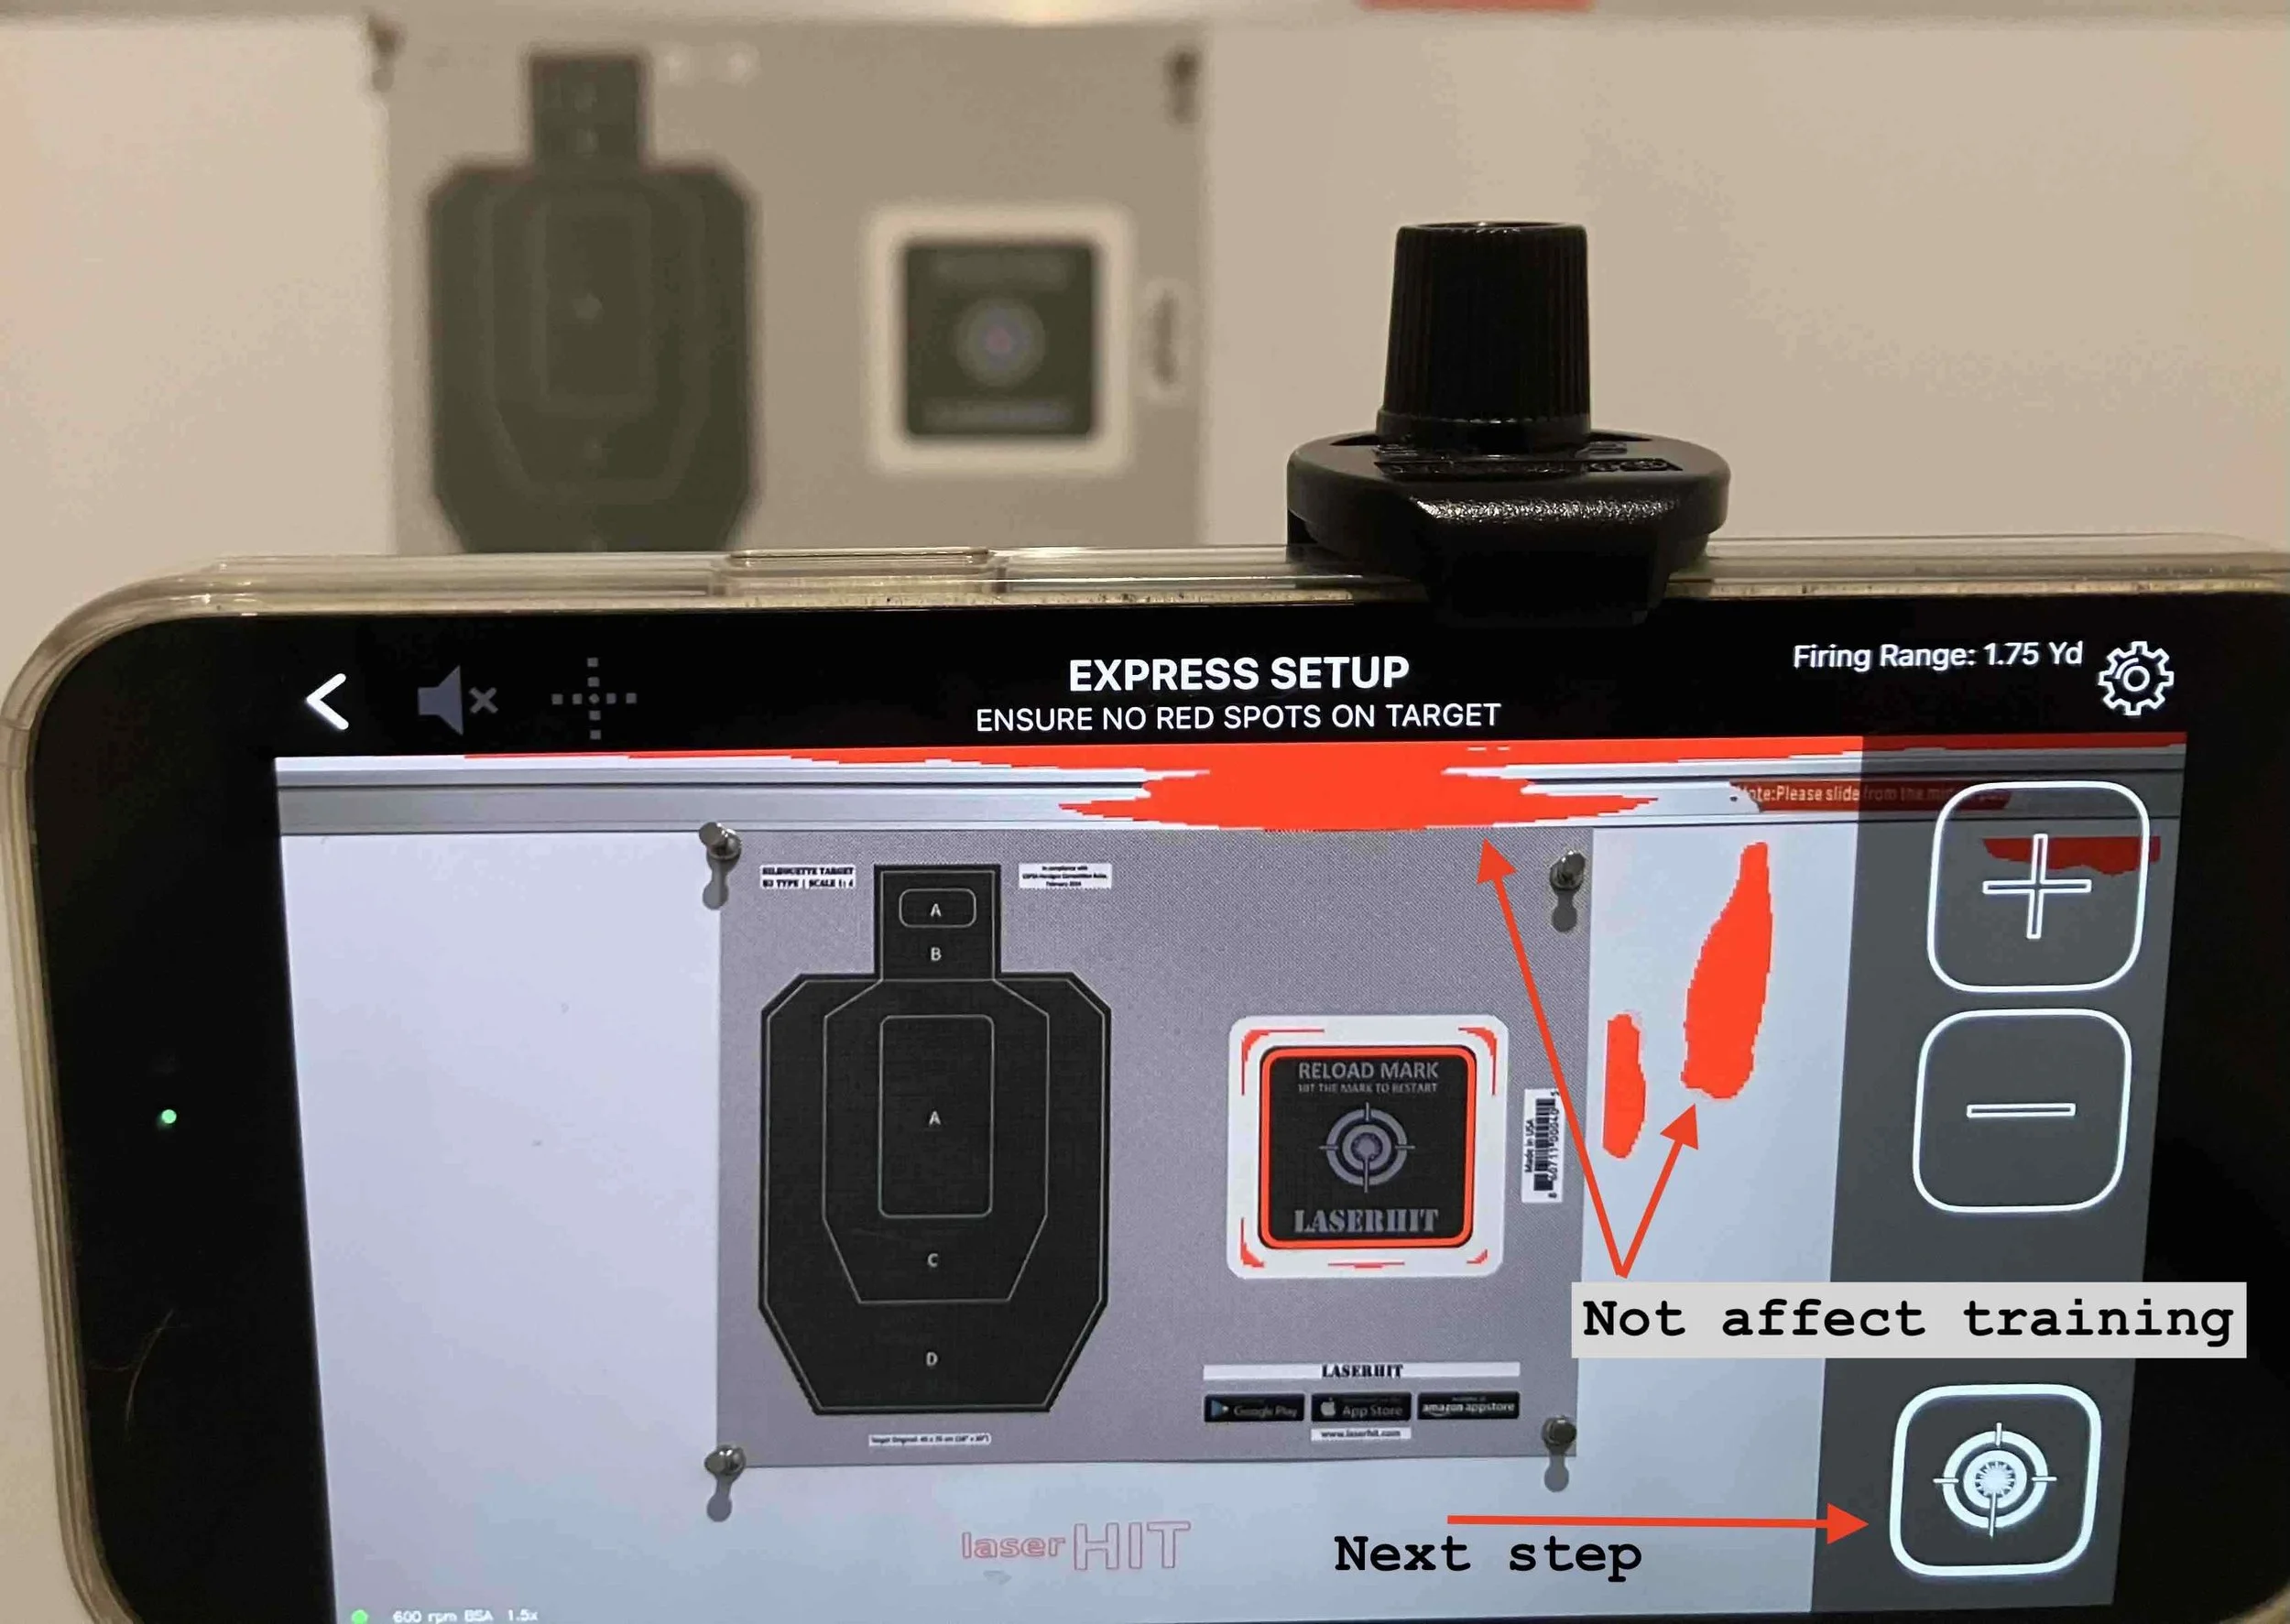
Proceed to the next step, use the zoom controls to frame the target properly within the phone screen, and allow the app a moment to adjust automatically before making manual corrections.
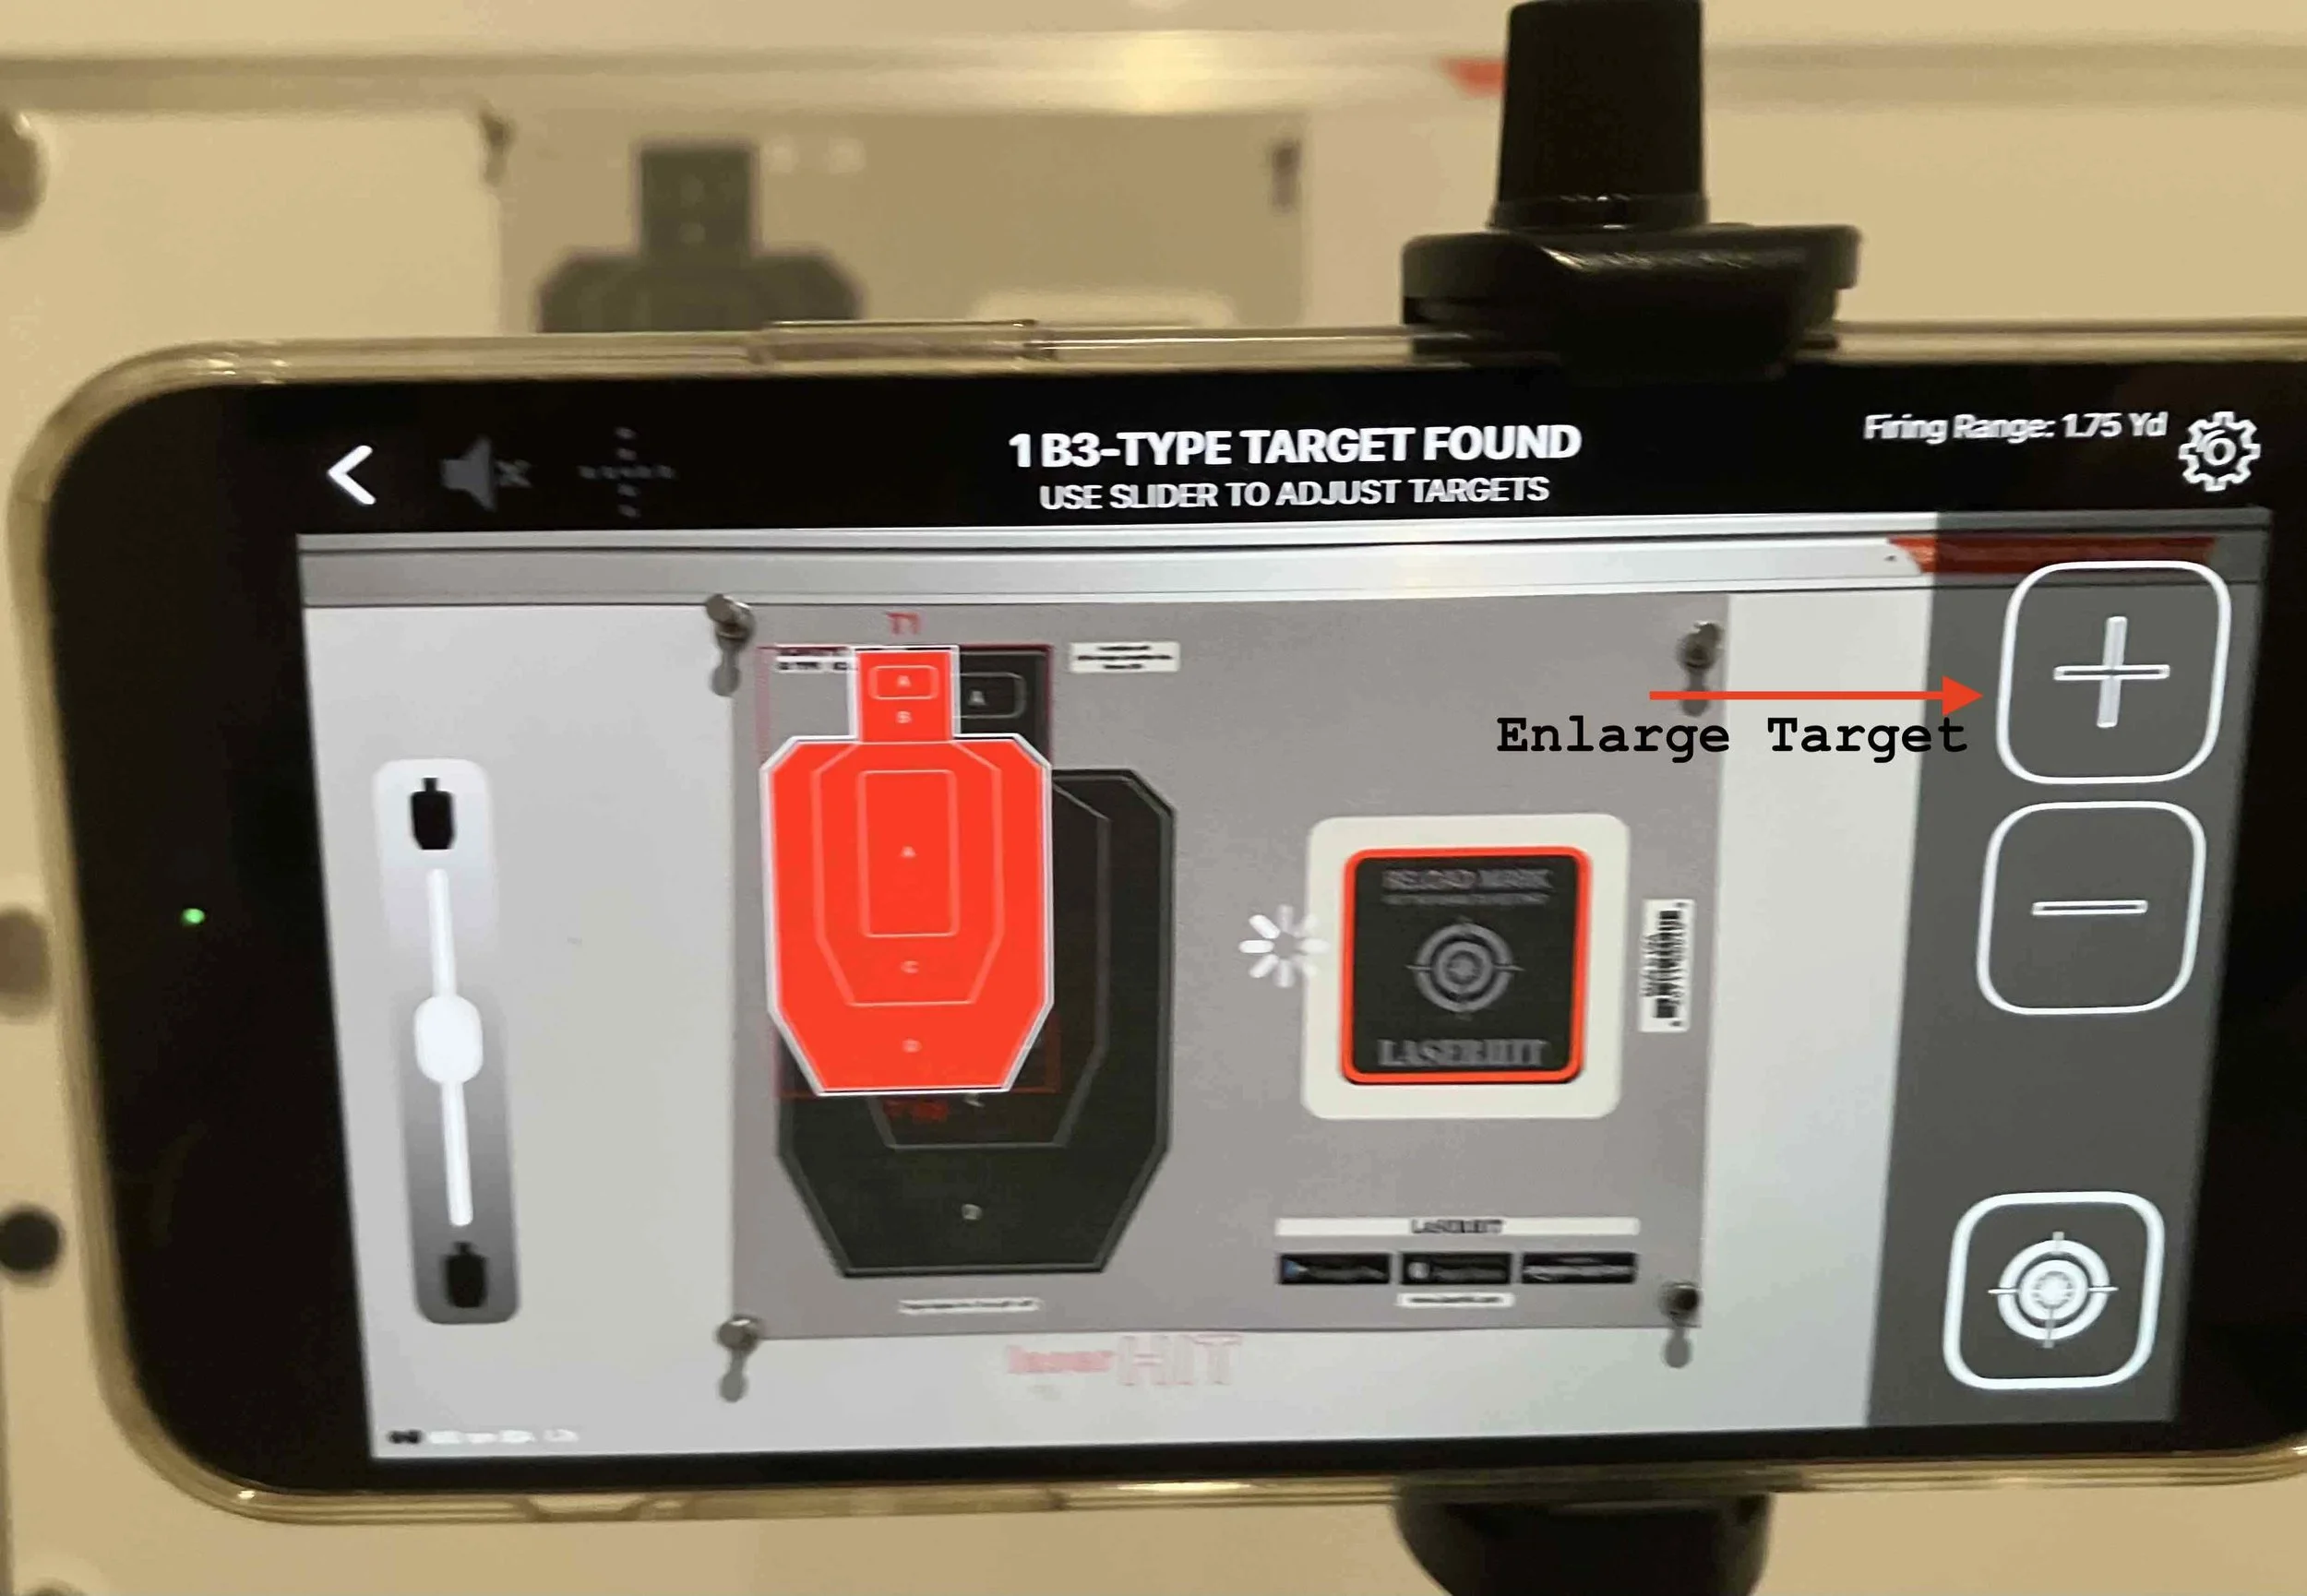
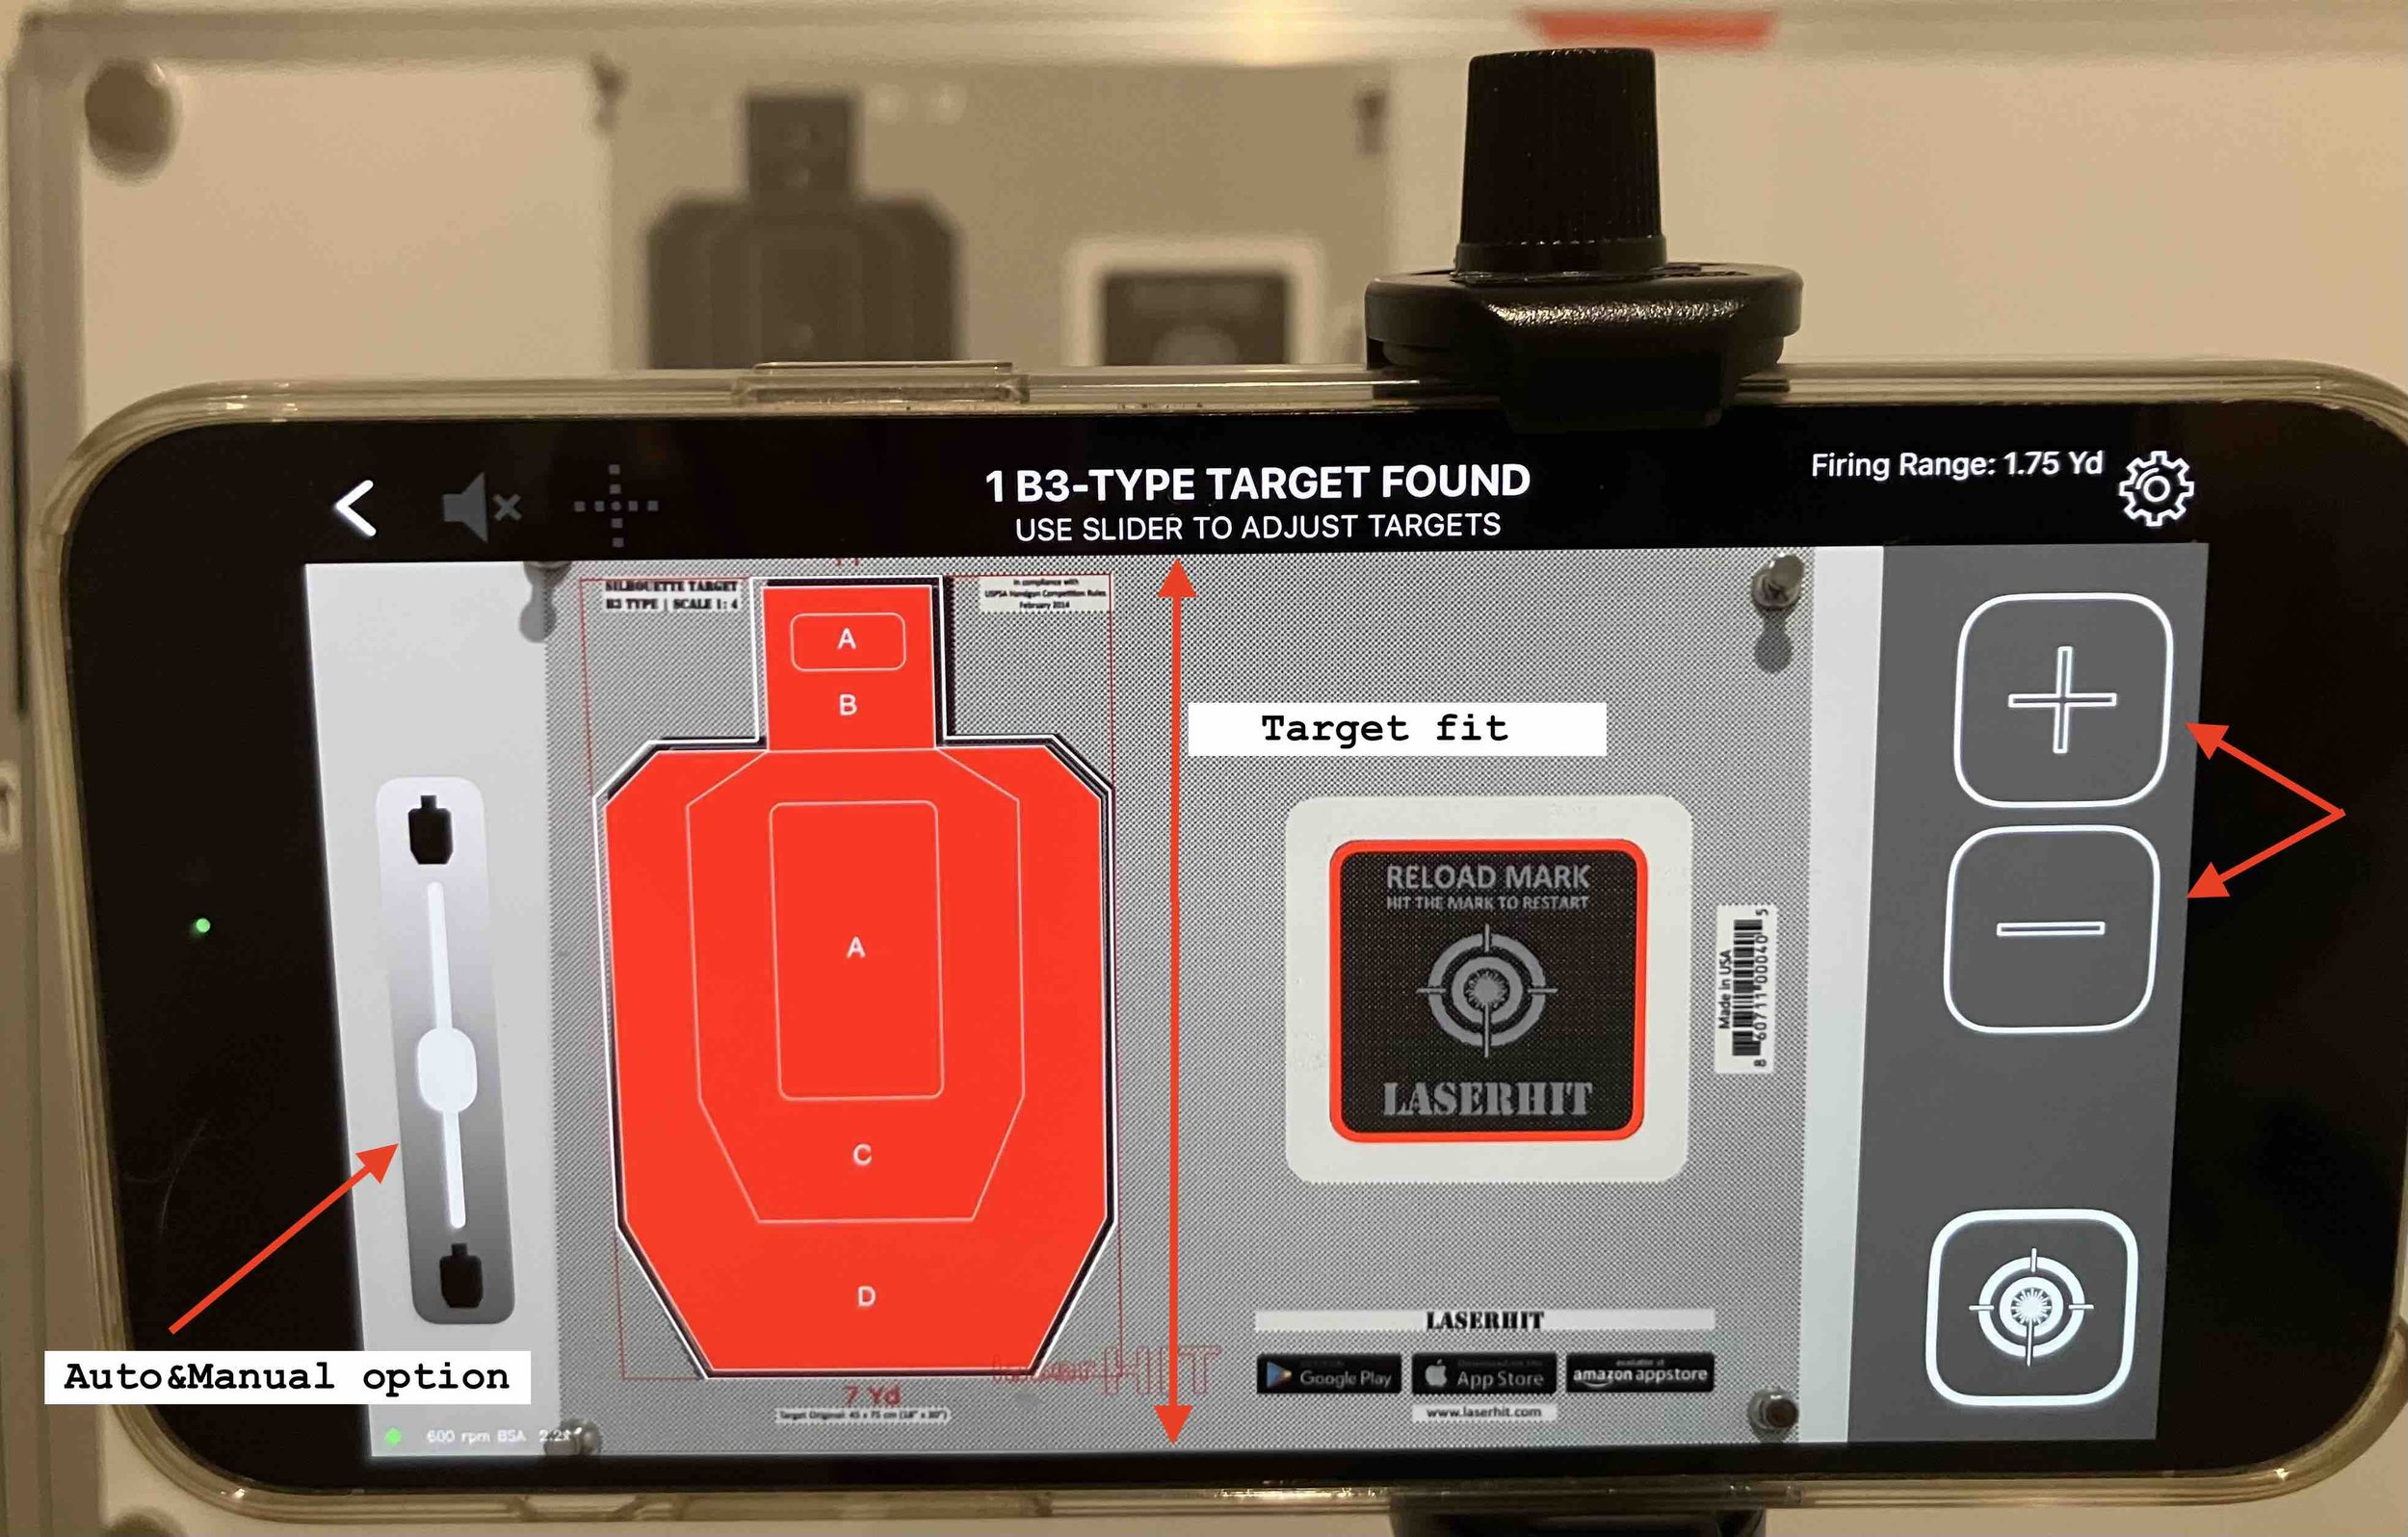
Once the system detects a B3-type target, zone geometry is locked in. From that point forward, torso and head zones become enforceable elements of the drill. Shot placement is evaluated precisely, and shot order is tracked without inference.
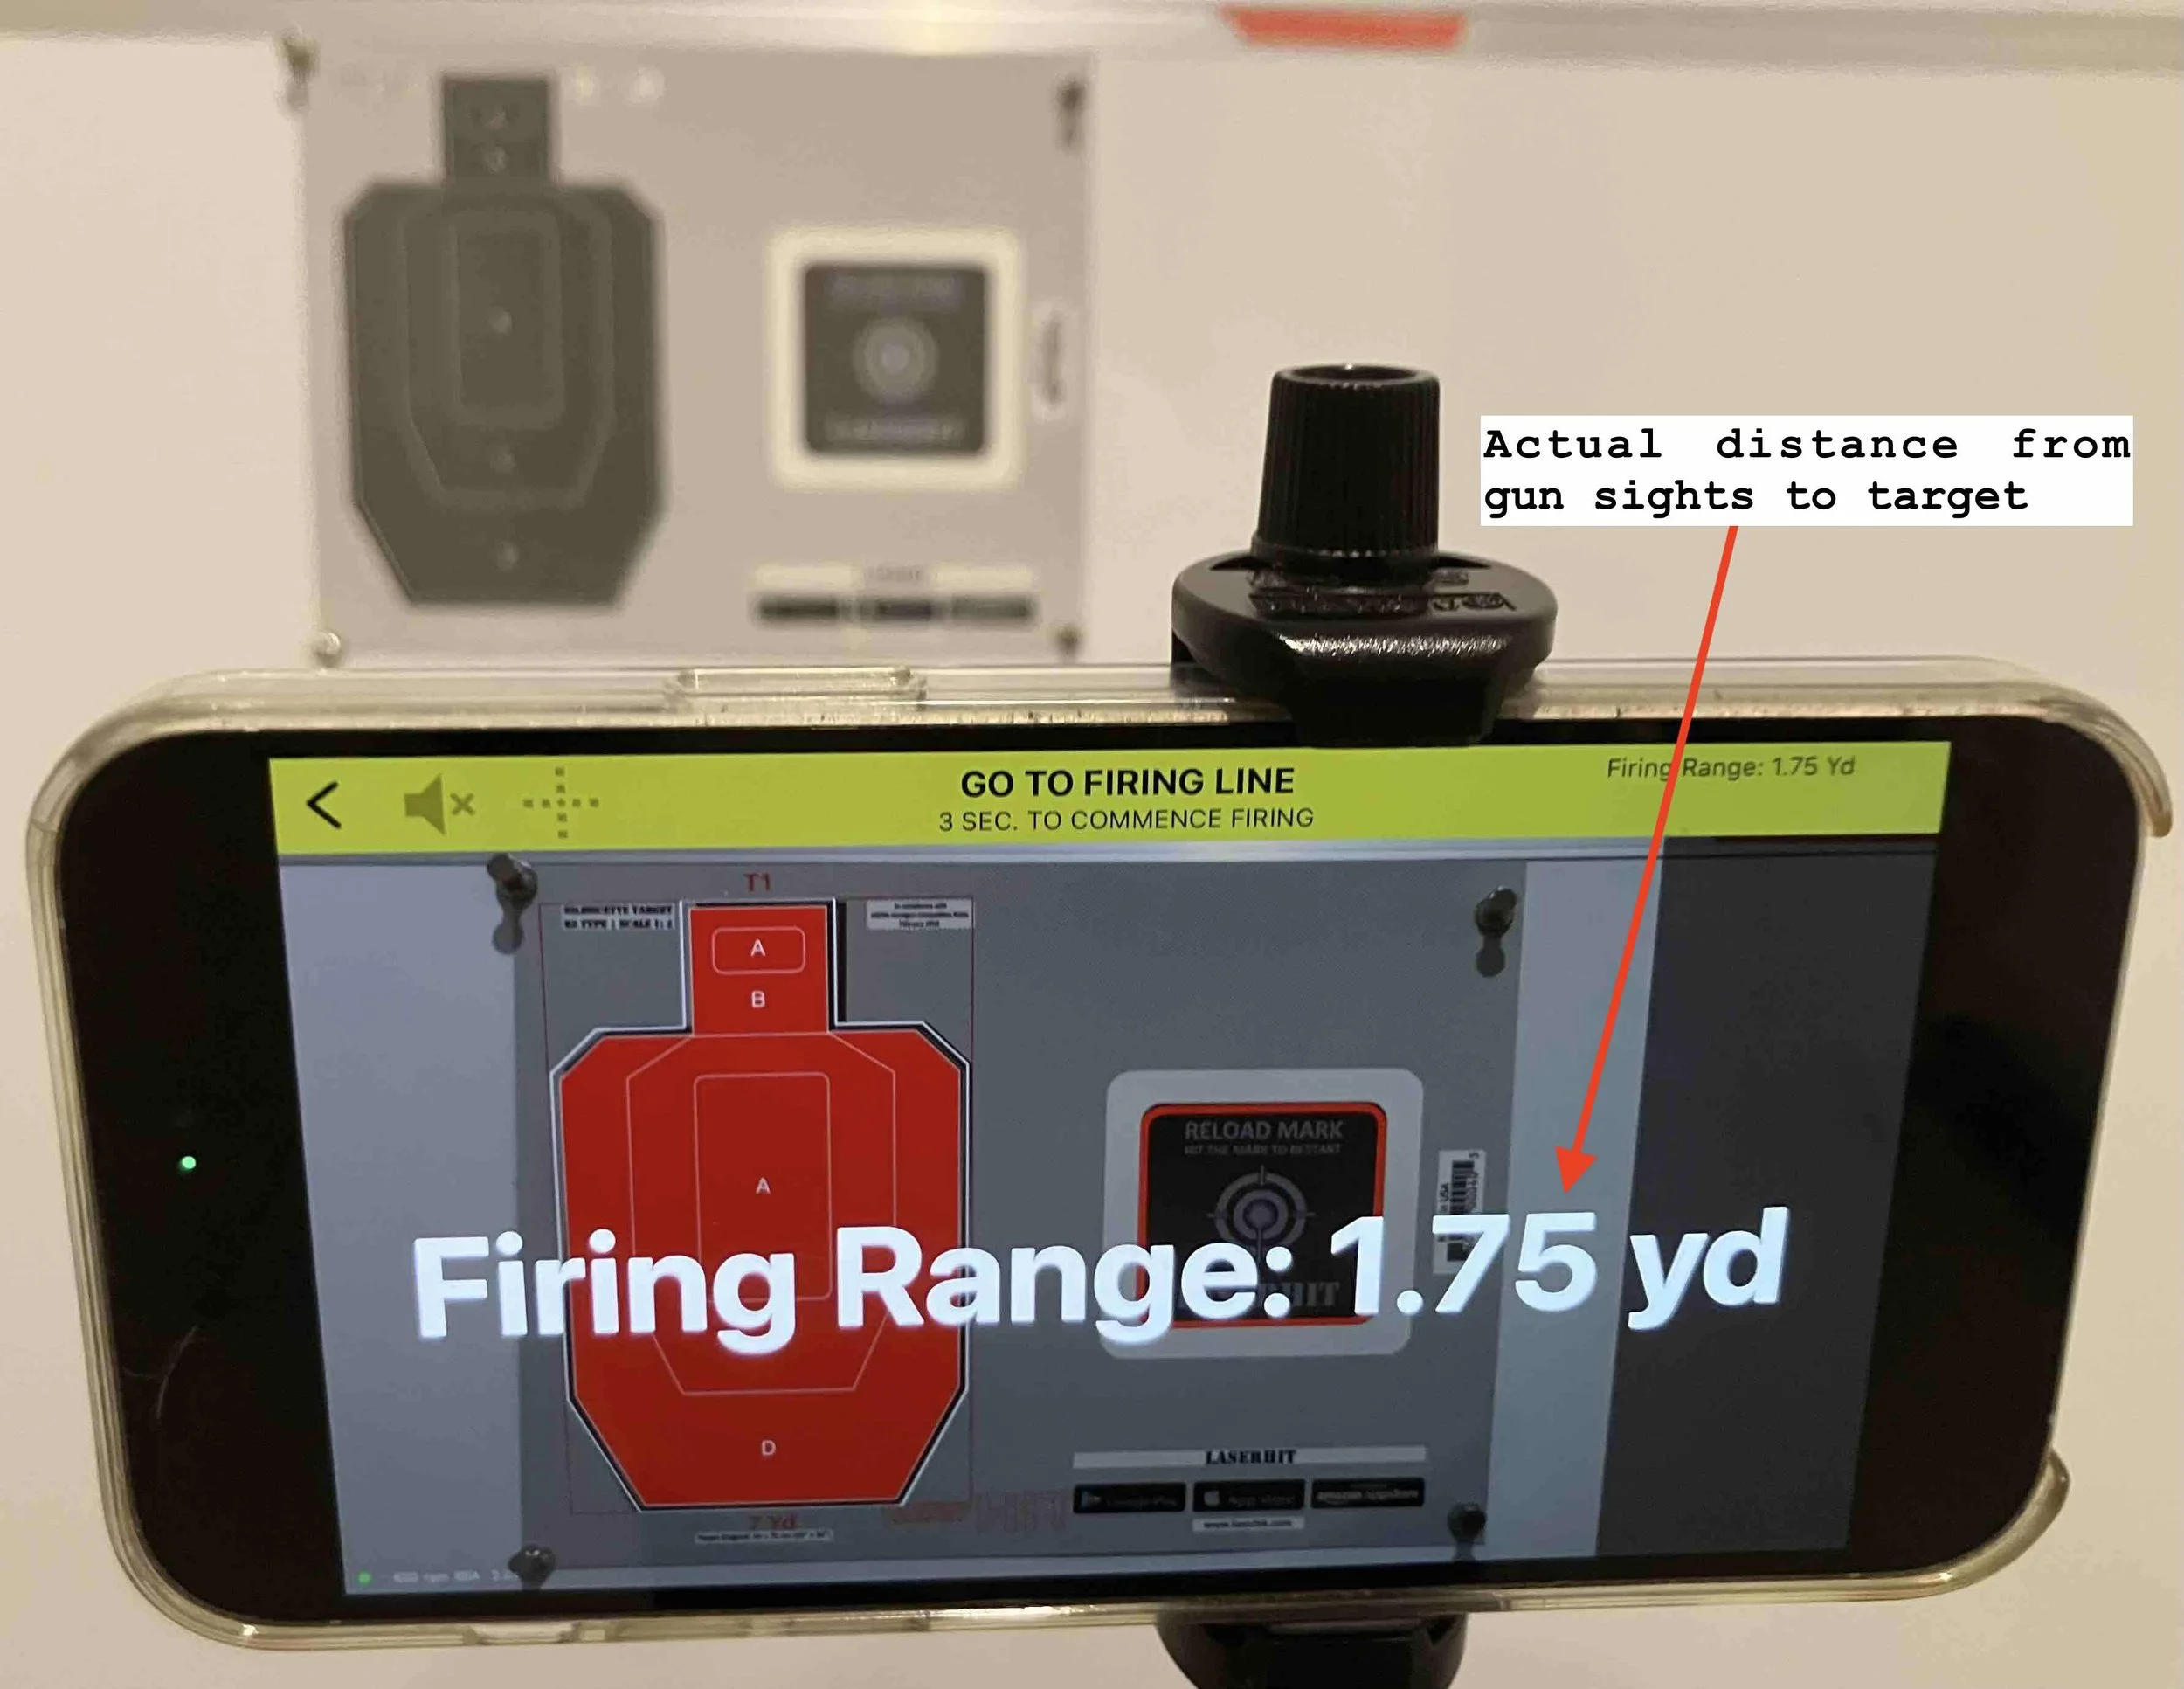
On the Go to Firing Line screen, pay attention to the displayed Firing Range. This value represents the calculated indoor distance that matches the drill’s defined range and target scale.
At Ceasefire, the right-side shot list tells the full story. Each hit is logged in order with its zone designation. Correct zones in the wrong sequence do not count. The system records execution exactly as it happened.
Before You Go
Failure-L1 is not designed to be comfortable. It introduces escalation, judgment, and precision at the moment when composure matters most.
The drill is not judging speed or raw accuracy in isolation. It verifies discipline across setup, distance, zone recognition, and shot order. That is exactly what a defensive escalation drill is meant to do.
If you disagree with how escalation should be trained, measured, or enforced, say it openly and help shape what comes next.